Enable conversion tracking with our easy WooCommerce integration. Please follow these instructions to set up Voyage's Global tag. You will need to have admin access to your WordPress account to follow along.
Note: to capture and use these WooCommerce events for drip campaigns, you'll also need to create custom events in Voyage and add them to your "add to cart" and "checkout" flows.
WordPress Code Snippets Setup
Once you are logged in to your WordPress, hover over to Plugins [1], and click Add New [2]. To the right, type in the words "code snippets" [3]. In the results, look for a plugin of that same name and with the logo shown [4] then click Install Now [5]:
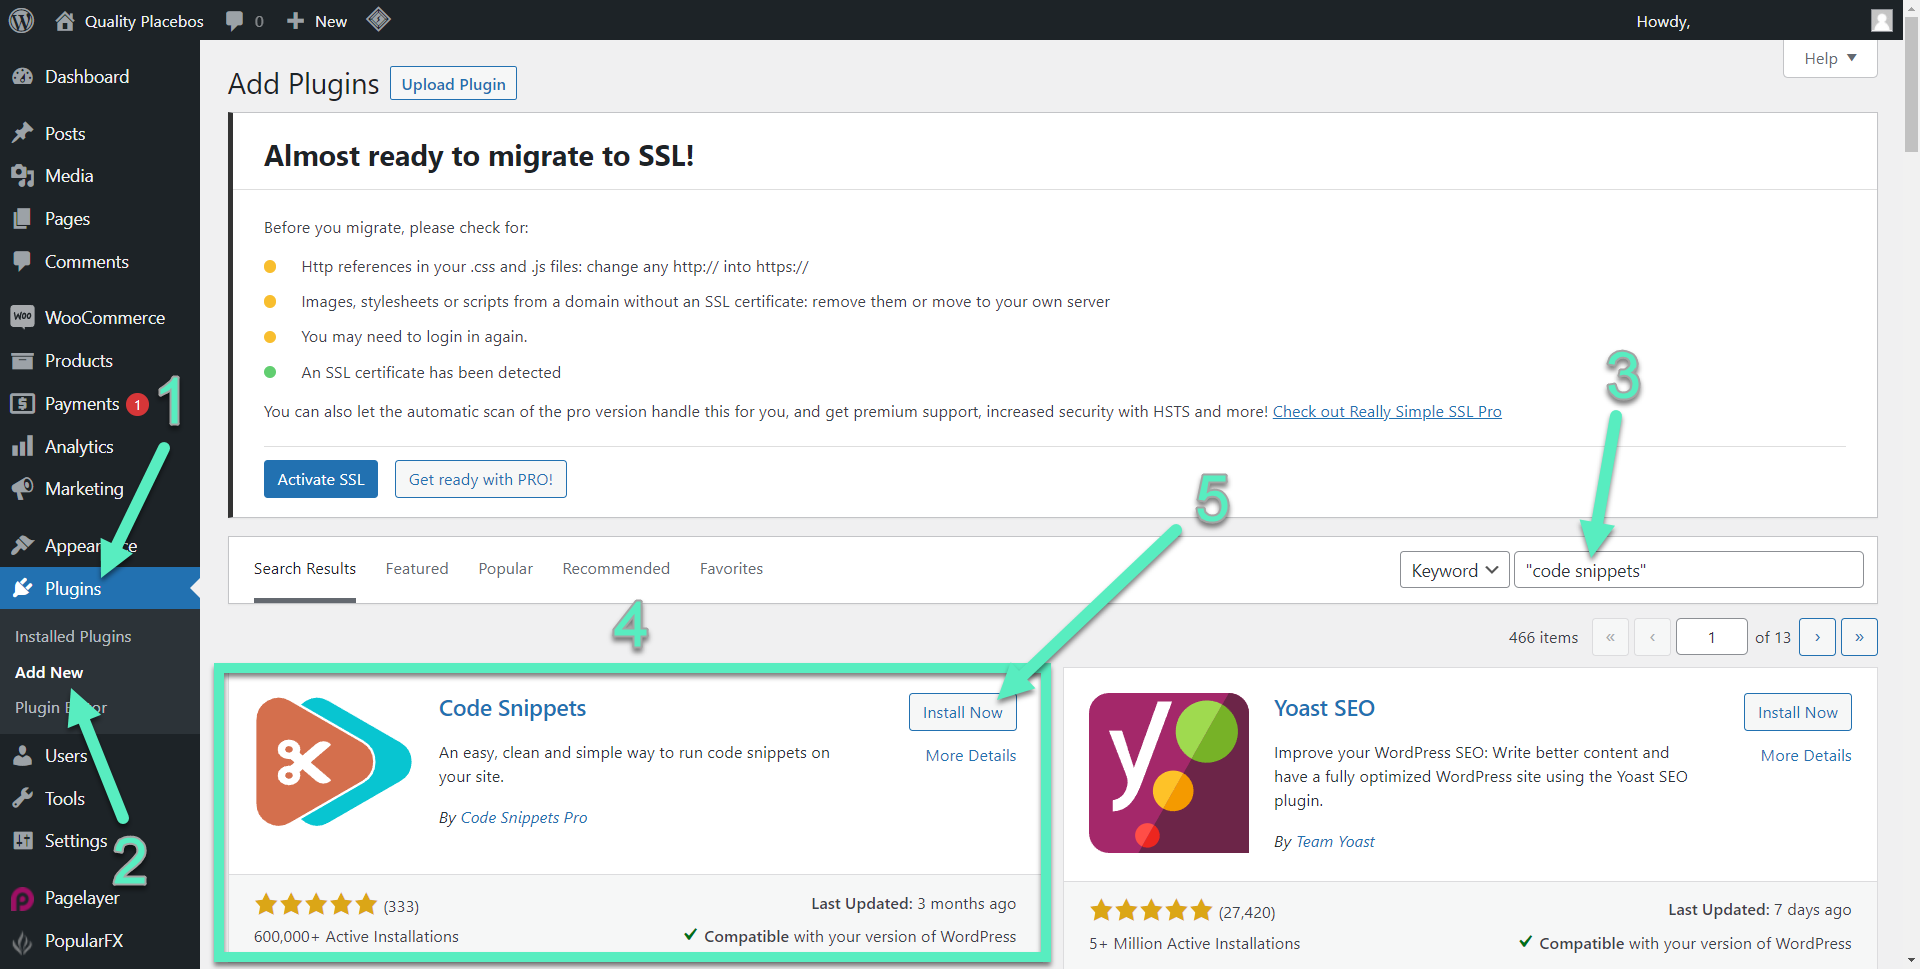
After it's installed, click on Activate right away:

Voyage Global Tag Snippet
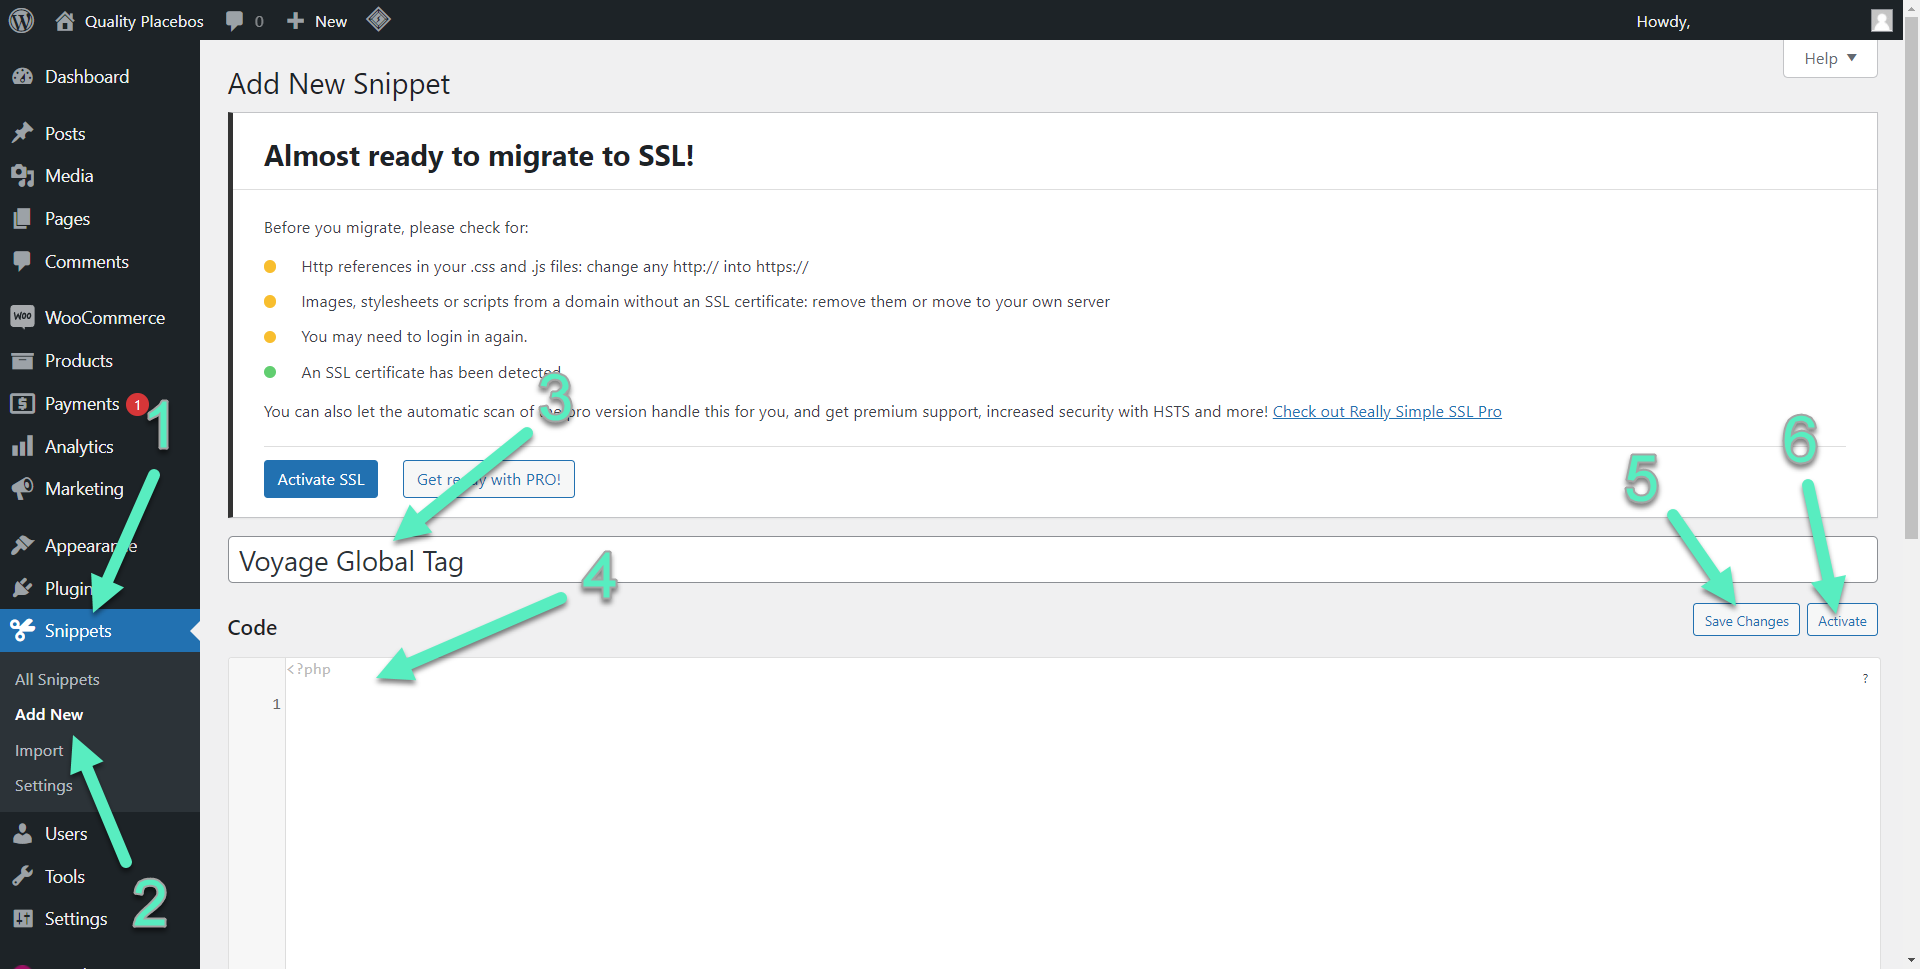
You'll see a new Snippets main menu item [1] in WordPress that you can hover over to click on Add New [2]. Give it an appropriate name such as Voyage Global Tag [3] then follow along in the next steps to paste your custom code in the Code field [4]. (Take note also of the Save Changes [5] and Activate buttons [6] we'll reference later.):
You'll need your Voyage Client ID for the next step. Inside the Voyage web app, click on Settings [1], then on Account [2]. Look for the Client ID field [3]:

Copy and paste this code into WordPress. Then replace the [Client ID] text in this code block with your own Client ID string:
add_action('wp_head', function () { ?>

The Client ID value should be placed into the code [1], ensure Run snippet everywhere is selected [2], then click on Activate [3]:Back to Top
 Set Up Purchase Pixel
The next step varies depending on if you are using the default Thank You Page or a Custom Thank You Page.
Default Thank You Page
Once again, click on Snippets select Add New in WordPress as described above. Give the snippet the name, "Voyage Purchase Pixel." This time, paste this code unmodified into the code block and click Activate as shown above:
add_action( 'woocommerce_thankyou', function ( $order_id ) { $order = wc_get_order( $order_id );?>} );

Custom Thank You Page
Custom Thank You Pages are a premium WooCommerce addition. If you have them enabled, navigate to Appearance, then select Theme Editor. Under Theme Files on the right, you'll scroll down until you see WooCommerce. Expand it, and also expand checkout then select "thankyou.php":
Scroll all the way down until just before then final
code block, and paste in this line of code without modification:
And that's it! You are all set to begin using WooCommerce event tracking inside Voyage SMS.
If you have any additional questions please contact us at [email protected].