
Seamlessly connect your BigCommerce stores to Voyage's powerful SMS marketing capabilities. Segment, personalize, and convert like you never have before with a Voyage / BigCommerce integration. In order to integrate Voyage with BigCommerce (BC), you must create an API account for Voyage. Follow along in this article to learn how.
Navigate and Create API Account
After logging into your BigCommerce account, head over to Settings on the left-hand menu:

Scroll down and select "API accounts" under the section "API"

In this section, click the "Create API account" button

On the following screen, make sure that "V2/V3 API token" is selected under "Token type" and type "Voyage" into the "Name" field.

Then scroll down to set the following permissions:
Modify
Content
Checkout content
Information & settings
Read-only
Customers
Orders
Products
Carts
All other permissions can remain on None. Then click "Save".
A text file will start downloading. Keep in mind, this text file will be the only copy BigCommerce will provide. Be sure to store it in a secure, reliable location. The same necessary integration details will be shown on screen. Leave this screen open for now (don't click on Done yet):

Leave this BigCommerce browser tab open, and create a new browser tab window. Log in to your Voyage account to continue.
Connect Voyage and BigCommerce
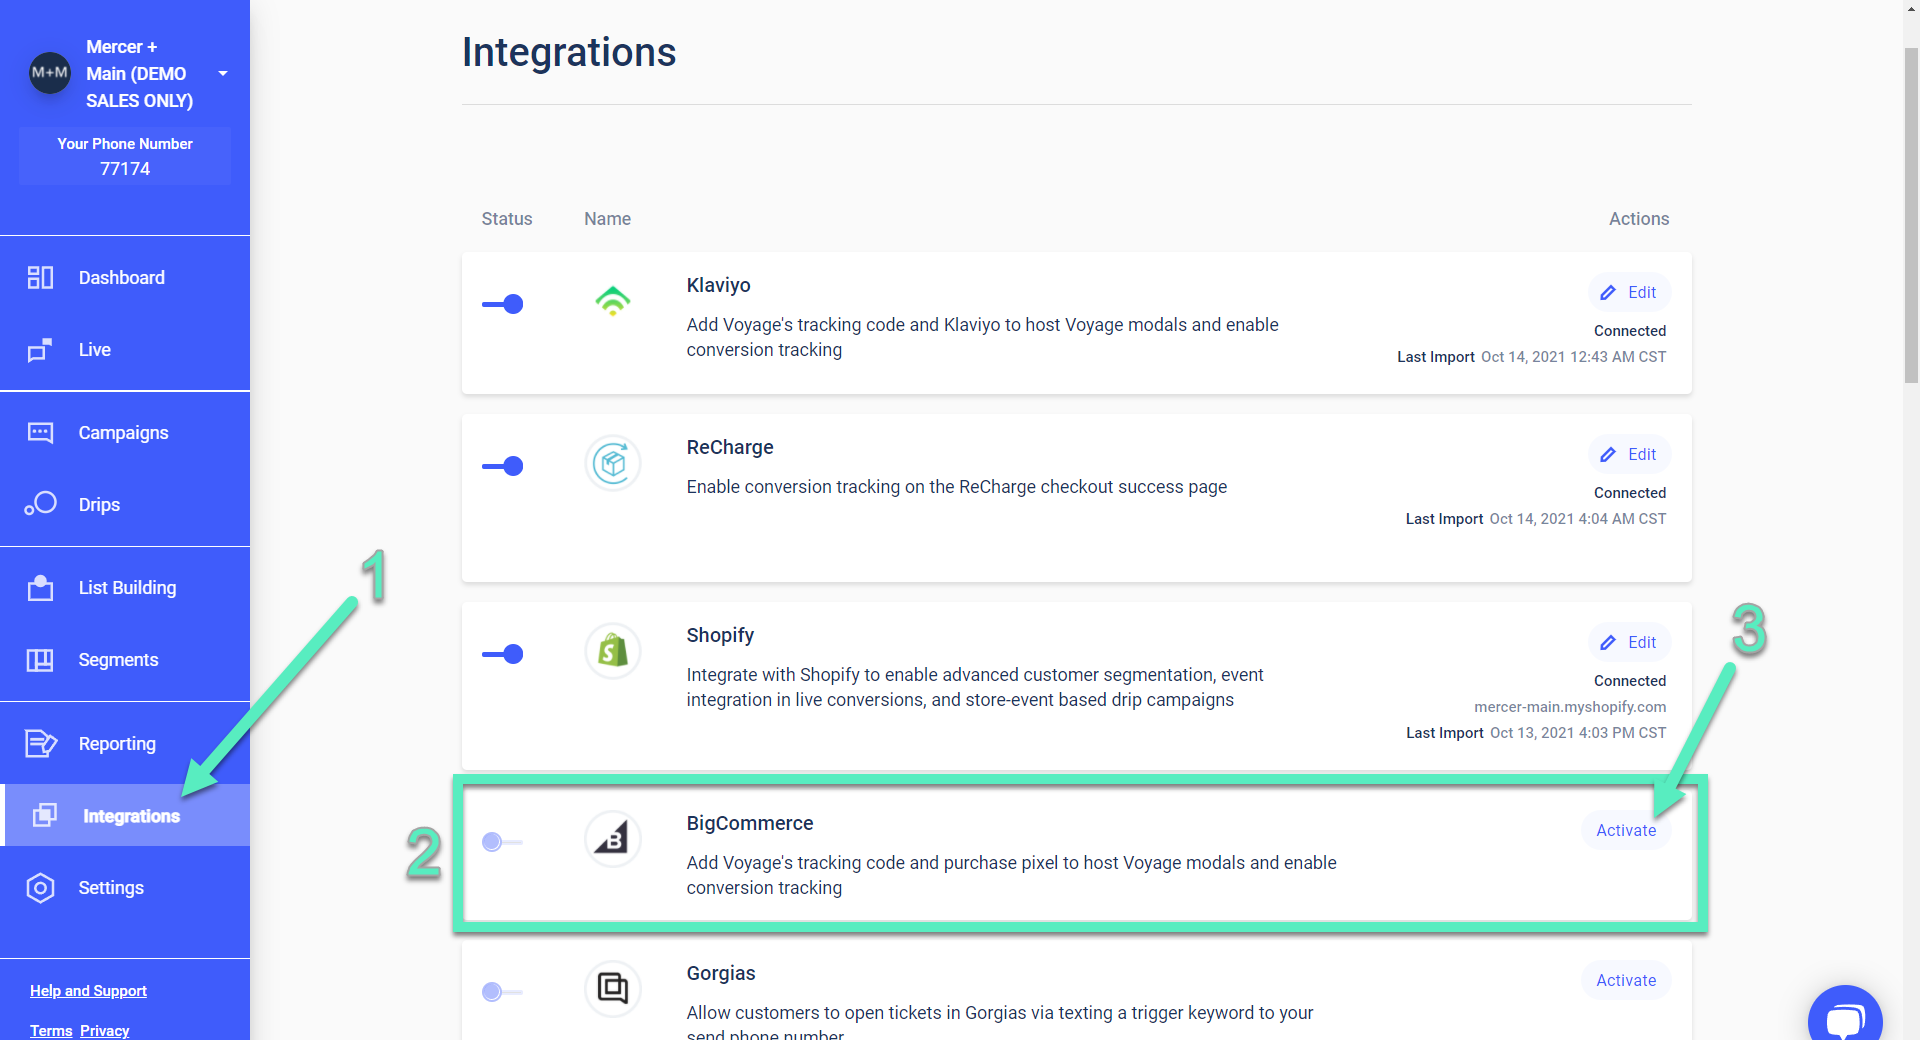
Once inside your Voyage account, select Integrations from the main menu [1] and scroll down to BigCommerce [2]. Note that the Shopify integration can't be active at the same time as BigCommerce. If you do need to deactivate the Shopify integration, you may need to wait 15 minutes for the old integration to be fully disabled before continuing. Click on Activate [3] to continue:
On this screen, you'll need to populate these fields with values from BigCommerce. You can refer either to the BigCommerce tab you should still have open, or the .txt file that was downloaded earlier. The Store Hash field [1] is the string in the API Path URL just after "/stores/". For example, if your API Path is https://api.bigcommerce.com/stores/lmvgat835sn/v3/ your Store Hash would be "lmvgat835sn". Your Client ID [2], Client Secret [3], and Access Token [4] are all labeled the same in both Voyage and in BigCommerce so all you need to do is copy and paste each. When everything is filled in, click on Next [5]:

When successful, you'll see this message:

If you run into any errors, please log out of Voyage then log back in and try the integration again. You may need to wait 15 minutes after disabling other conflicting integrations before the BigCommerce integration can be activated.
It could take up to 24 hours after successful activation for your BigCommerce data to fully import into Voyage. Afterwards you will have access to customer attributes and event triggers in your Voyage platform.
Install Voyage Tags
You will need to install the Global Voyage Tag and Purchase Tag to fully track customer events across your BigCommerce pages.
Global Tag
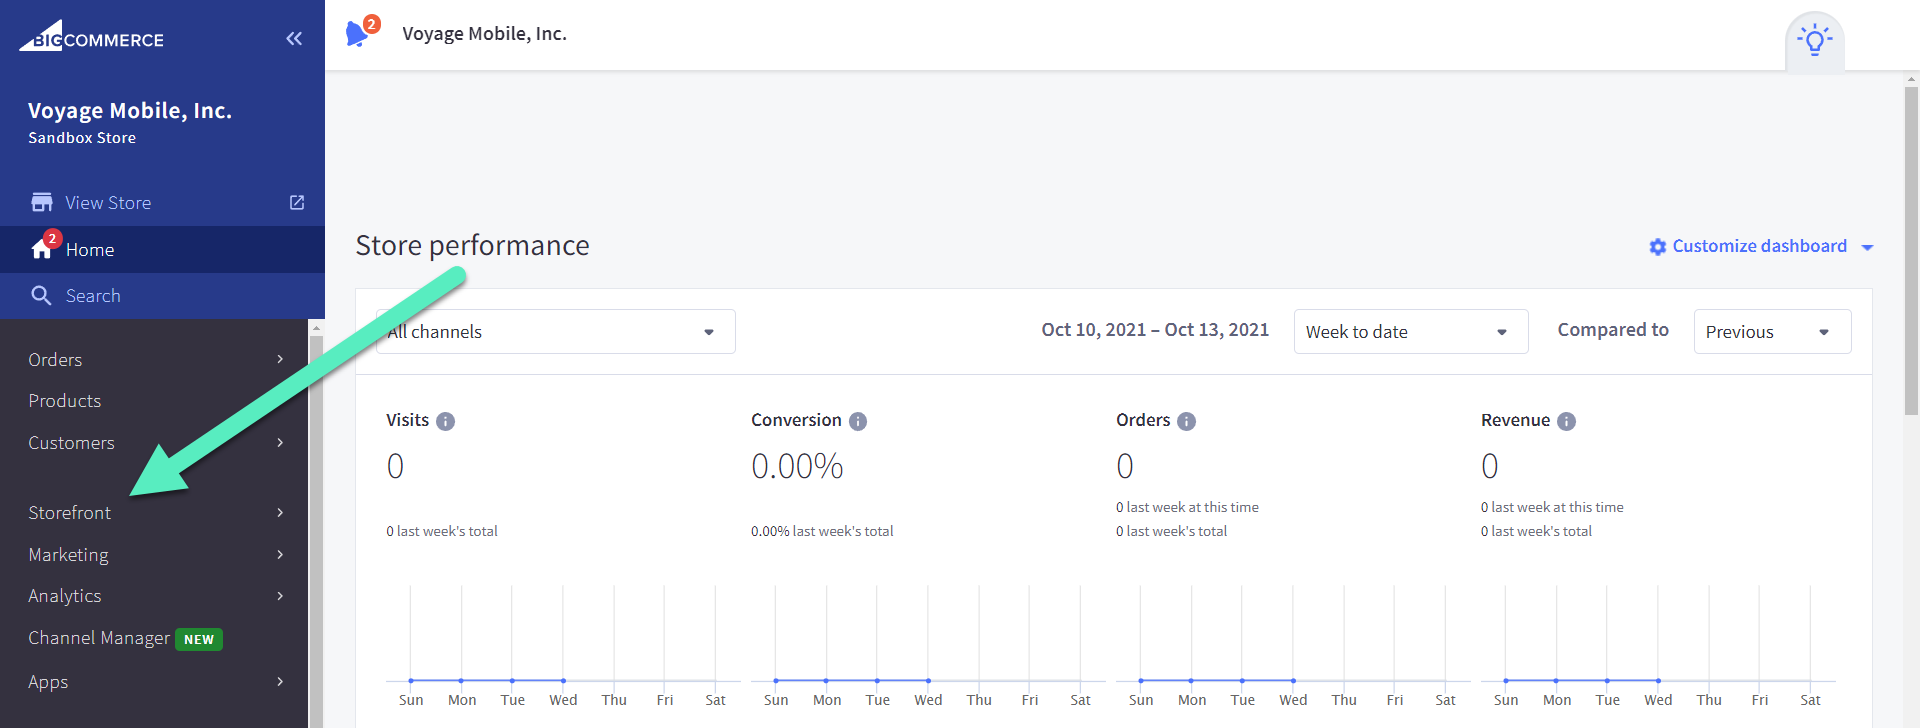
To begin, navigate in your BigCommerce dashboard to Storefront:
Then select Script Manager [1] and click Create a Script in the top right corner [2]:

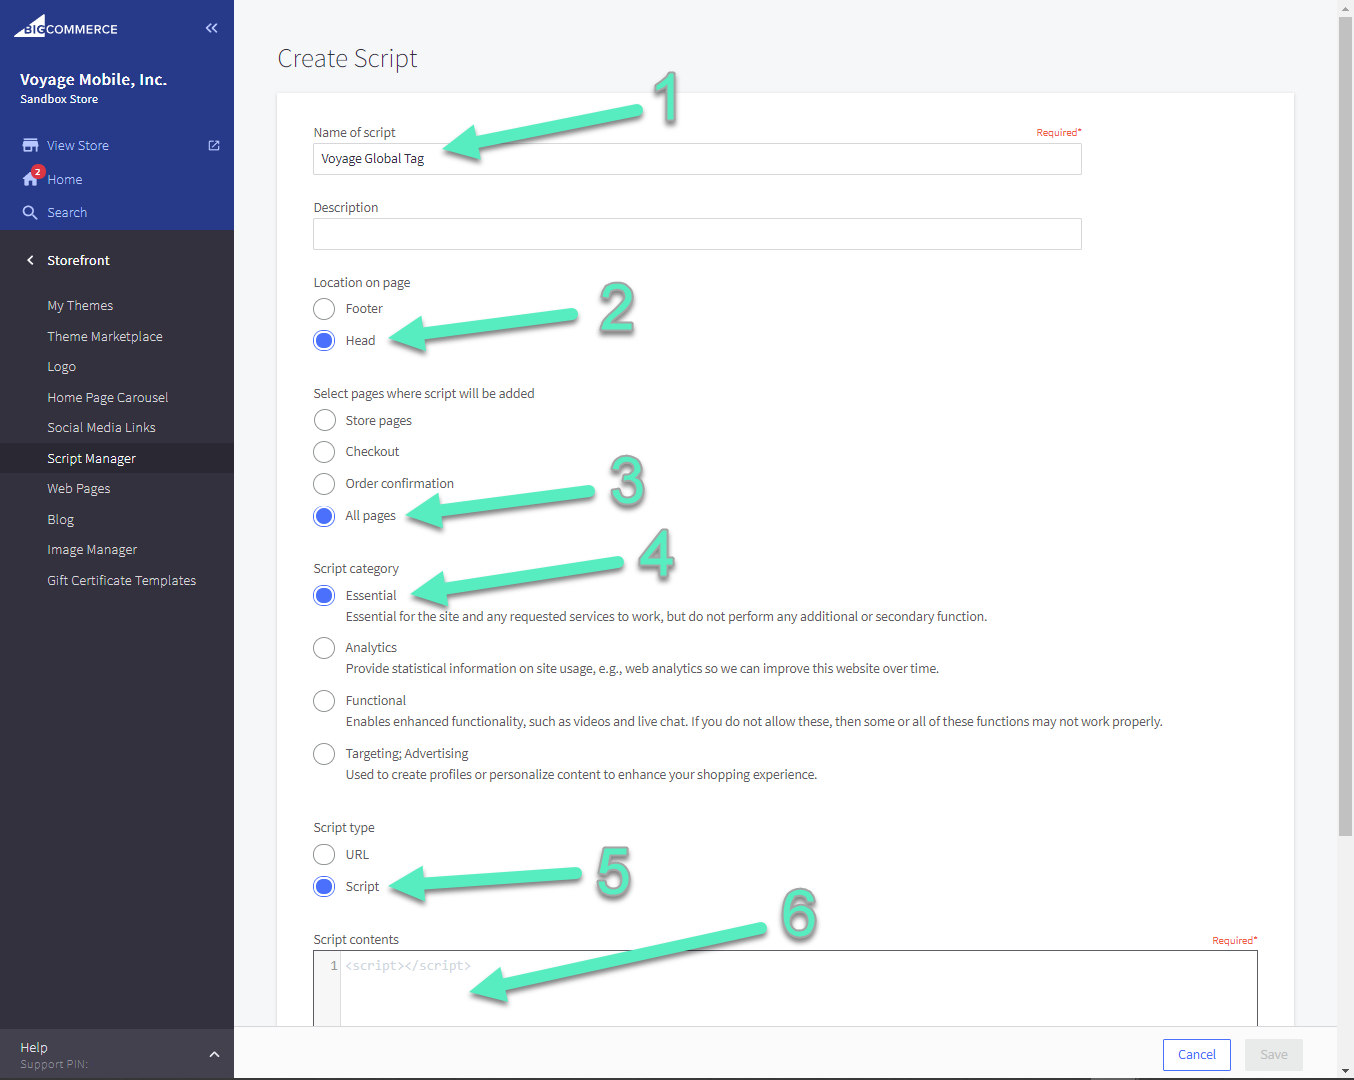
Give this script an appropriate name, such as "Voyage Global Tag" [1]. Ensure the options are set as follows: Location on page should be set to Head [2], 'Select pages where script will be added' should be on All pages [3], and the 'Script category' should be set to Essential [4]. Chose Script for 'Script type' [5], then copy and paste the code snippet below into the 'Script contents' field [6]:
Copy and paste this code snippet, but remember to replace 'Client ID' (keeping the quotes) in the code below with your own Client ID found in your Voyage dashboard under the Settings menu > Account > Client ID:
Purchase Tag
Next you'll want to add Voyage's purchase tag to BigCommerce. Again navigate to Advanced Settings in BigCommerce as described above. Then click on Data Solution (formerly Web Analytics) [1]. Look for Affiliate Conversion Tracking near the bottom [2] and click on Connect [3]. Note that if you already have a connection, you'll see an option to Edit your connection instead:
On the following screen you will paste the code found below into the Connection field [1]. Be sure to modify the code by replacing Client ID with your own value from Voyage. Then click Save [2]:

Here is the code you'll be pasting into the Connection field in BigCommerce. Note that you will need to replace 'Client ID' (keeping the quotes) in the code below with your actual Client ID string found in your Voyage dashboard under the Settings menu > Account > Client ID:
After pasting and saving this code, you may receive a message saying the code is invalid. You can safely ignore this message.
FAQ
Q. Why is the Voyage Global Tag not loading after adding to the Script Manager?
A. Using Script Manager is only available for Stencil Themes with BigCommerce. If your theme is based on Stencil but you are still having issues, it may be helpful to follow these Fixing missing scripts steps when troubleshooting.
If you have any additional questions please contact us at [email protected].