Give your subscribers options! With our easy to use Keyword List Building campaigns, new subscribers can type in words you define to trigger a specific opt-in flow. For example, they could text "signup" to 71023 to become a subscriber. In this article we'll show you everything you need to know to succeed with Keyword campaigns.
List Building Navigation and Overview
Keyword campaigns are a type of List Building campaign. Start by navigating to the main List Building page [1]. Here you'll see a summary of important metrics at the top [2] along with a list of all List Building campaigns below [3]. Keyword campaigns will be designated as such in the Type column [4] along with their current keyword. To follow along with this article, click on New List Building Campaign [5] to start creating a new Keyword campaign:

Create New List Building Campaign
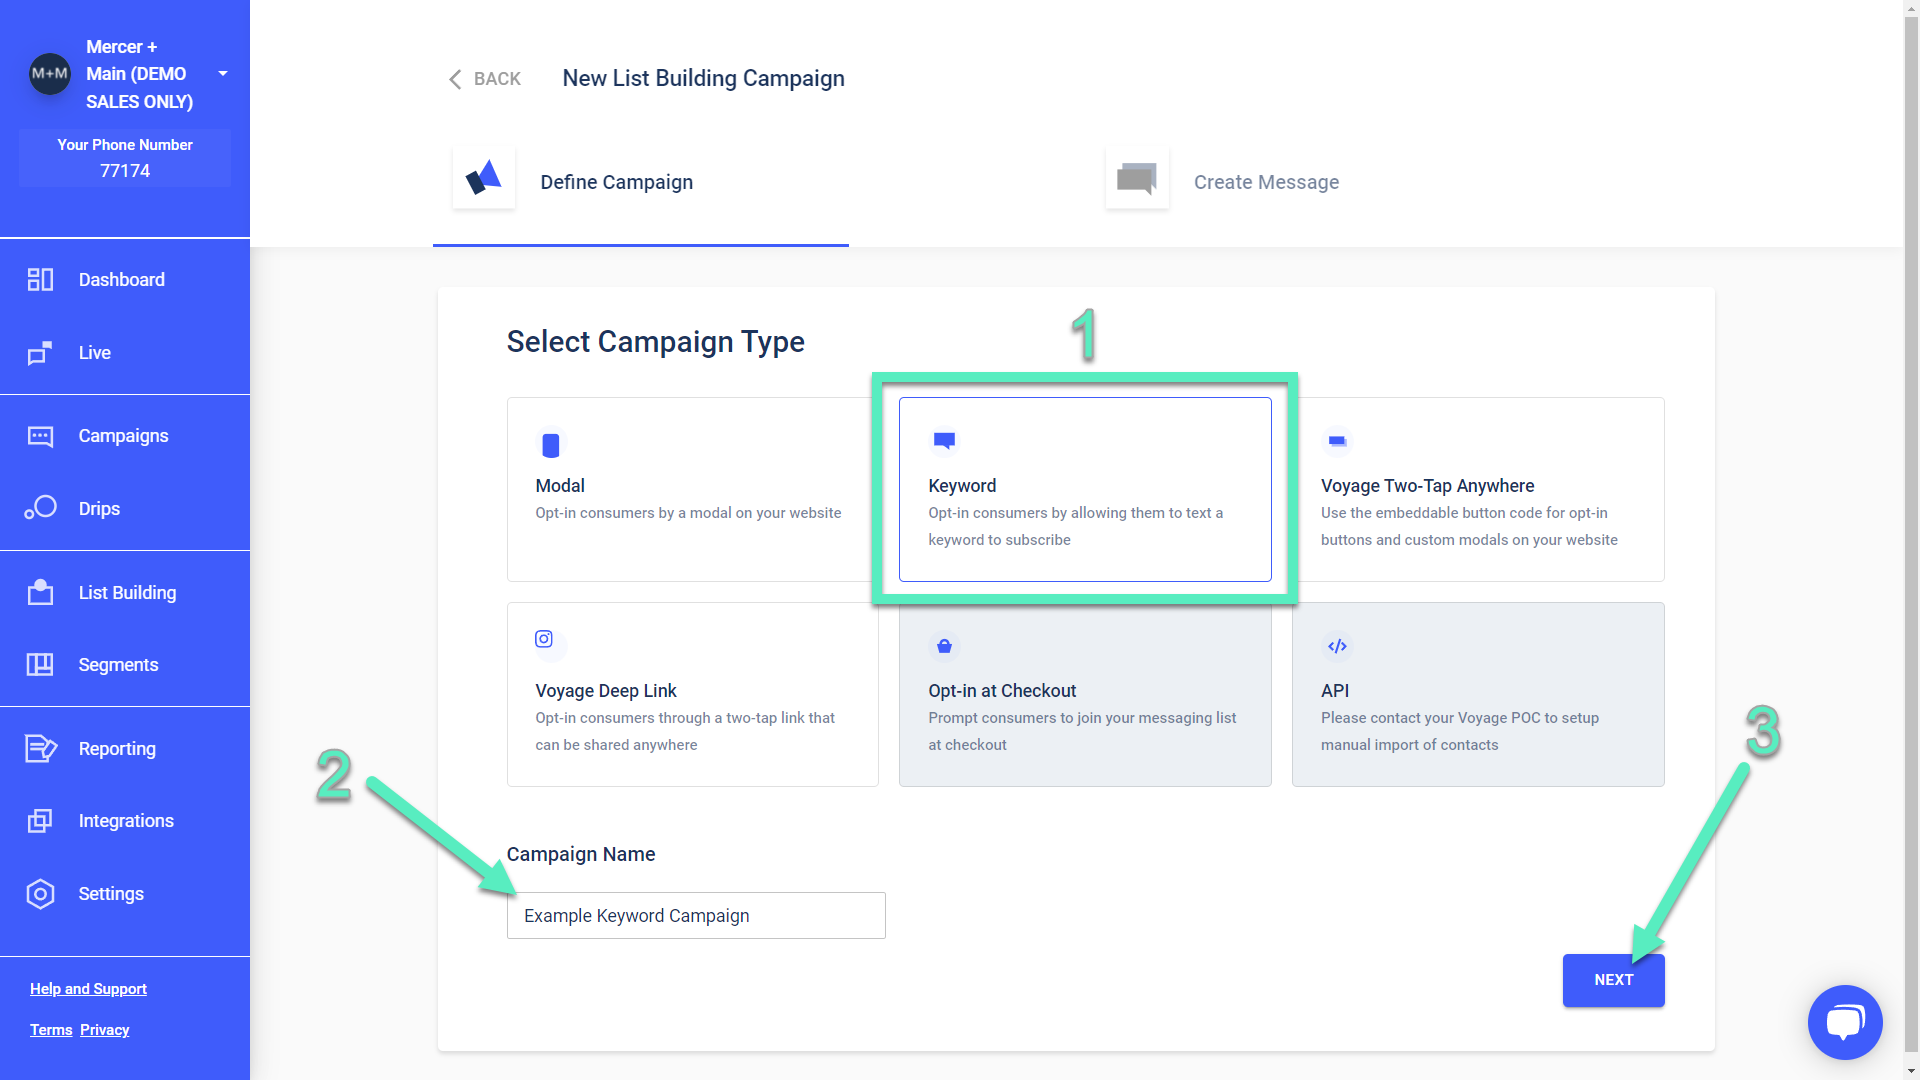
On the following page, you'll want to select the Keyword option [1] and give your campaign a name [2], which is only seen internally. Then click Next [3]:
Customer Opt-in Flow and Messaging
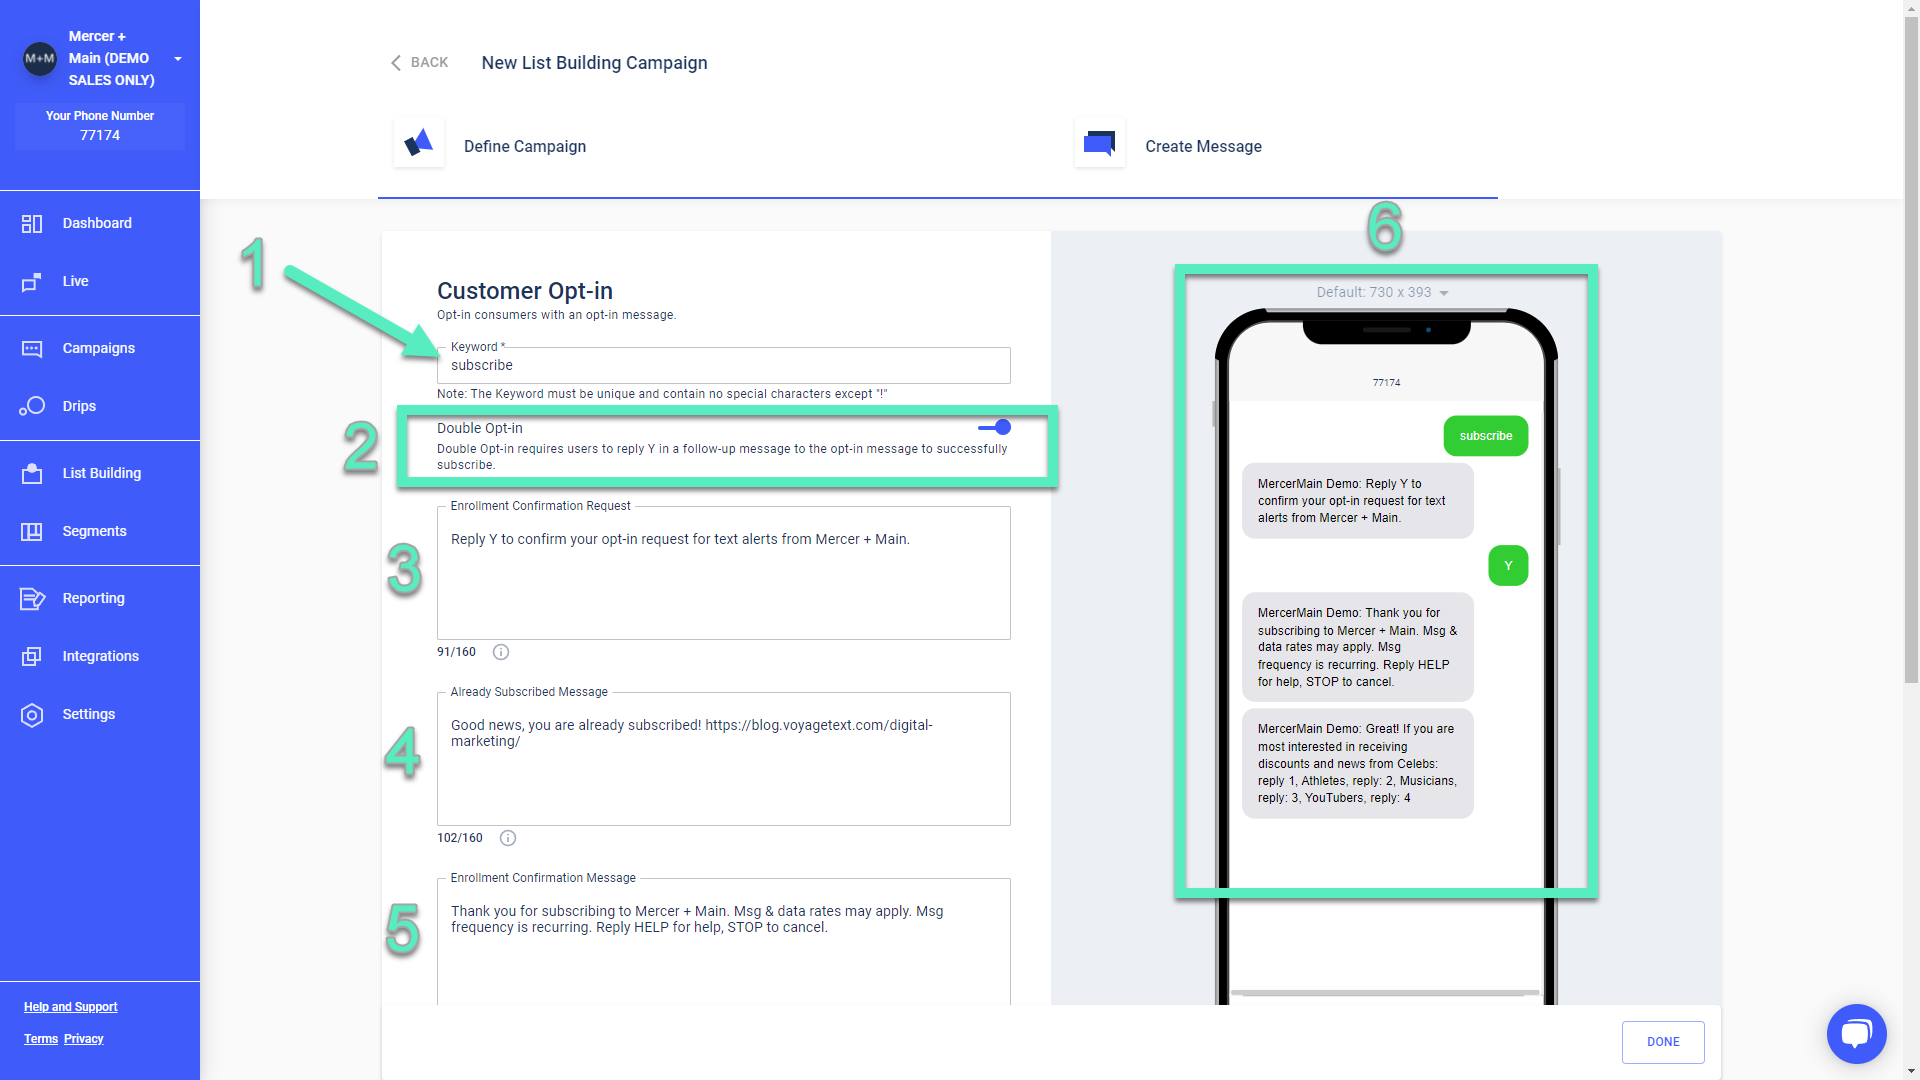
On this page, you'll first define the keyword [1] that prospective subscribers will use to initiate the opt-in flow. The double opt-in confirmation [2] is recommended for full compliance, and that messaging can be customized here [3]. If they were already a subscriber a separate message is sent [4] (this message will not show in the preview pane). The final enrollment confirmation message can be modified here [5]. All your changes can be seen in the preview pane on the right [6]:
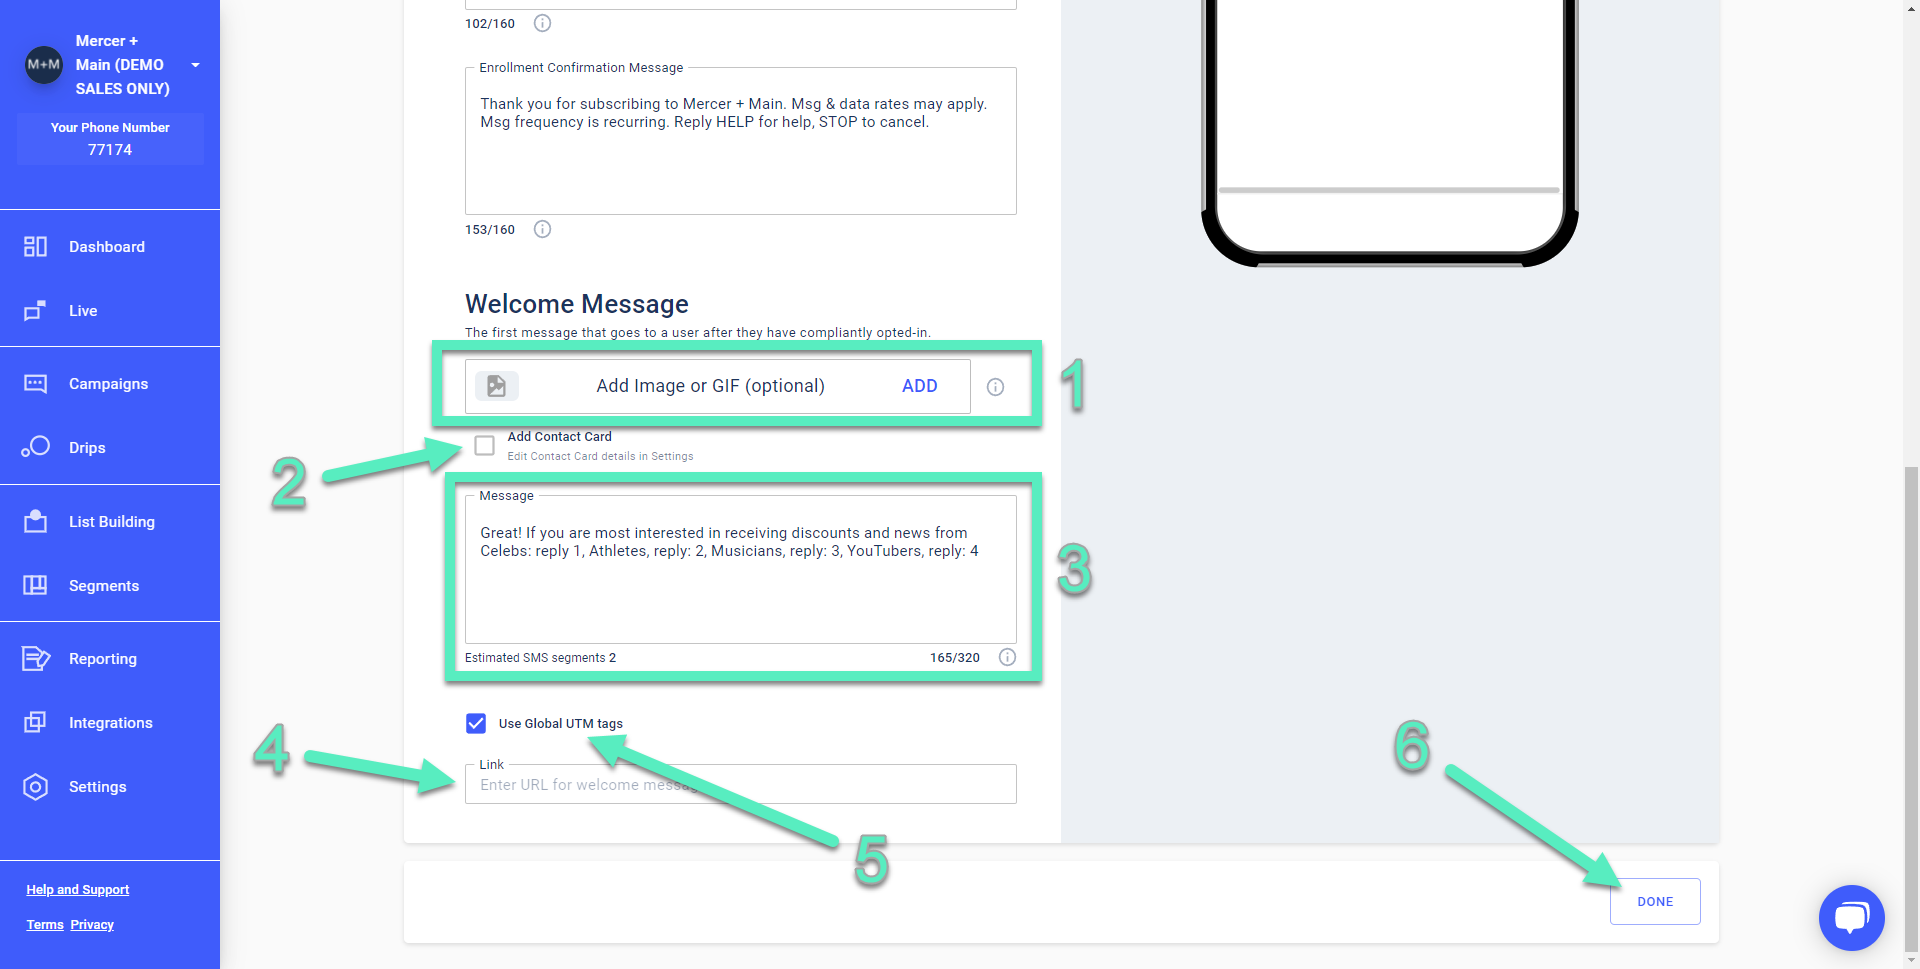
Scrolling down, you'll see welcome messaging options. These will present to the customer after they've fully completed the opt-in flow above. You are able to send an optional image [1], which can be a nice touch. If you have a contact card set up, you can include that as well [2]. Put in a custom welcome message here [3], and we recommend including a welcome URL as well [4]. Global UTM tags can be enabled or disabled [5], and when you are finished click on Done [6]:
Activate Keyword Campaign
Back on the main List Building page, you'll see your newly created Keyword campaign at the top of the list [1]. Under the Off/On column [2], you'll see a switch that will be automatically turned on by default [3]. You can toggle the switch to "inactive" when creating, previewing, modifying and collaborating on new campaigns before changing them to live/active. When the toggle is blue, your keyword campaign is active:

If you have any additional questions please contact us at [email protected].