
Connect Voyage and Shopify to get the most out of SMS messaging with your eCommerce store. This article will walk you through installing the Voyage Private App in Shopify so you can pull in customer profile and event data for segmentation, setup abandoned checkout messages, and more.
Note: To complete Shopify's Private App installation, you will need to be logged in to Shopify with admin permissions.
Enable Shopify Private Apps
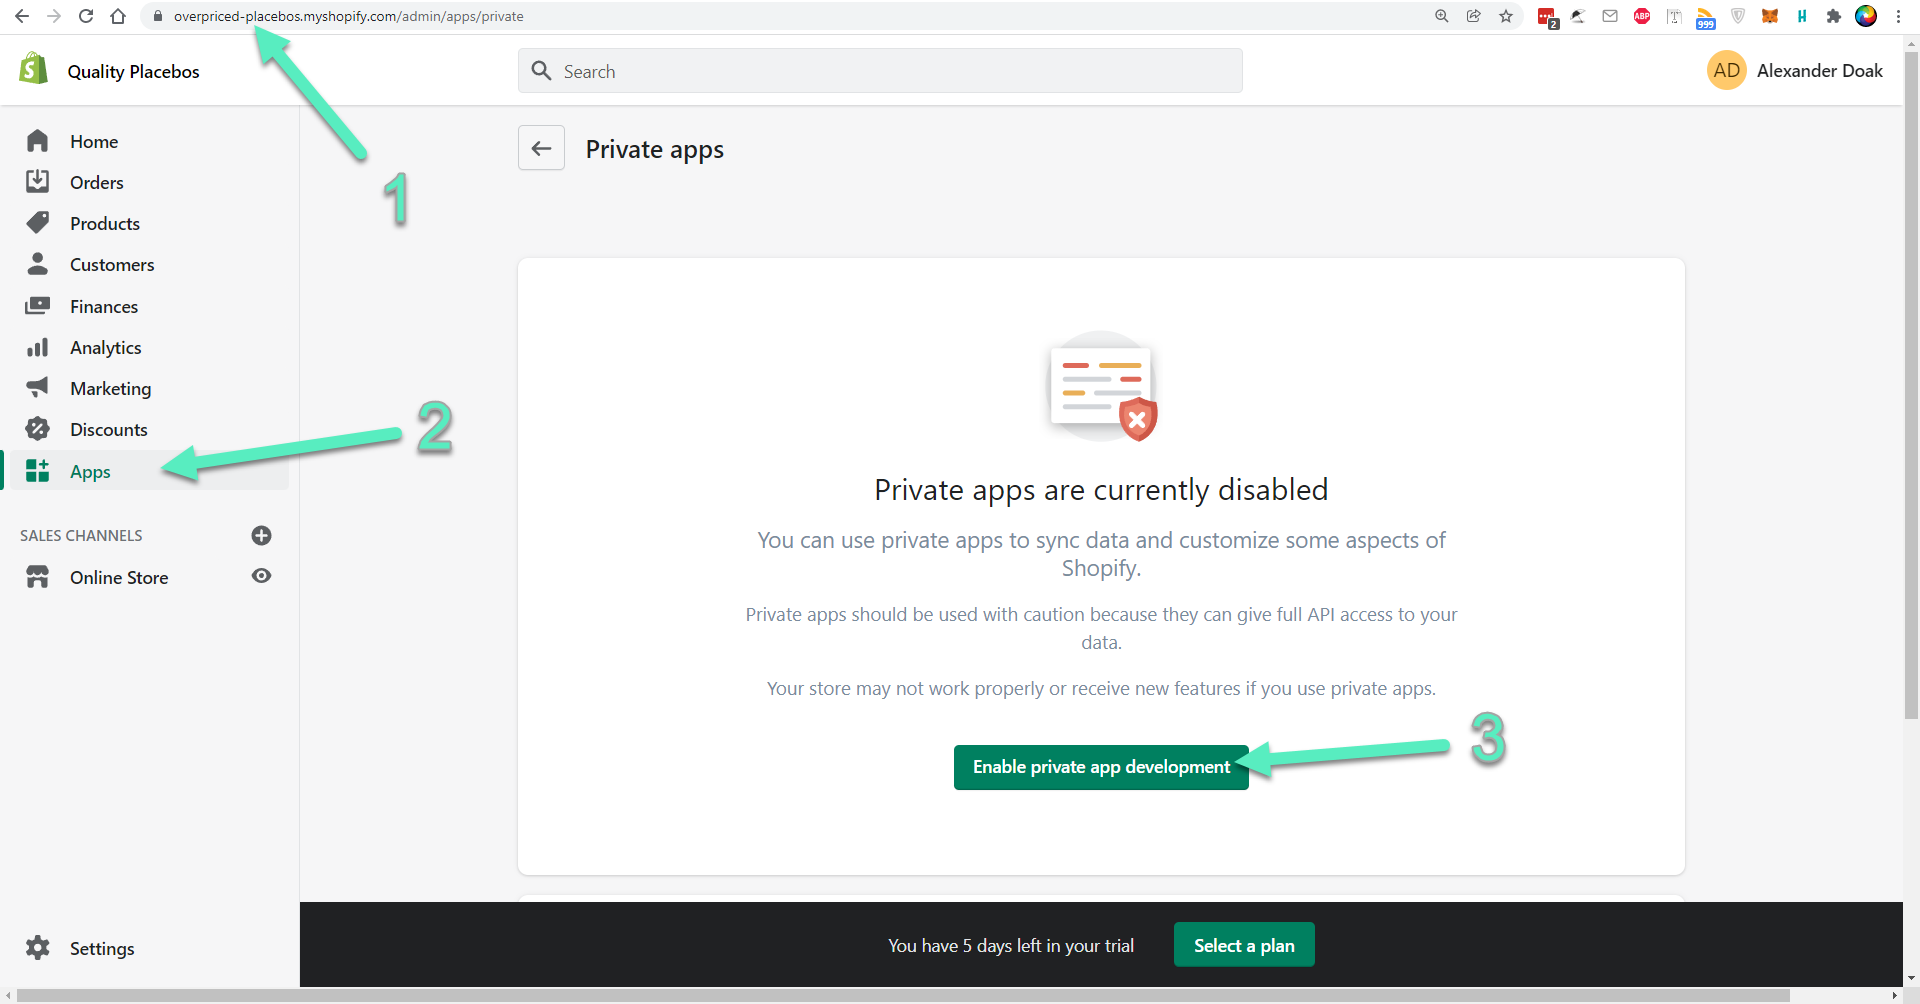
First, you'll need to enable private app development in Shopify if you haven't done so already. Log into Shopify and navigate to the main admin interface. The URL will be similar to: https://mydomain.myshopify.com/admin where "mydomain" is the name of your Shopify store domain. Click on Apps in the main menu [1]. In the top right corner, click on Develop Apps [2]:
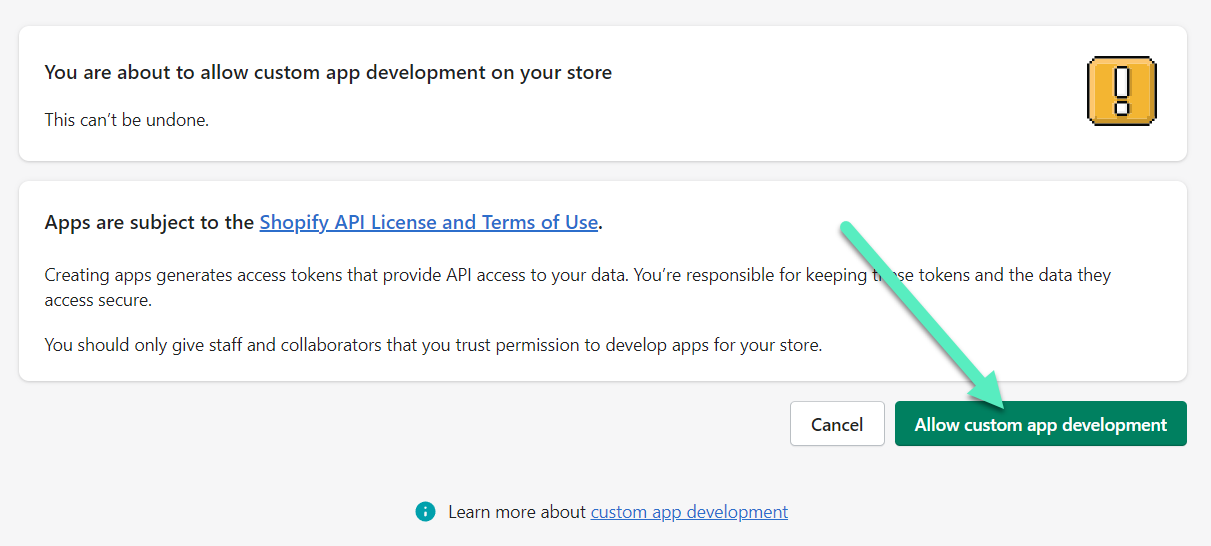
You will be prompted to formally allow custom app development on your store with two confirmation screens. Note that enabling custom app development can't be undone:

Shopify Private App Setup
If you haven't done so already, log into Shopify and navigate to the main admin interface. Click on the Apps main menu item, then click on Develop apps as shown in the previous step.
Click on the green, Create an app button:

Give your app an appropriate name [1], then enter your developer's emergency email address here [2] or your own email if you don't have a developer on staff. Click on Create app [3] to continue:

On the next page, click on the Configuration tab [1], and select Configure on Admin API integration [2]:

On the list of inactive permissions, you will need to enable the following:
Read
Customers
Fulfilment Services
Orders
Products
Inventory
Read and write
Draft Orders
Price Rules
Themes
Also on that same Admin API integration page, scroll down to the 'Webhook API version' section. Click on the Event version dropdown selection, and choose 2022-04:

With those settings in place, click on Save at the bottom (or at the top). You'll see a Configuration saved message.
The Save button at the top will change into an Install app button [1]. Click it to see a confirmation message. Click Install to continue [2]:

You will see an App Installed confirmation at the bottom of the screen.
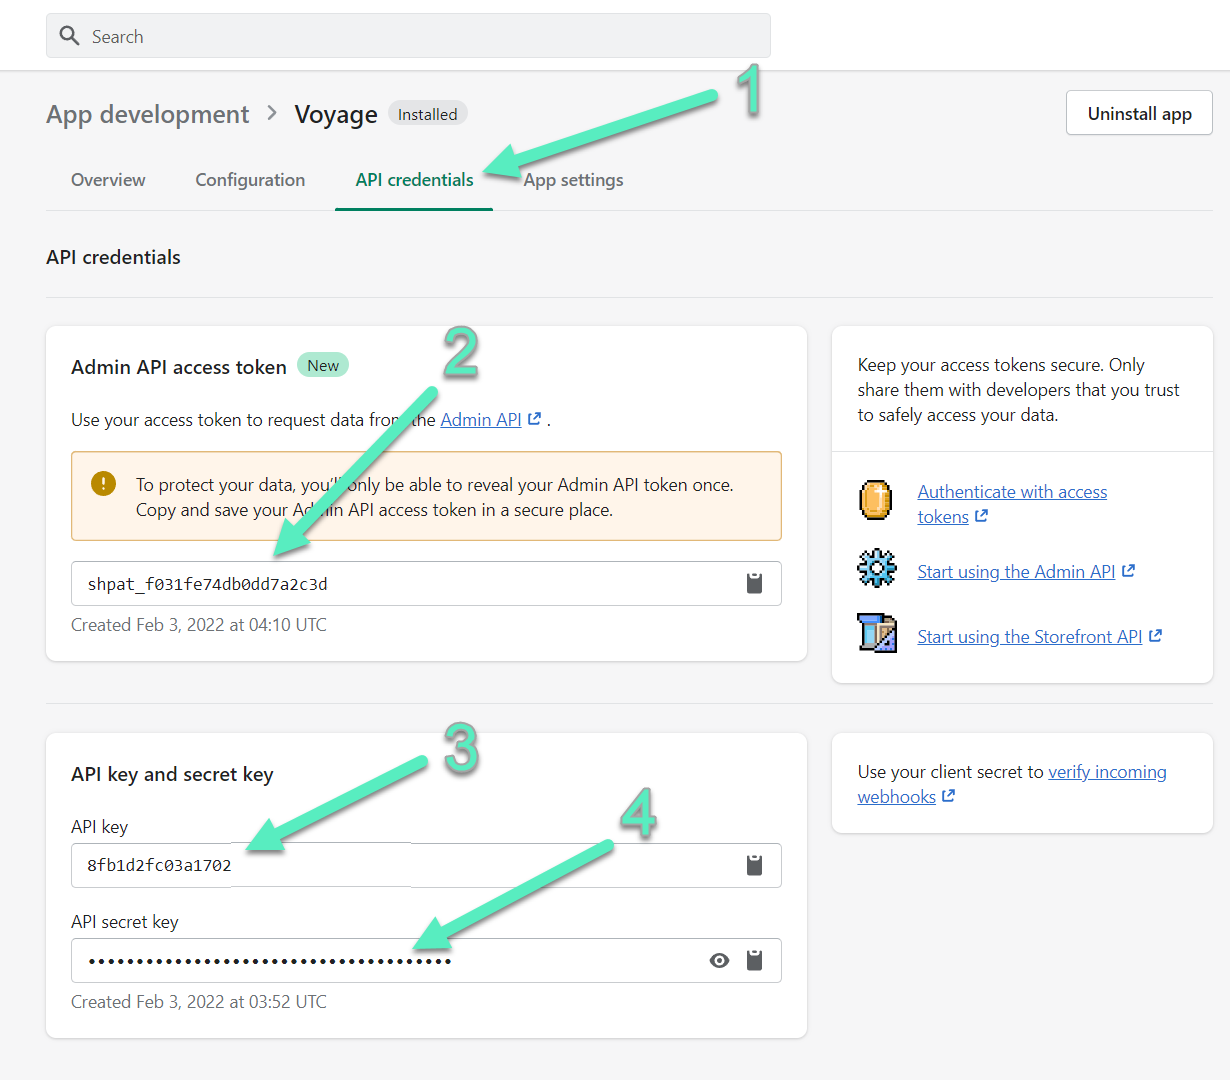
On the API credentials tab [1], there are three pieces of information you'll need to capture for pasting into Voyage. Your Admin API access token [2] (also called a Password in Voyage), your API key [3], and your API secret key [4] (also called Shared Secret in Voyage). So either leave this browser tab open, or copy and paste these values to a secure location:
Paste Integration Details
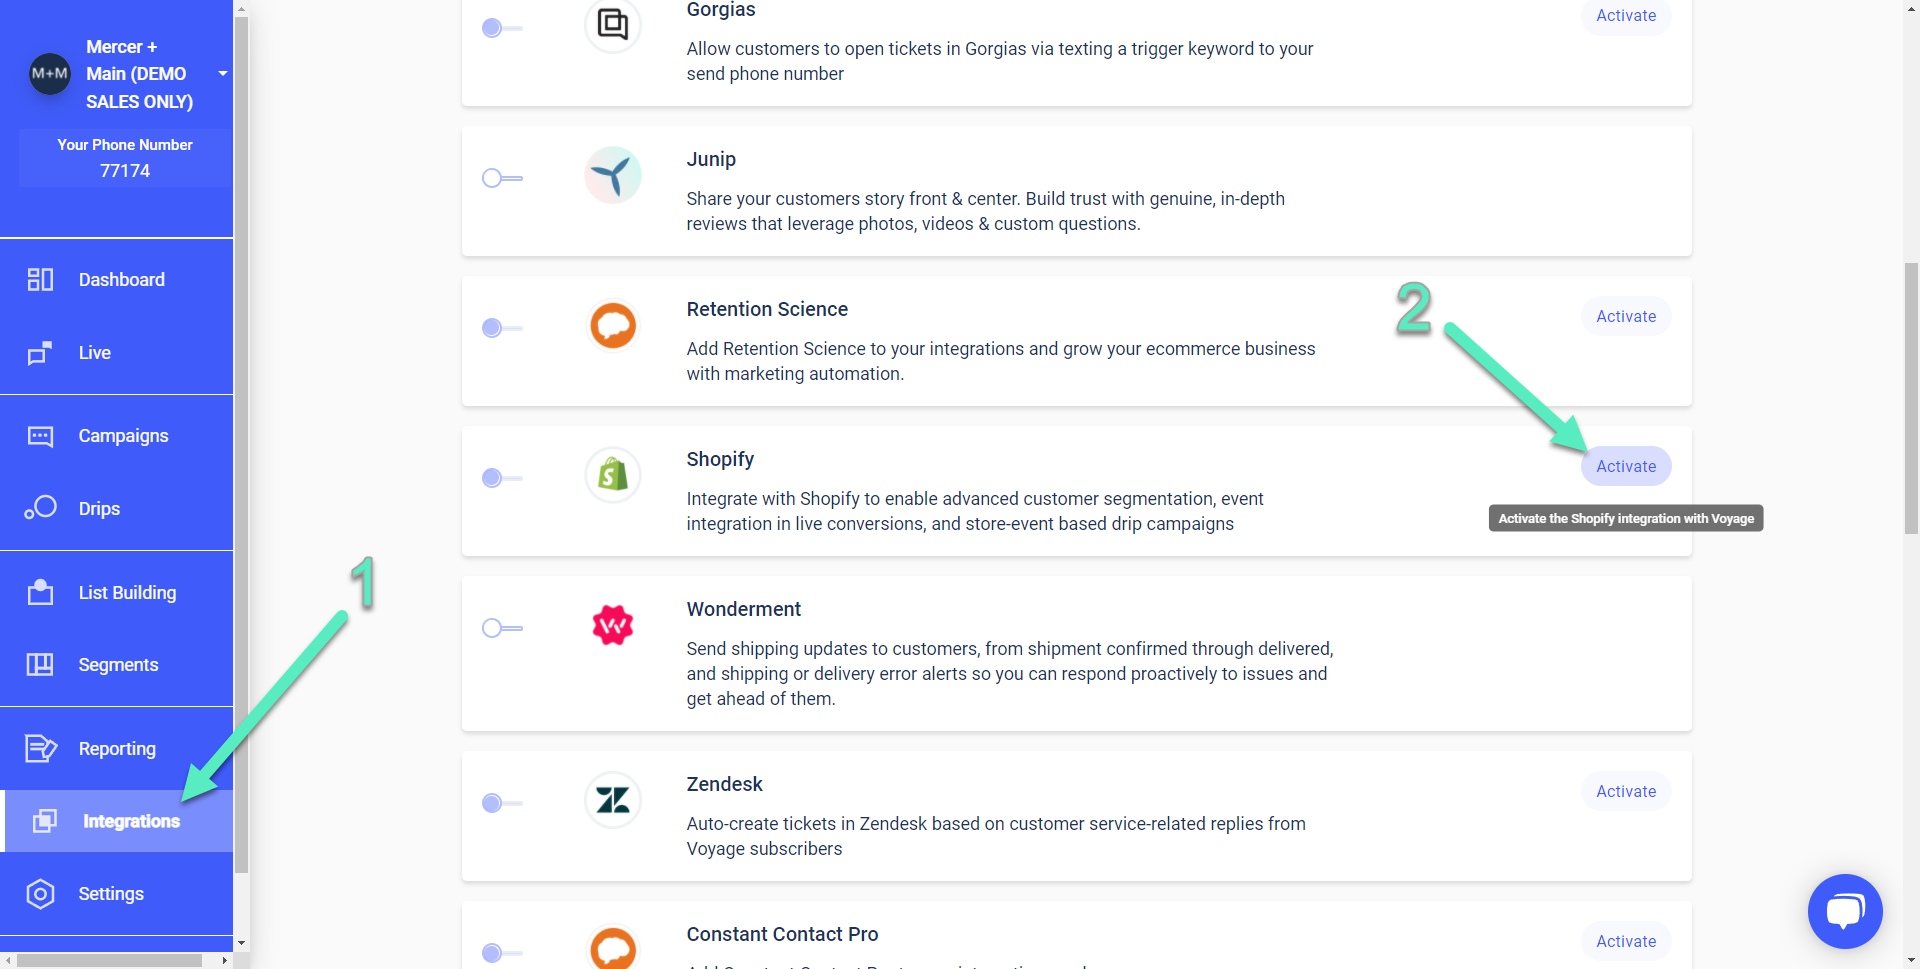
Open another browser tab to https://app.voyagetext.com/. Click on Integrations [1] then find the Shopify selection and click on Activate [2]:
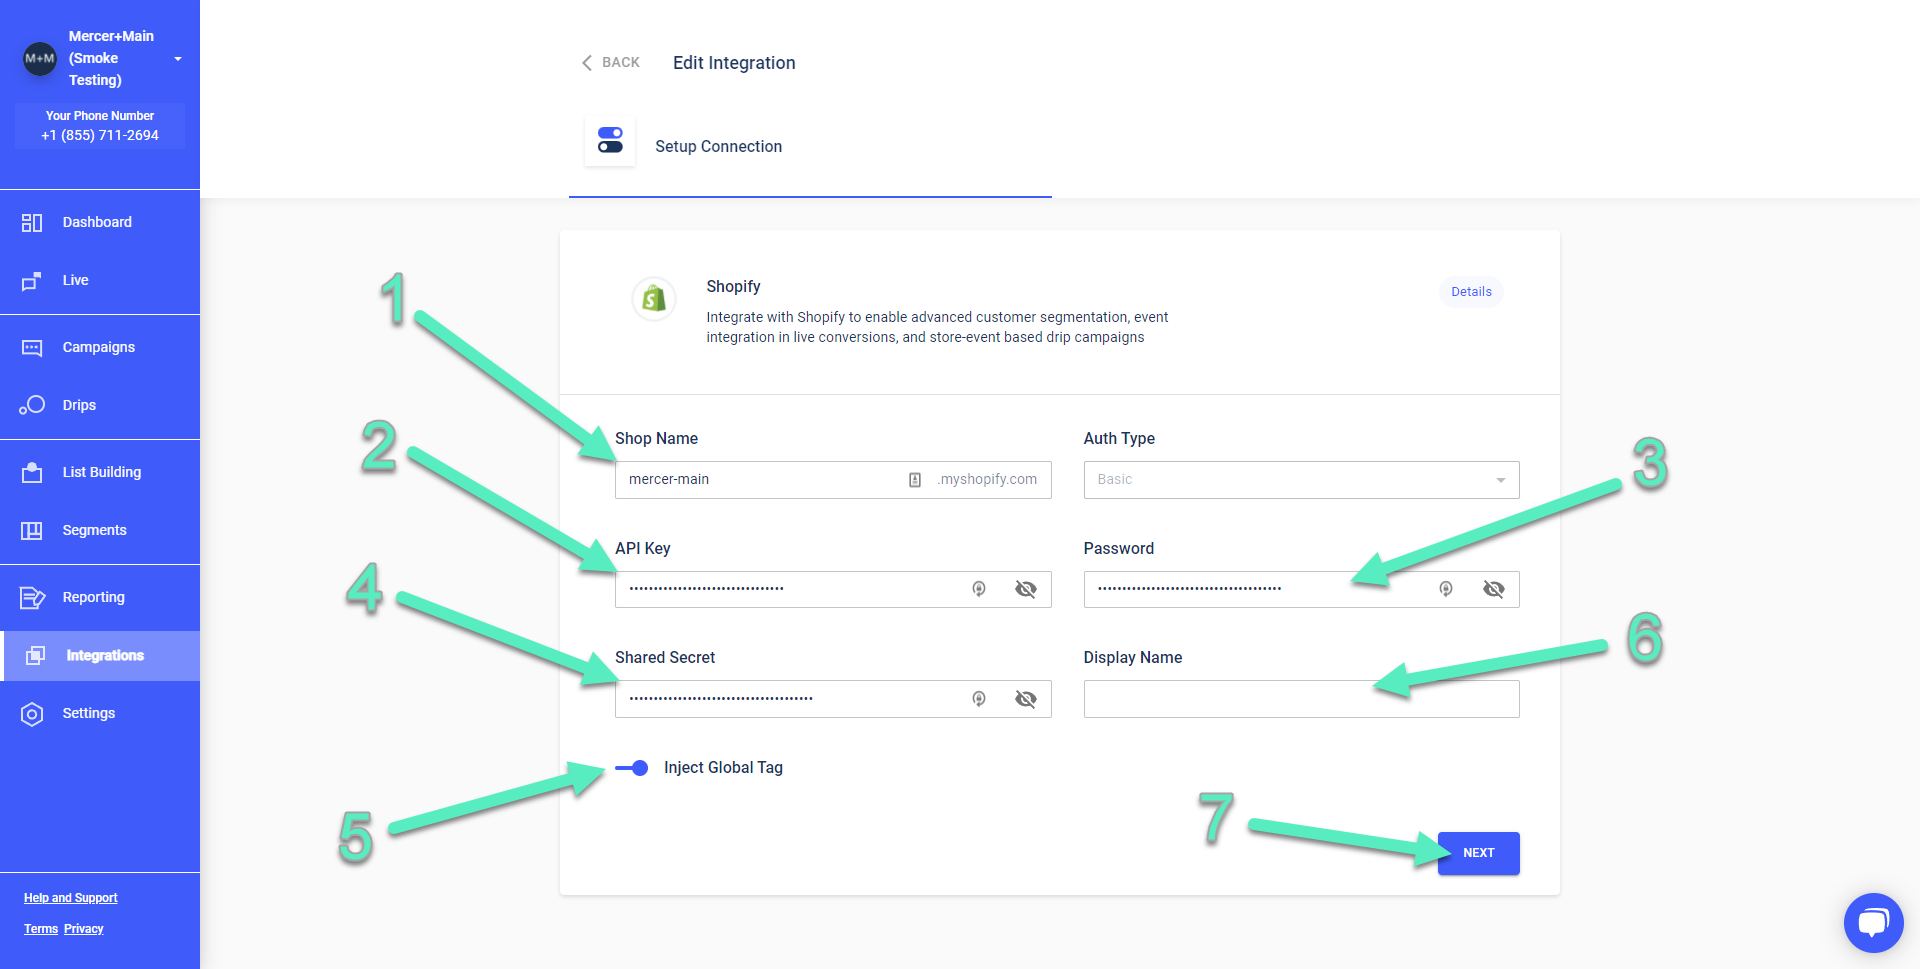
Here is where you'll put in your Shopify domain name [1], and copy over the API Key [2], Password (Admin API access token) [3], and Shared Secret (API secret key) [4] from the Shopify details described in the step above.
Be sure to turn on Inject Global Tag [5] to automatically install the Voyage Global Tag.
The optional Display Name field [6] is useful when you have multiple integrations with Shopify. Click Next [7] to continue:
You should see this message. Click Done to return to the integration list:

If a field was missing or incorrect, you may see an error message. Simply follow the instructions to rectify the issue.
Insert Voyage Purchase Tag on Shopify:
NOTE: If you want to utilize Opt-In at Checkout, please reference this documentation page and skip the following.
In this step, we'll insert Voyage's purchase tag into the Shopify platform to gather that important purchase data as it is generated.
First, again ensure that you have admin rights within your Shopify store.
Please reference this page for guidance on the purchase tags.
Shopify FAQ
What features can I unlock with the Shopify integration?
Our Shopify integration supports the following features:
Customer segmentation by Shopify purchase history, including created order, total spent, and more.
Drips for Abandoned Checkout and Abandoned Cart scenarios
Where can I find my Shopify shop/store name?
This is also called your Domain name. From the Shopify Admin main menu, click on Online Store [1], and then click on Domains [2]. Look for the section that says Shopify-managed domains [3] and find the portion of the domain preceding .myshopify.com. This is your store name [4]:

If you have any additional questions please contact us at [email protected].