Give your customers another powerful support channel with our Voyage SMS and Zendesk integration. Allow consumers to open support tickets by texting a trigger keyword to your Voyage send phone number. Follow along in this article to get set up so you can use the Zendesk dashboard to communicate back and forth with consumers via SMS
Benefits of Zendesk Integration
A challenge with customer support these days is it becoming increasingly robotic. Finding how to contact a brand can be often difficult for customers. The back and forth emails can get lost in a swamped inbox. Now with our Zendesk and Voyage integration, you can communicate with consumers where they pay the most attention (SMS) thereby reducing friction and increasing brand loyalty. Other benefits include:
Make a top impression with your consumers directly through text message conversations.
Select a keyword of your choosing for customer to text to open a support ticket in Zendesk
Reply to these support tickets directly in Zendesk which sends an SMS to the consumer on the same phone number they receive marketing messages
Zendesk Setup
Be aware that you can only have one ticketing system integration active at a time. So for example, if you have a Gorgias integration you must deactivate that before turning on your Zendesk integration.
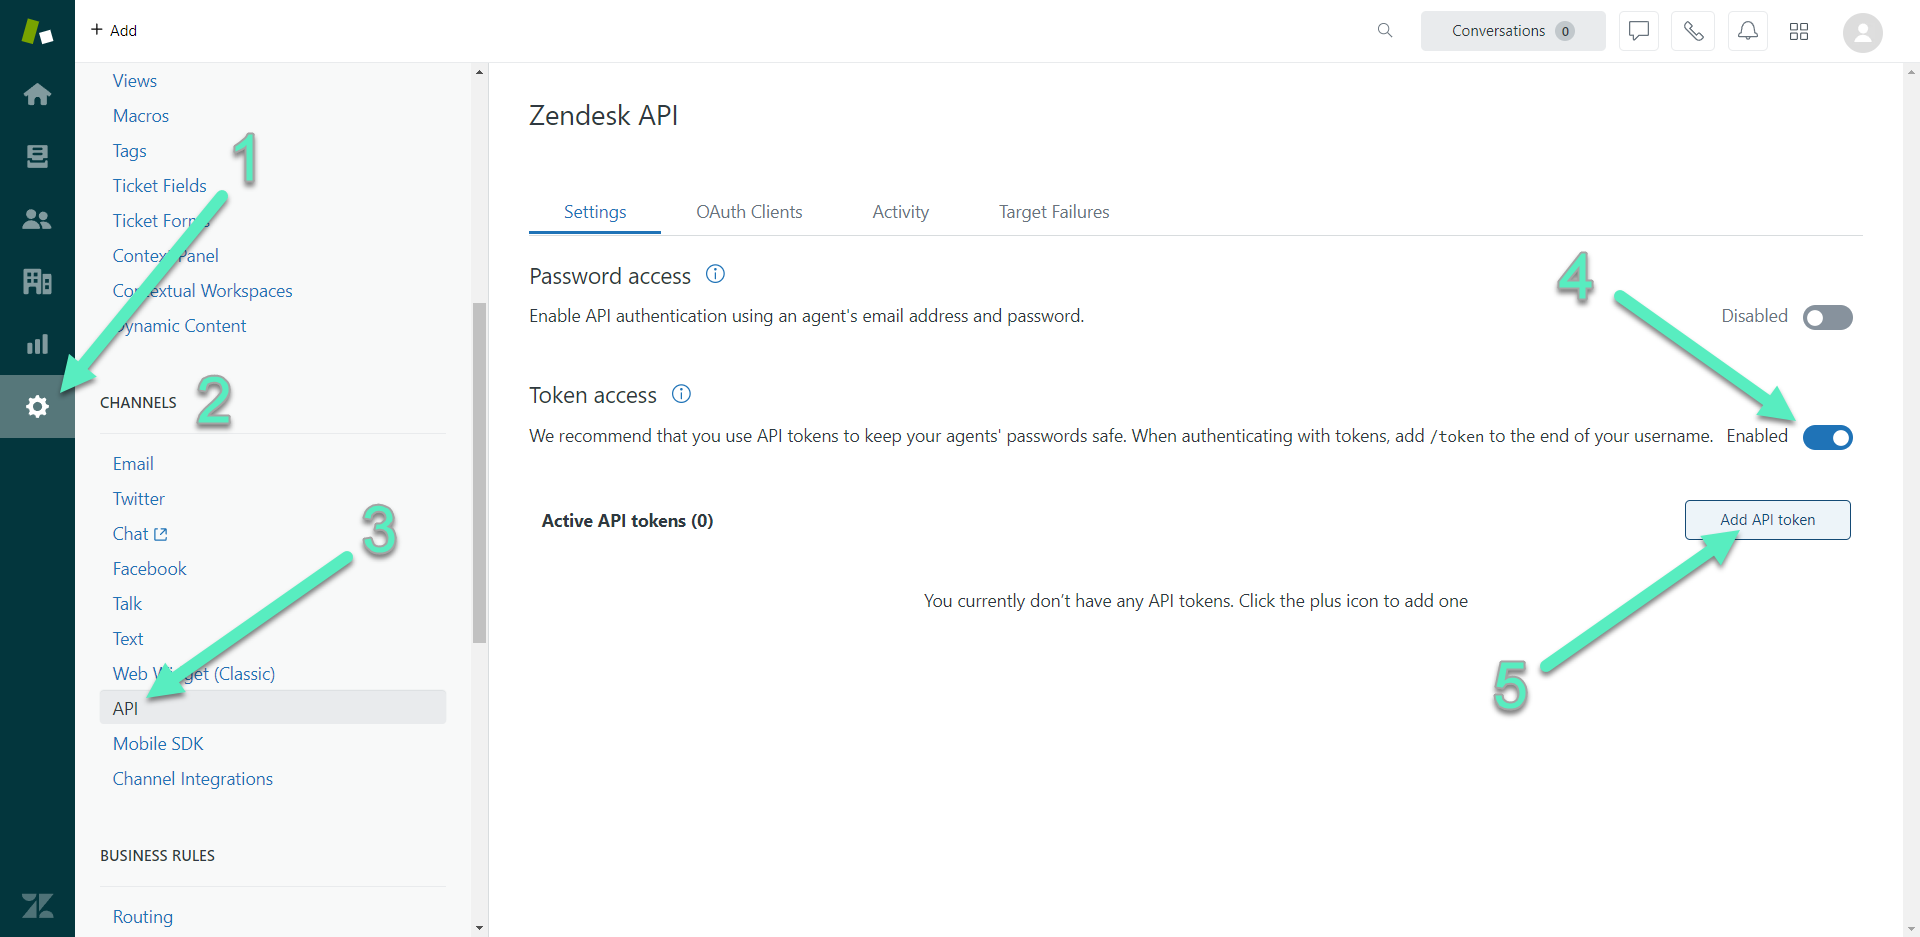
Log in to your Zendesk account, and navigate to the Admin Center. Click on the Gear icon on the far left [1] then scroll down until you find the Channels section [2]. Look for the API menu item there [3]. You may need to agree to Zendesk's API Terms of Service first before continuing. Click on the Token access switch [4] to enable the Add API token button [5], which you should then click on:
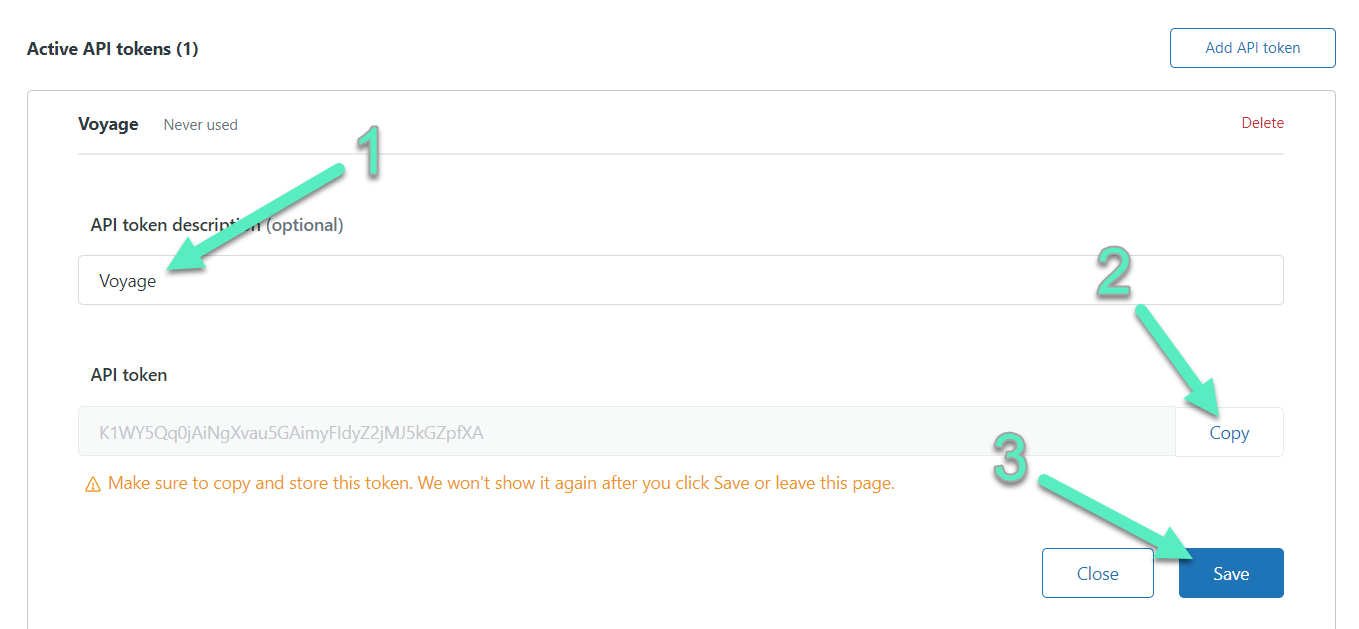
Name your token "Voyage" [1]. Copy the API token [2] and store it in a secure, permanent location. Click on Save [3] to continue:
You'll also want to grab your email address that you are using for Zendesk email support, so navigate again in the admin center to Admin [1], Channels [2], and Email [3]. Copy and save the email address found there [4] for later use in the Voyage integration setup:

And finally you'll need your Zendesk Subdomain. See this article for more details on how to find out what your Zendesk account's subdomain is.
Voyage Setup
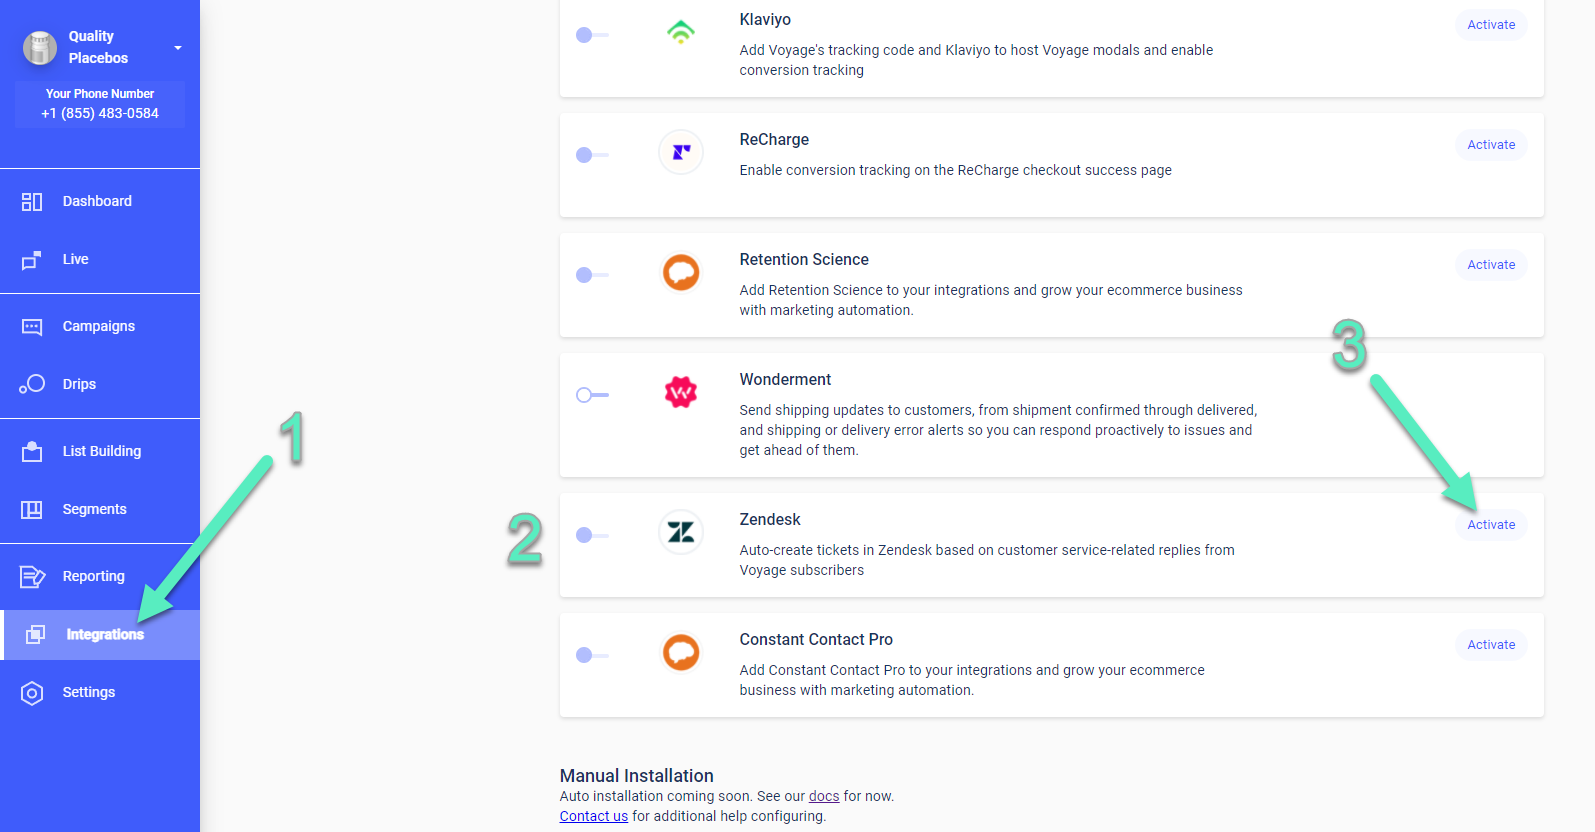
Log in to the Voyage SMS web app, and navigate to Integrations [1]. Scroll down until you see Zendesk [2] and click on Activate [3]:
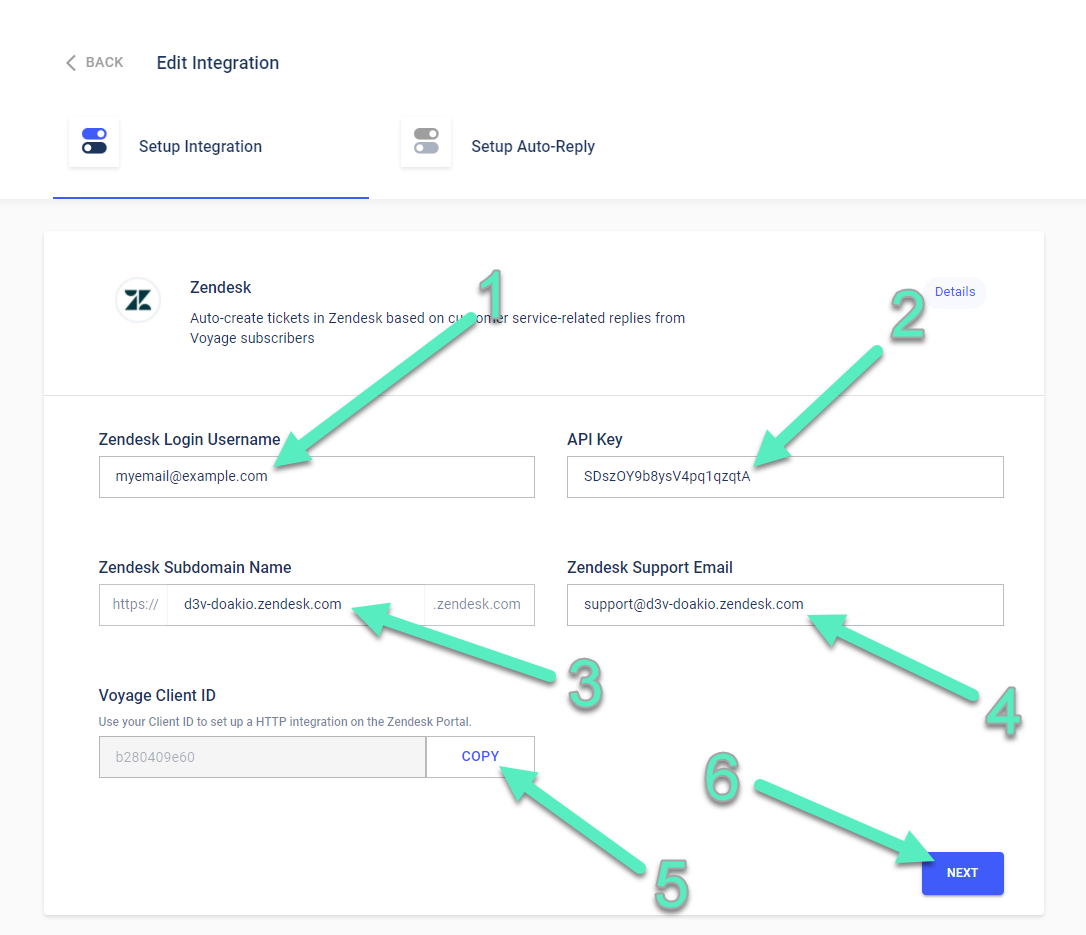
On the following screen, you'll need to enter in your Zendesk's login email address [1], along with the API key you saved [2]. Paste in your Zendesk subdomain [3] and your Zendesk Support email [4]. Copy and save your Voyage Client ID [5] for future use in the setup process, then click on Next [6]:
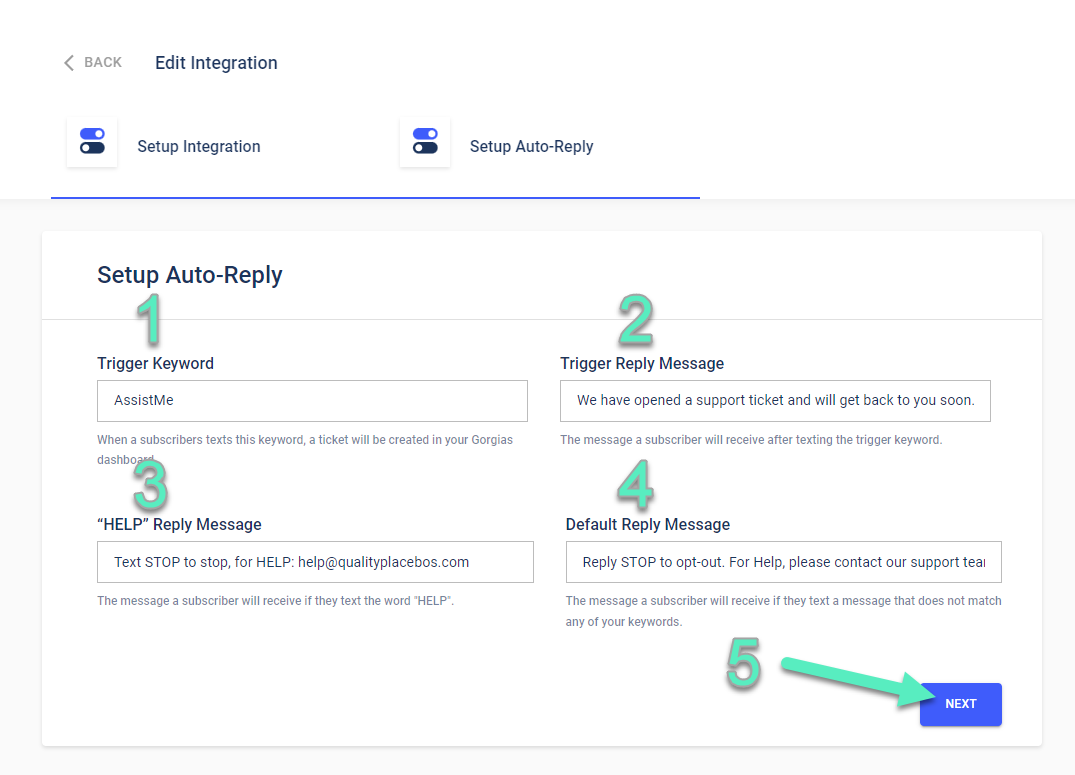
The next screen will allow you to define a trigger keyword [1] that subscribers will use to activate the Zendesk support channel. Modify the Trigger Reply Message [2], Help Reply Message [3], and Default Reply Message [4] as needed, then click on Next [5]:
If everything is populated correctly, you should see this success message:

Zendesk Extension
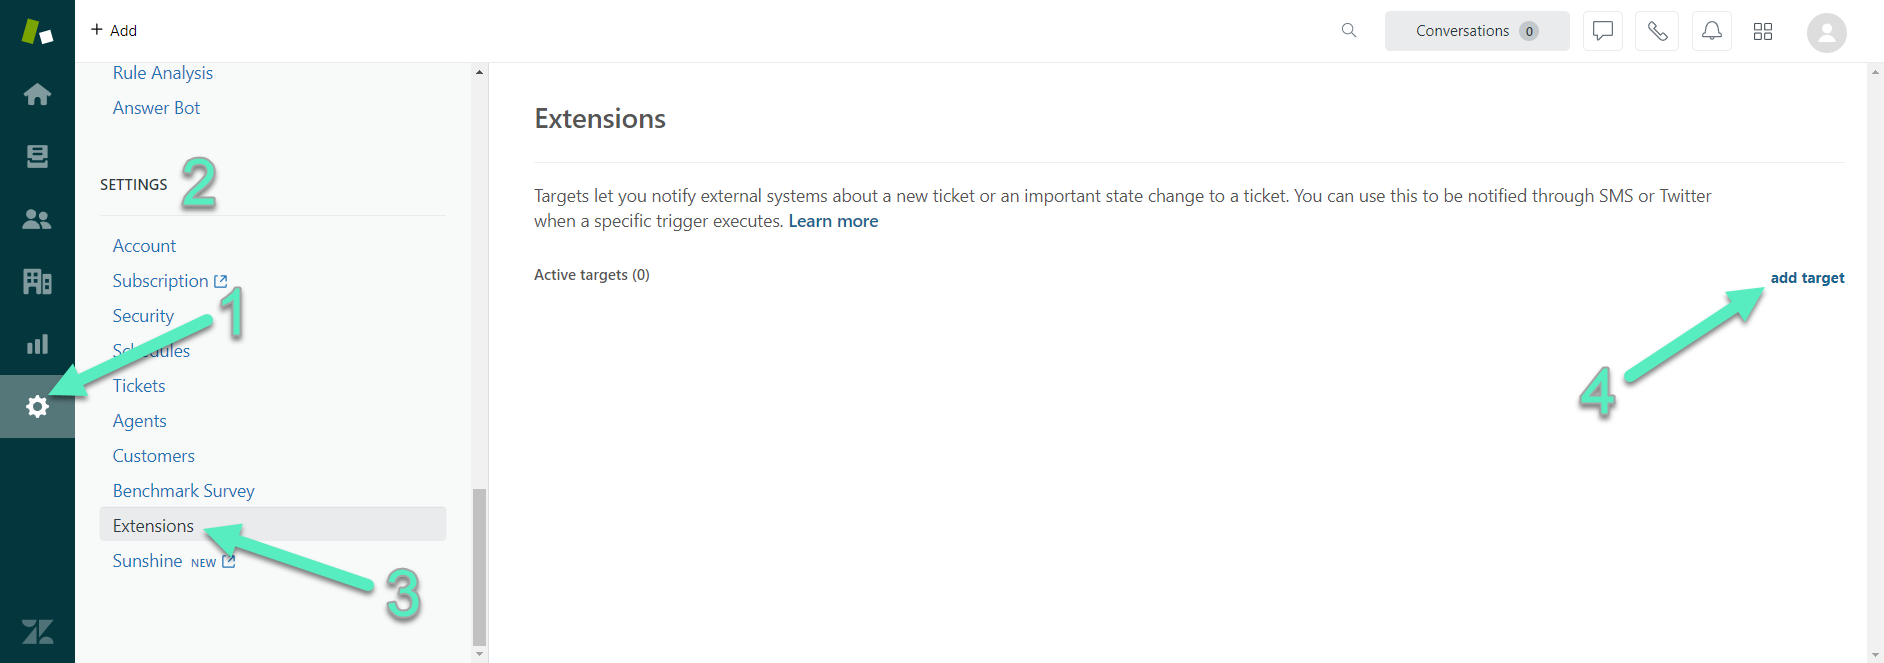
Heading back to Zendesk again, you'll want to navigate in the Admin Center to the Admin main menu [1], and scroll down until you see Settings [2]. Click on Extensions [3], then on that page click on add target [4] to the right:
On the following list of targets, click on HTTP target:

Give the target an appropriate title such as "VoyageApp" [1], then paste in the following URL into the URL field [2], where [Client_ID] is the value you captured from before during the Voyage setup:
Set the Method to Post [3], then switch the drop-down to Create Target [4] and click on Submit [5]:

You will be taken back to the list of Extensions, where you should see your new VoyageApp as an active target.
Zendesk Trigger
Once more Zendesk, click on on Admin [1], then scroll down to Business Rules [2]. Click on Triggers [3] and then click on Add trigger [4]:

Give your trigger an appropriate name [1], then populate the optional description [2]. Select Notifications for the Category [3]. Under "Meet ALL of the following conditions" you'll want to click on Add condition [4] and first choose Ticket [5] in the selection box. The Is condition should be "Update" [6]:

Add four conditions in total, and populate each according to this table:
Condition | Action | Value |
Ticket | Is | Updated |
Tags | Contains at least one of the following | voyage |
Comment | Is | Public |
Update via | Is not | Web service (API) |
Scroll down and Click on Add Action. Select Notify target [1] for the action, then select Voyage App [2] to make a JSON body field appear [3]. Here you'll paste the code below. Then click on Create [4]:
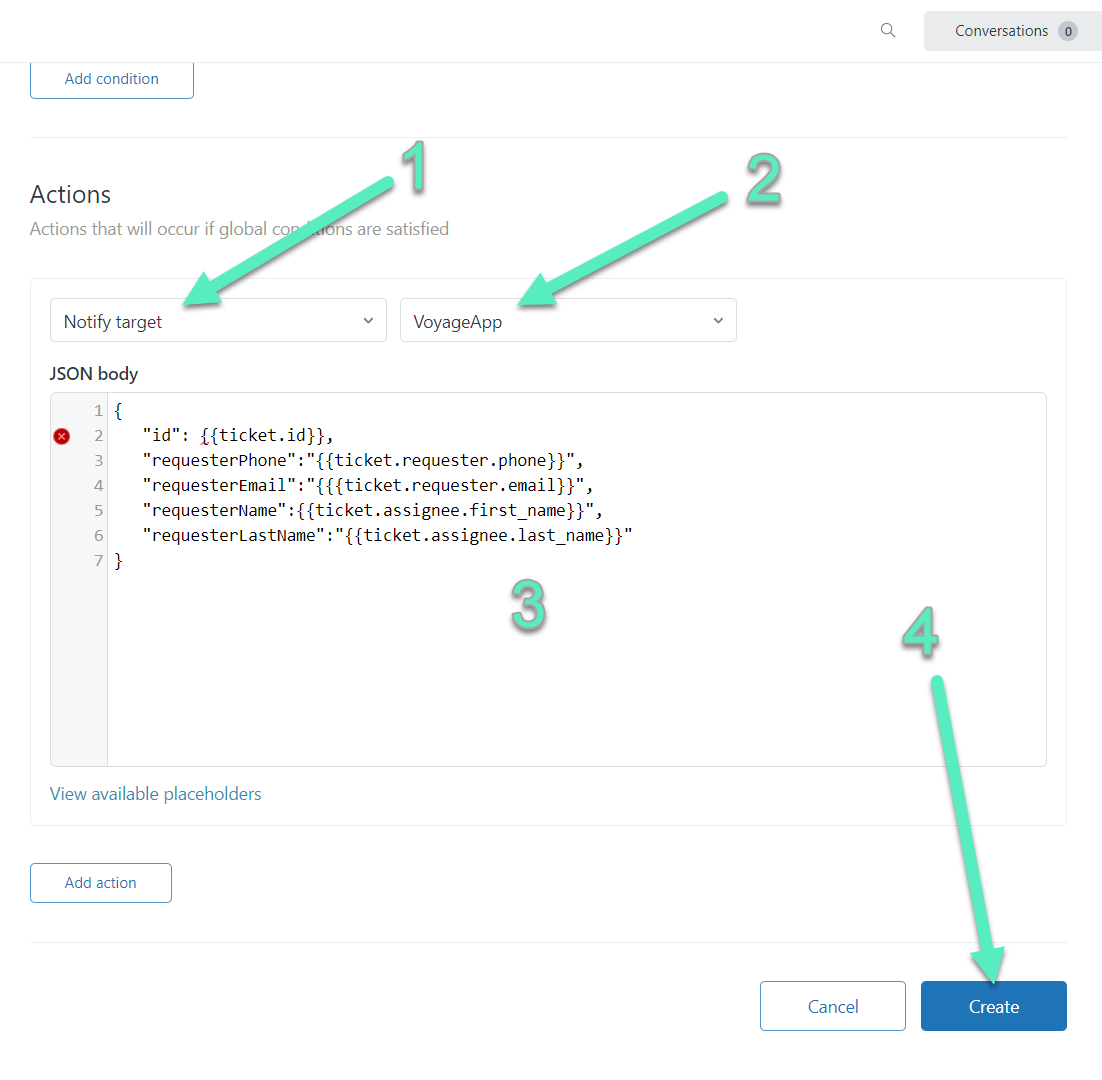
This is the code you should paste into the JSON body field:
{ "id": ##{{ticket.id}}, "requesterPhone":"", "requesterEmail":"", "requesterName":", "requesterLastName":""}And you are all set! Please allow up to 15 minutes for the integration to take effect after saving all configurations. Now when subscribes use the designated SMS keywords, you'll be alerted in Zendesk, and can respond there as well.
If you have any additional questions please contact us at [email protected].