Custom events are those which you define and implement to extend default Drip triggers. They help you follow subscriber actions beyond standard Voyage events. Here we'll show you how to set up custom events, and the many different ways you can use them to customize your subscribers' experience.
Refer to our sister article for more common examples of custom events.
Navigation and Creating Custom Events
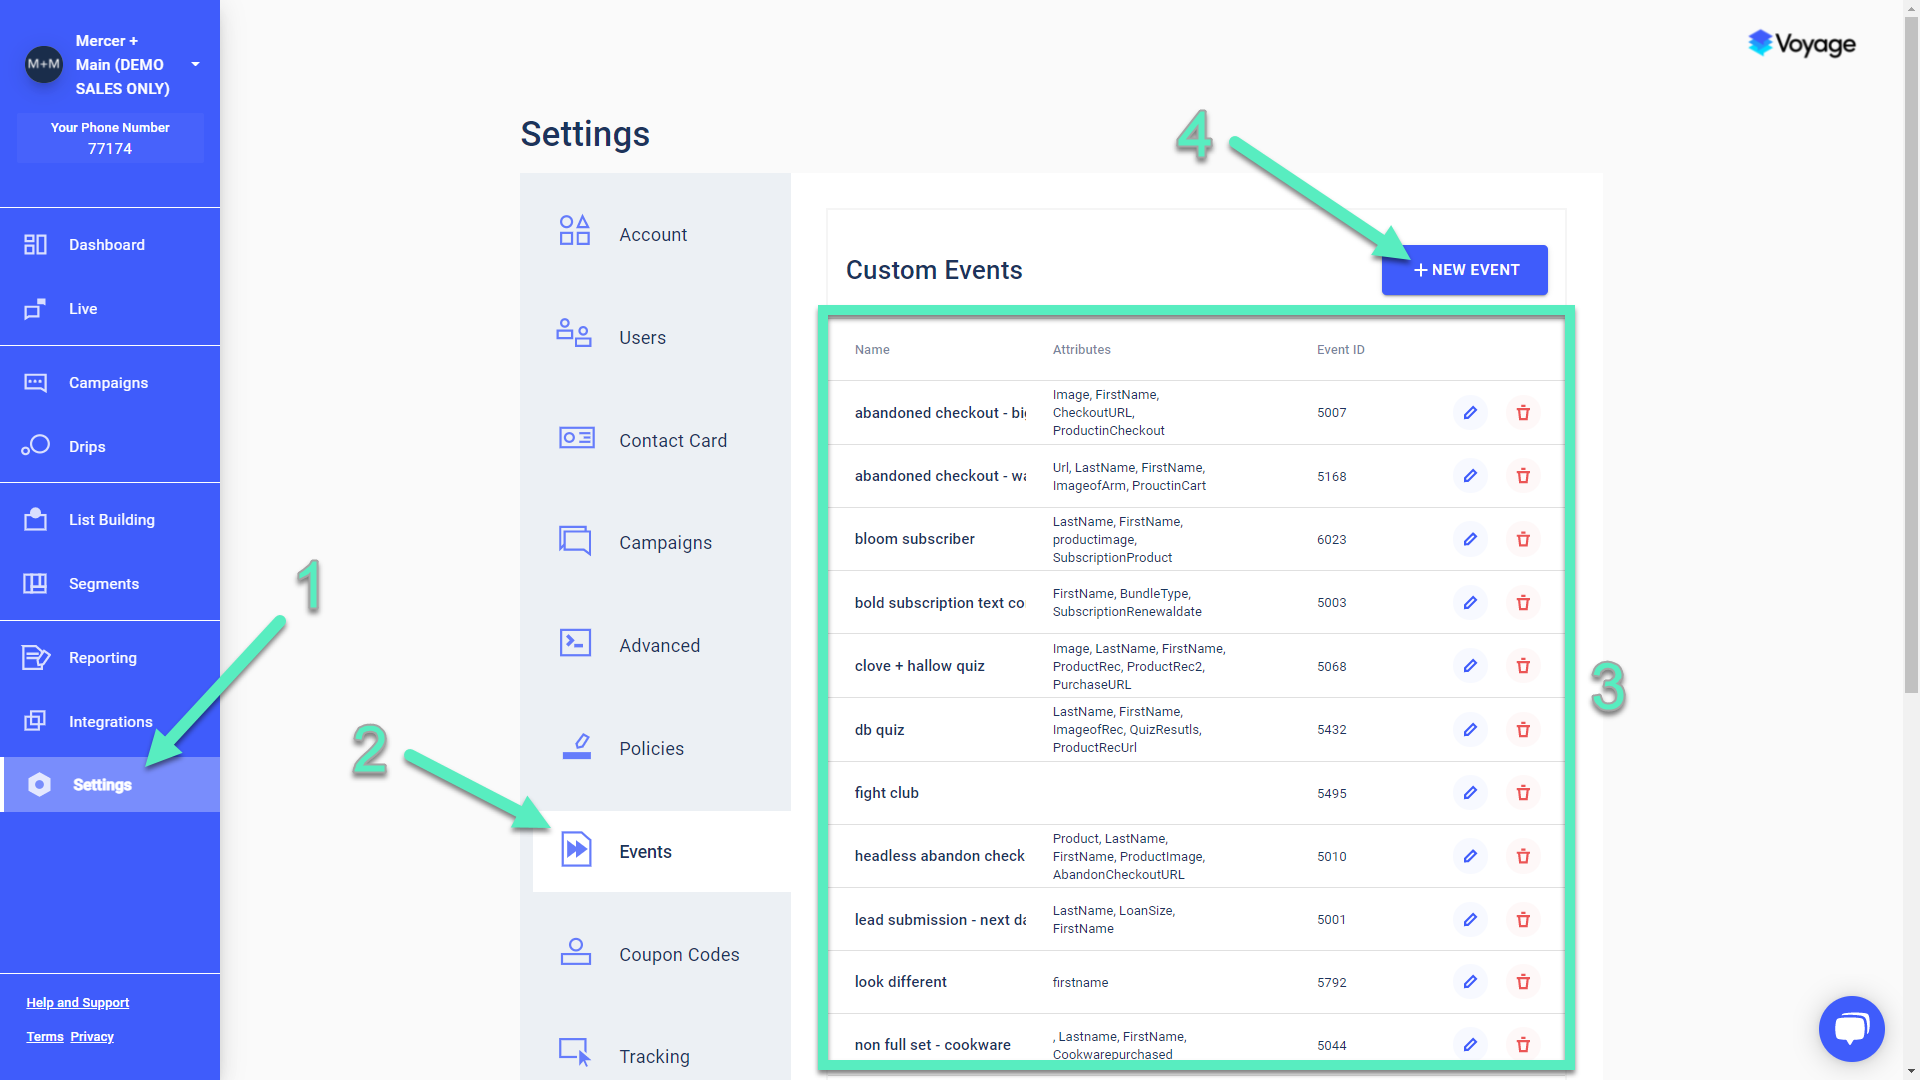
To see existing Custom Events or to create a new one, you'll need to navigate to Settings [1] on the Voyage main menu, then select Events [2] near the bottom. Here is where you'll be able to browse, edit, and delete any existing custom events [3]. Click on + New Event [4] to follow along with our guide:
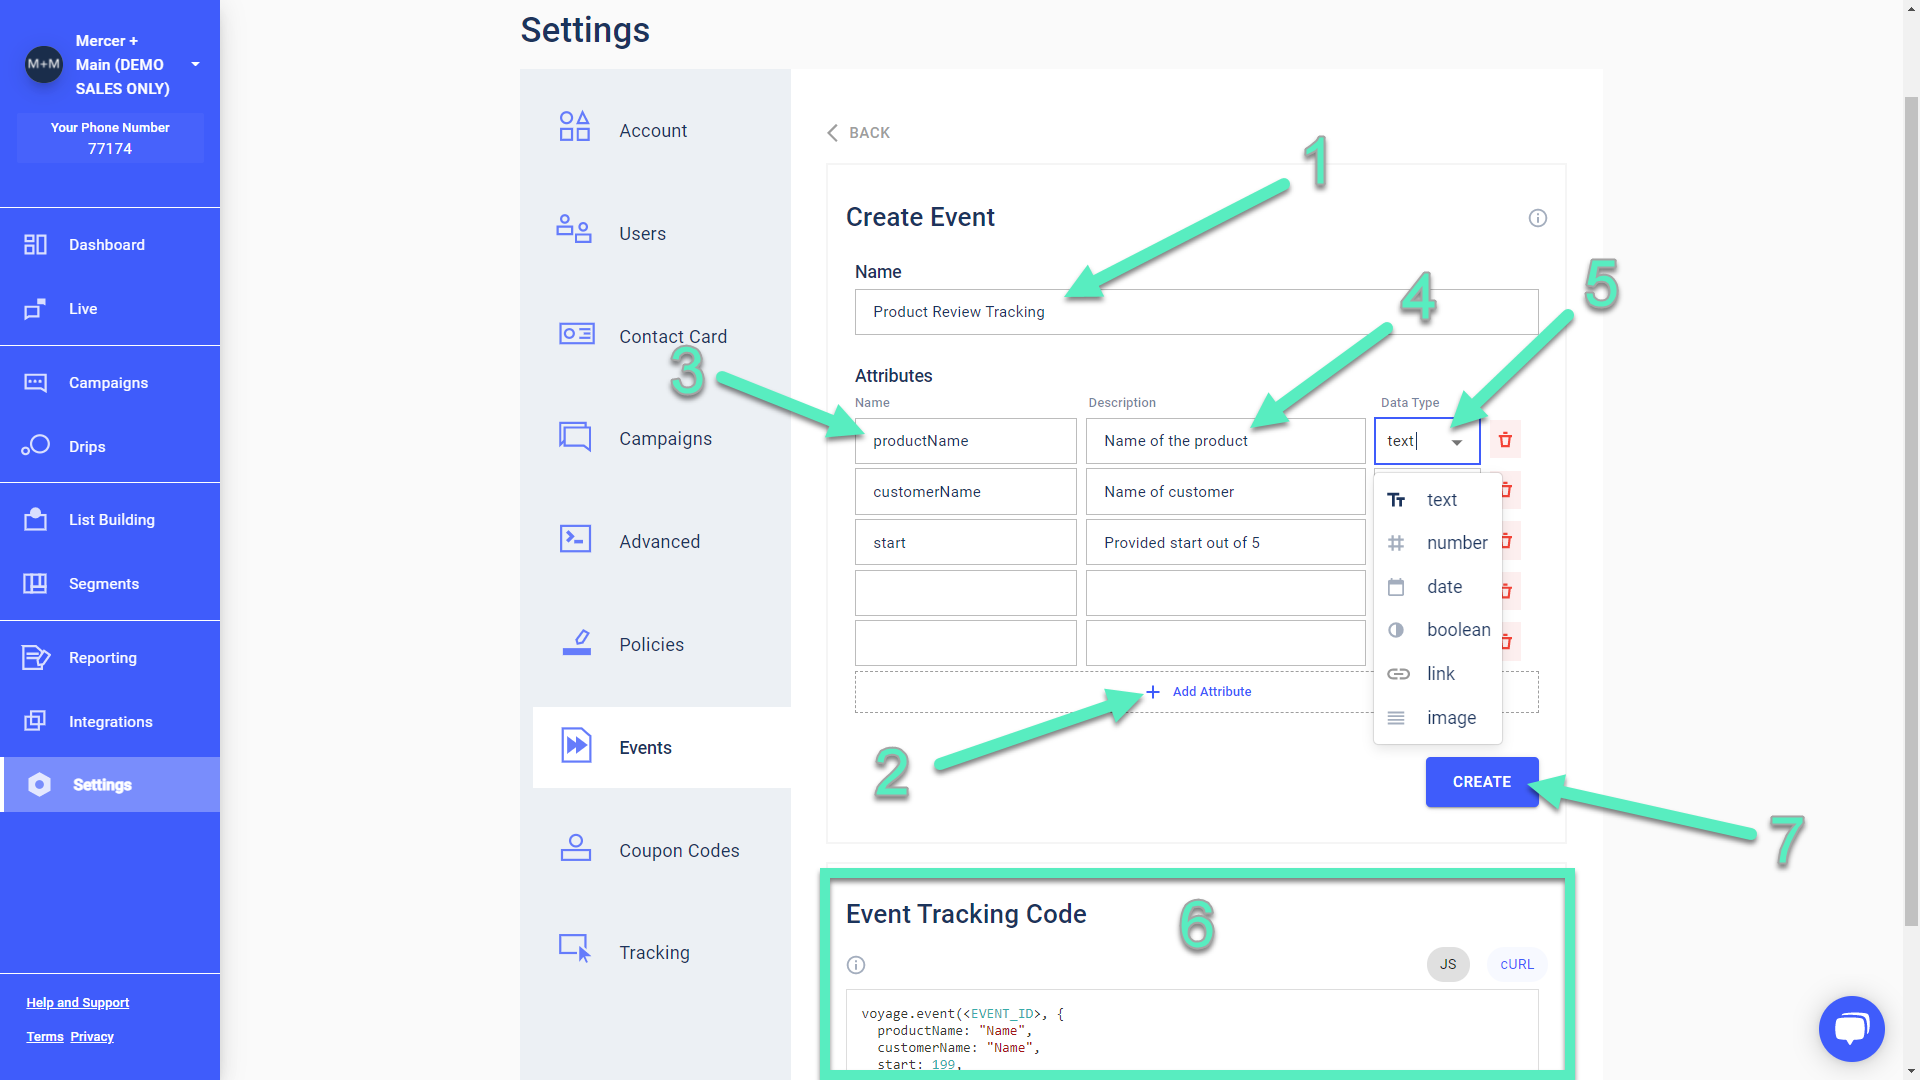
Give your Event a name [1], and click on Add Attribute [2] as many times as needed to incorporate attributes you anticipate. Each attribute requires a name [3], description [4], and a data type [5]. As you can see there are six possible data types. You'll notice your event tracking code is updating in real time [6] as you add and modify attributes. This code can be easily copied in JS or cURL format. When done, click Create [7]:
Implement Custom Events
Trigger custom events from any page of your site by copying the script shown below your event when creating or editing the event. Select your desired format [1], then click Copy Script [2]. Place the code into your page with relevant dynamic value(s):
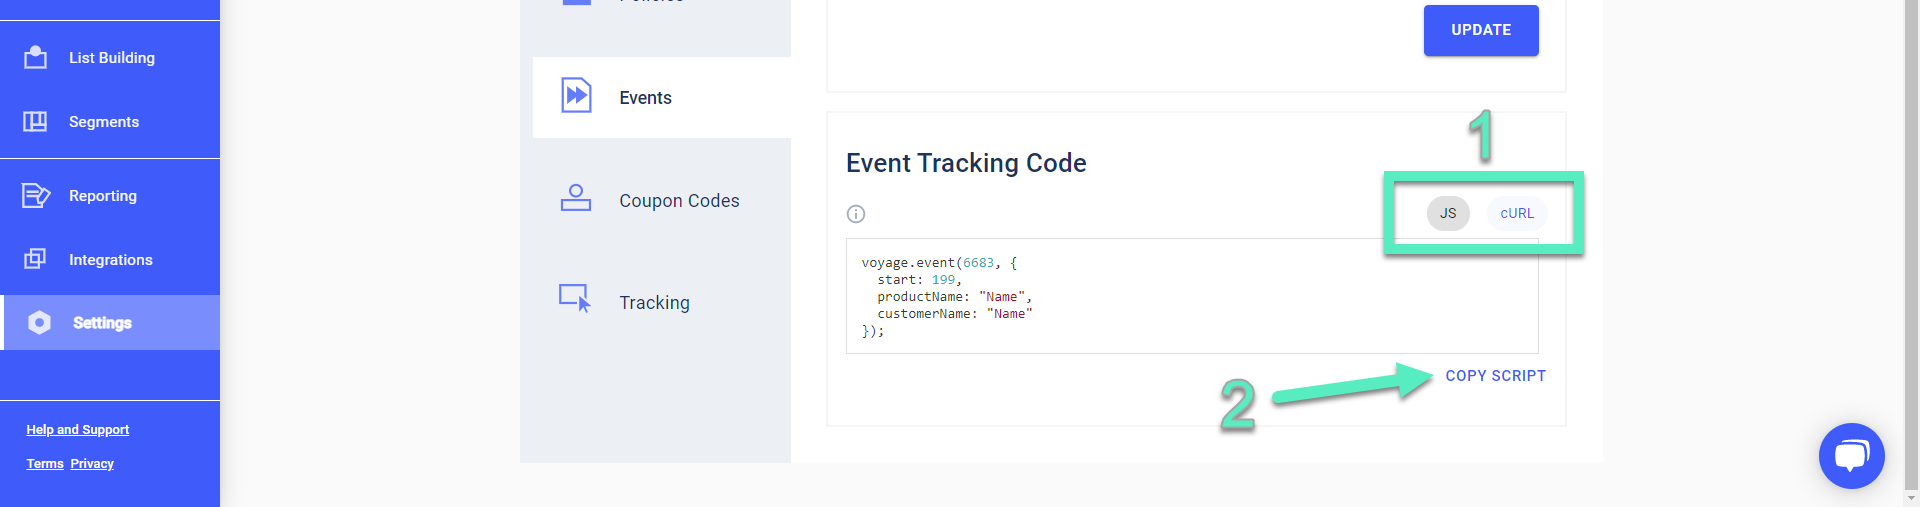
Note: Requires the Voyage Global Tag to be installed.
See this article for a list of common examples to utilize Custom Events to trigger Drips from a variety of platforms.
Custom Events in Drips
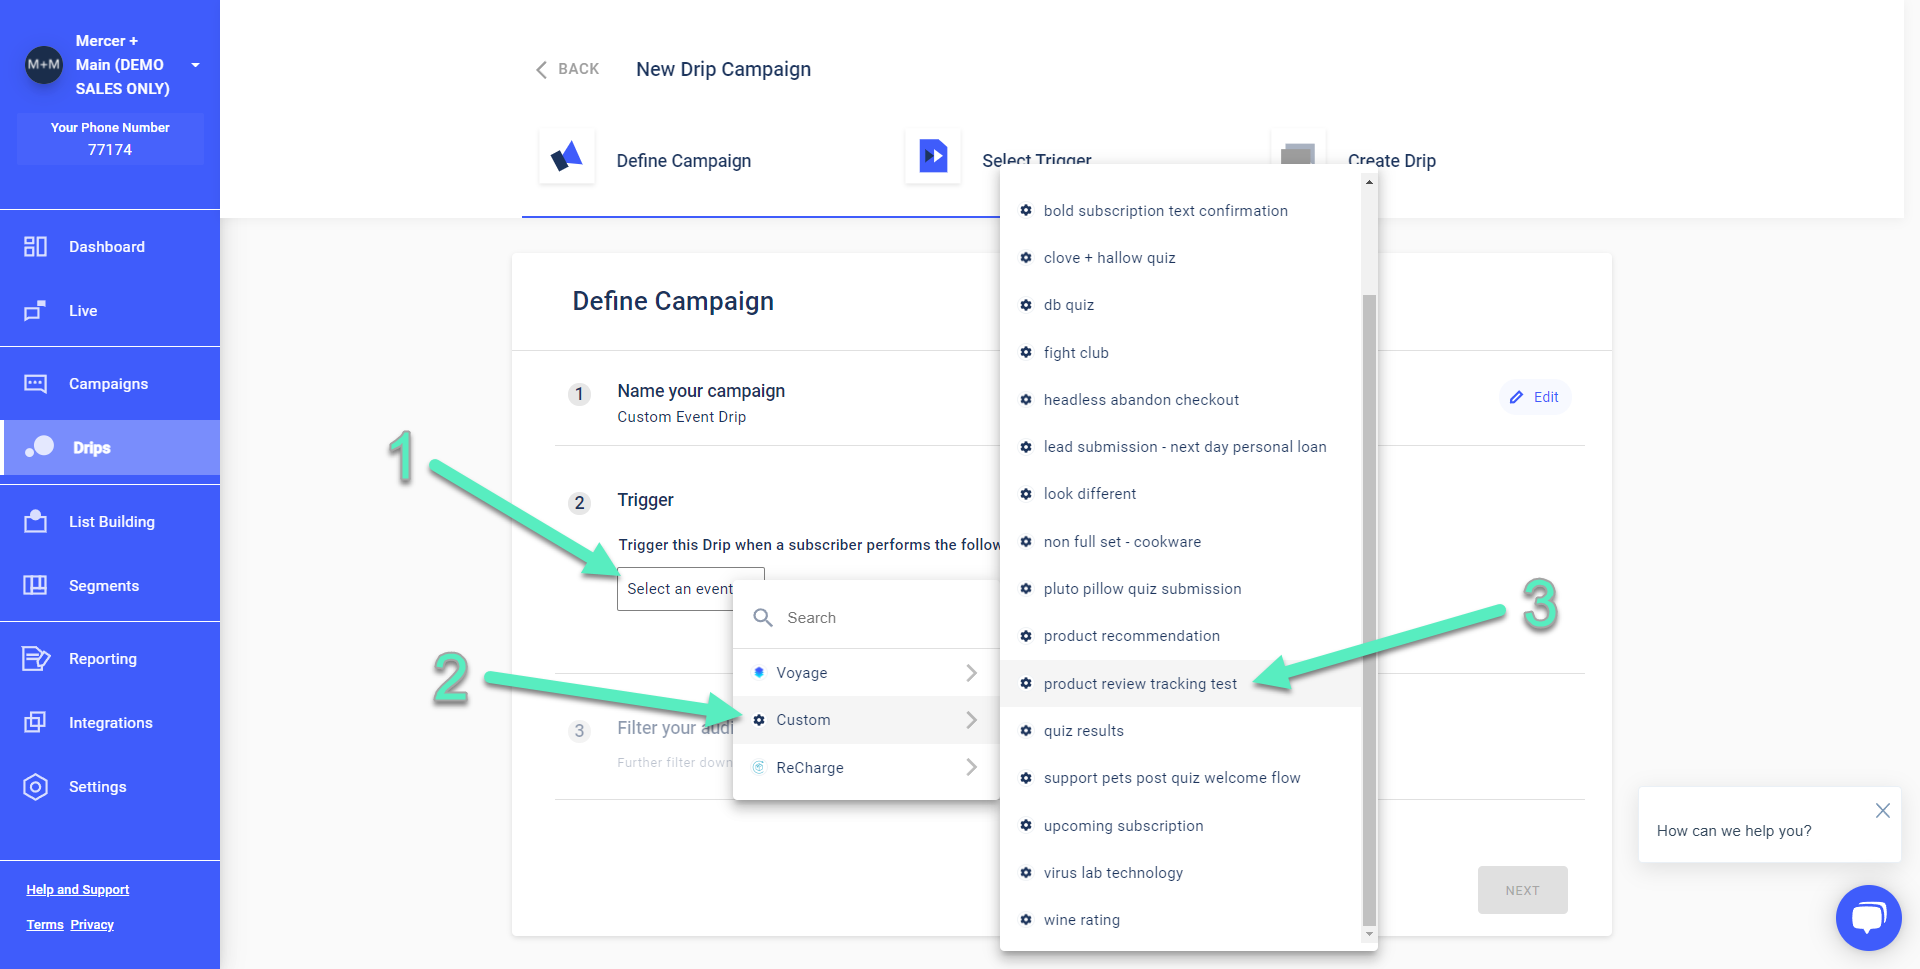
We have a full article on creating Drips here, so refer to that if this is your first time creating a Drip. Very early on in the creation process, you'll be presented with an option to select a Trigger [1]. You'll want to select the Custom menu option [2], and look through all of your custom triggers to find the one you are looking for. In our case, product review tracking test [3]:
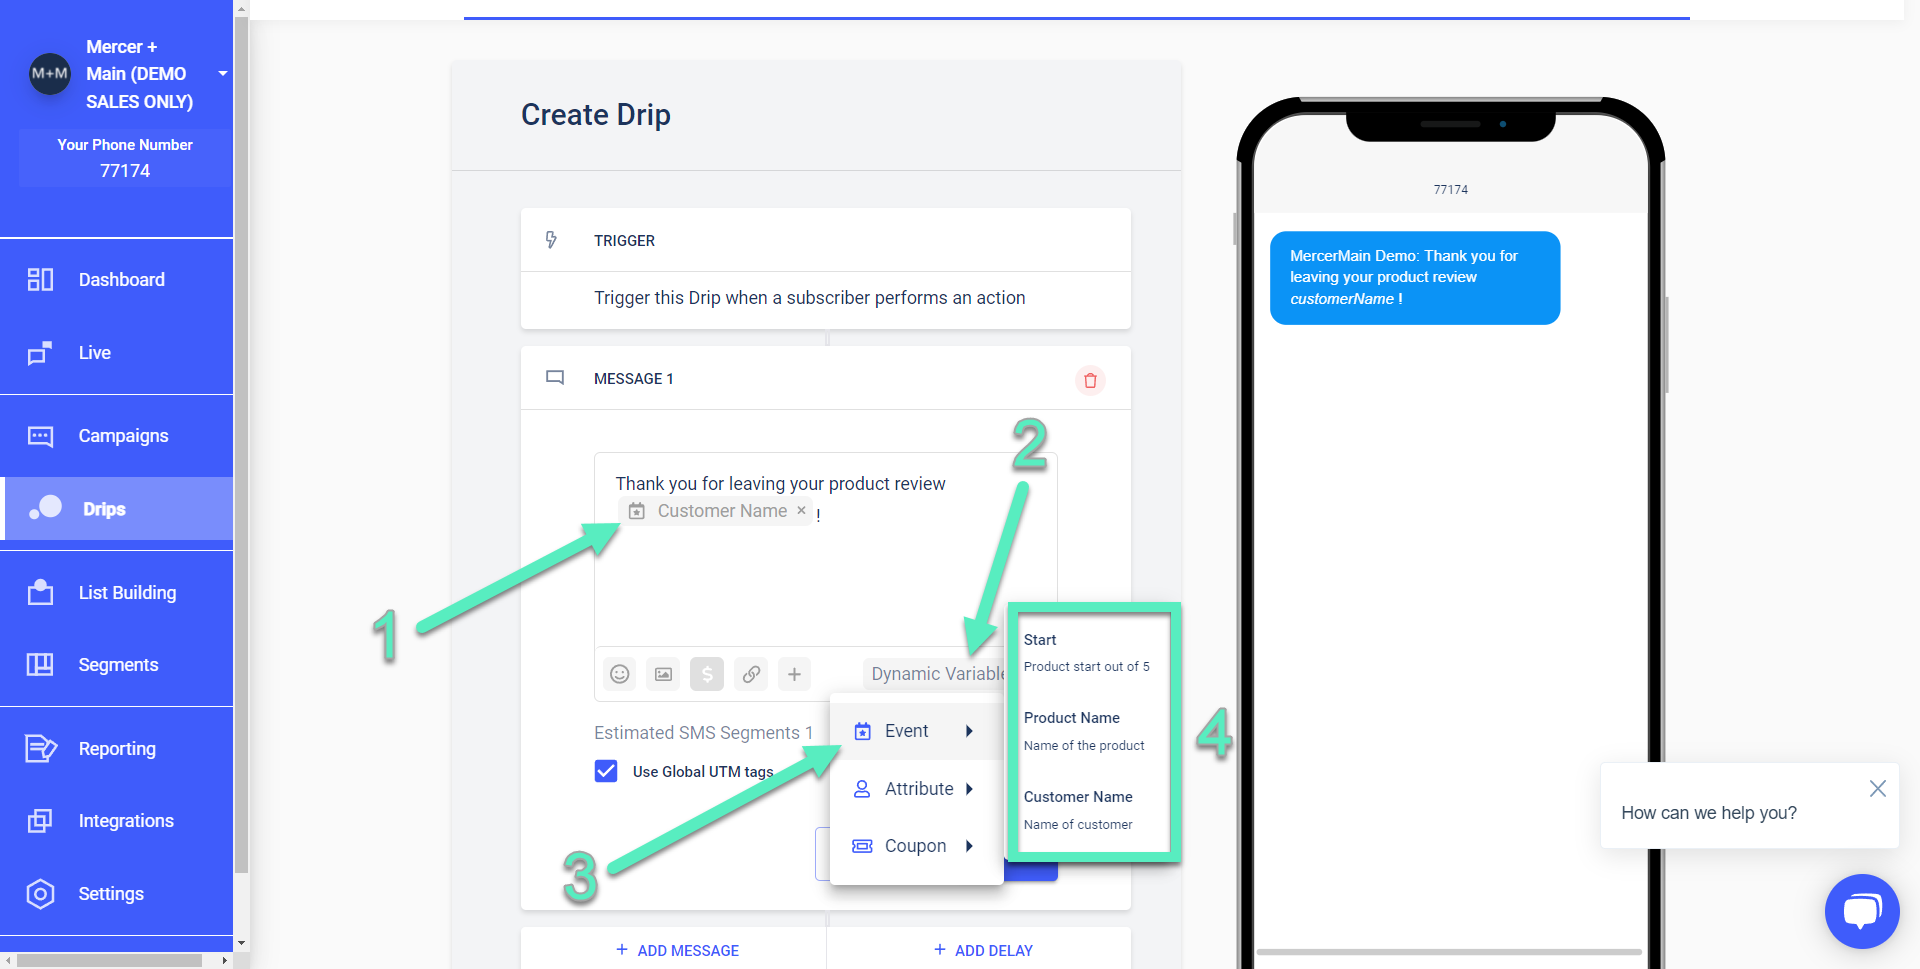
Then, when you are composing the message for that Drip [1], you'll be able to select Dynamic Variables [2], choose Event [3], and insert any of the variables you've defined for your custom event [4]:
Building Segments with Custom Events
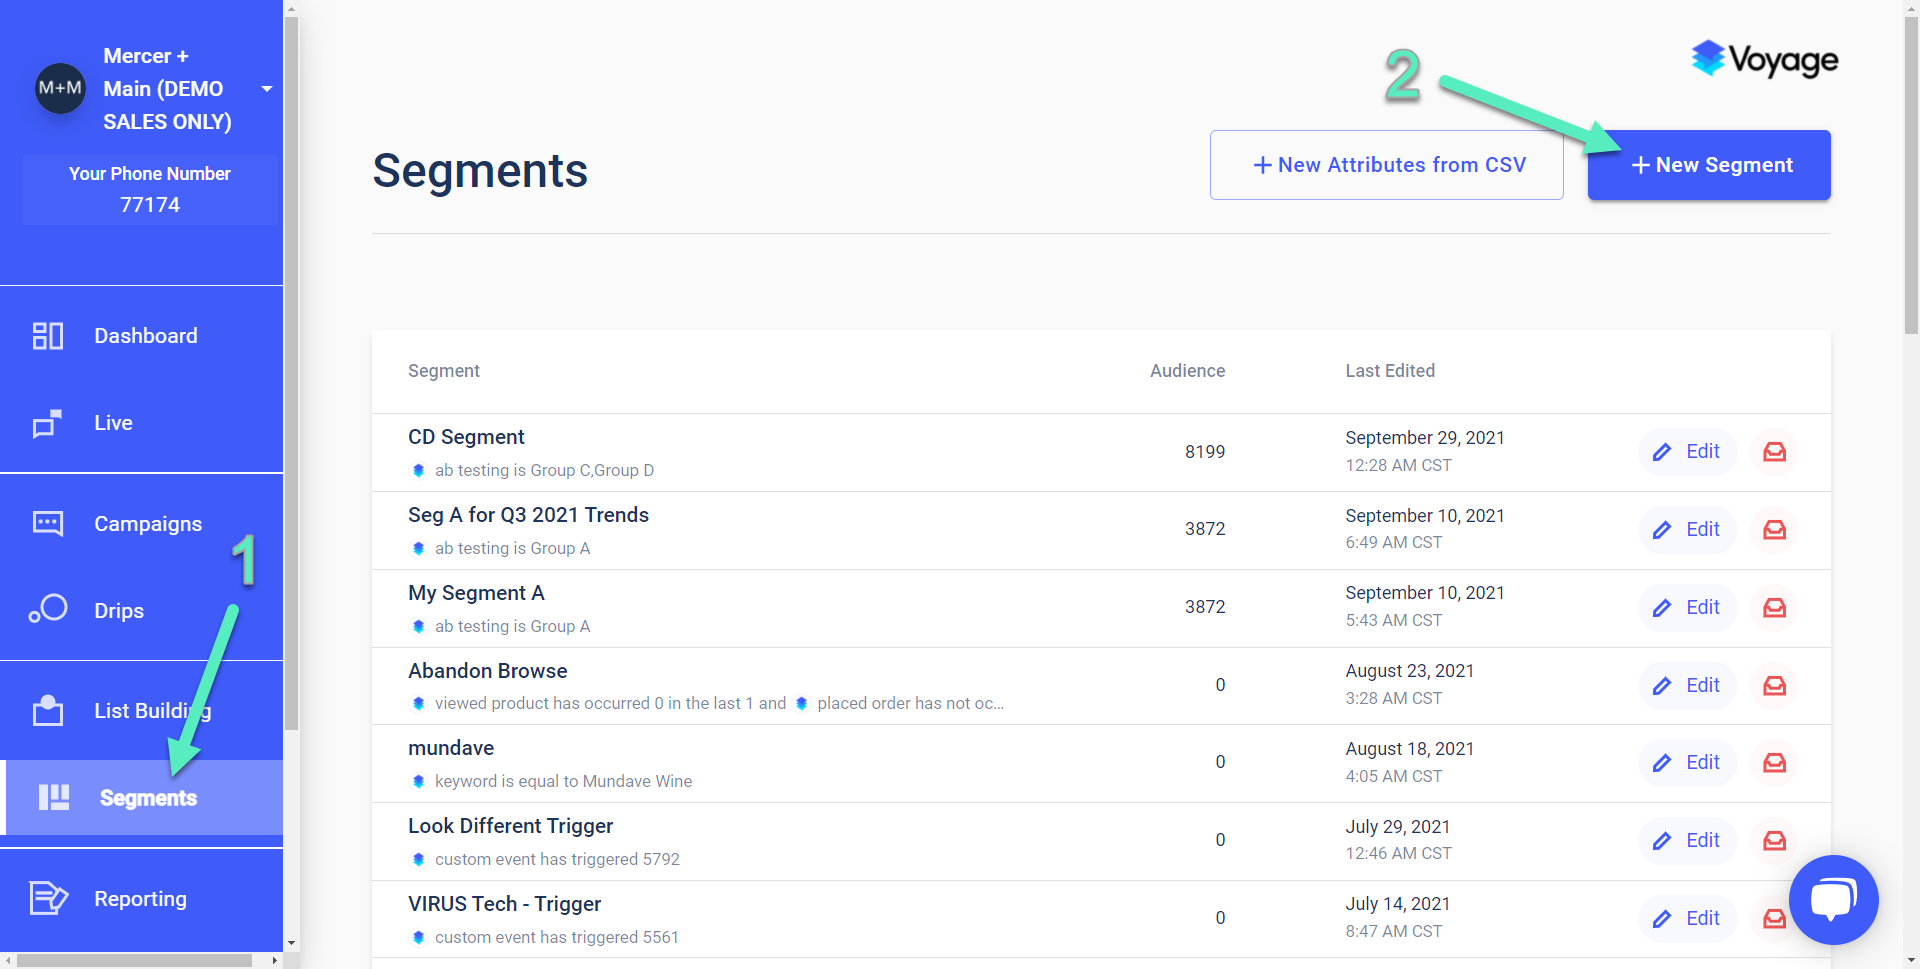
Additionally, it is possible to segment your subscriber base using custom events. First, go to the main Segments section [1], and click on New Segment [2]:
Click on Add Filter [1] to see the option that let's you chose a filter group. In this case, you'll select Voyage, then Custom Event [2]. From there you can click on select values [3] that will expand a list of all the custom events you've created [4]. Note: Currently it's not possible to build segments from custom event metadata values:

Integration with Custom Events
You can integrate with third-part applications using custom events. Application-to-Application (A2A) usage is supported for this purpose.
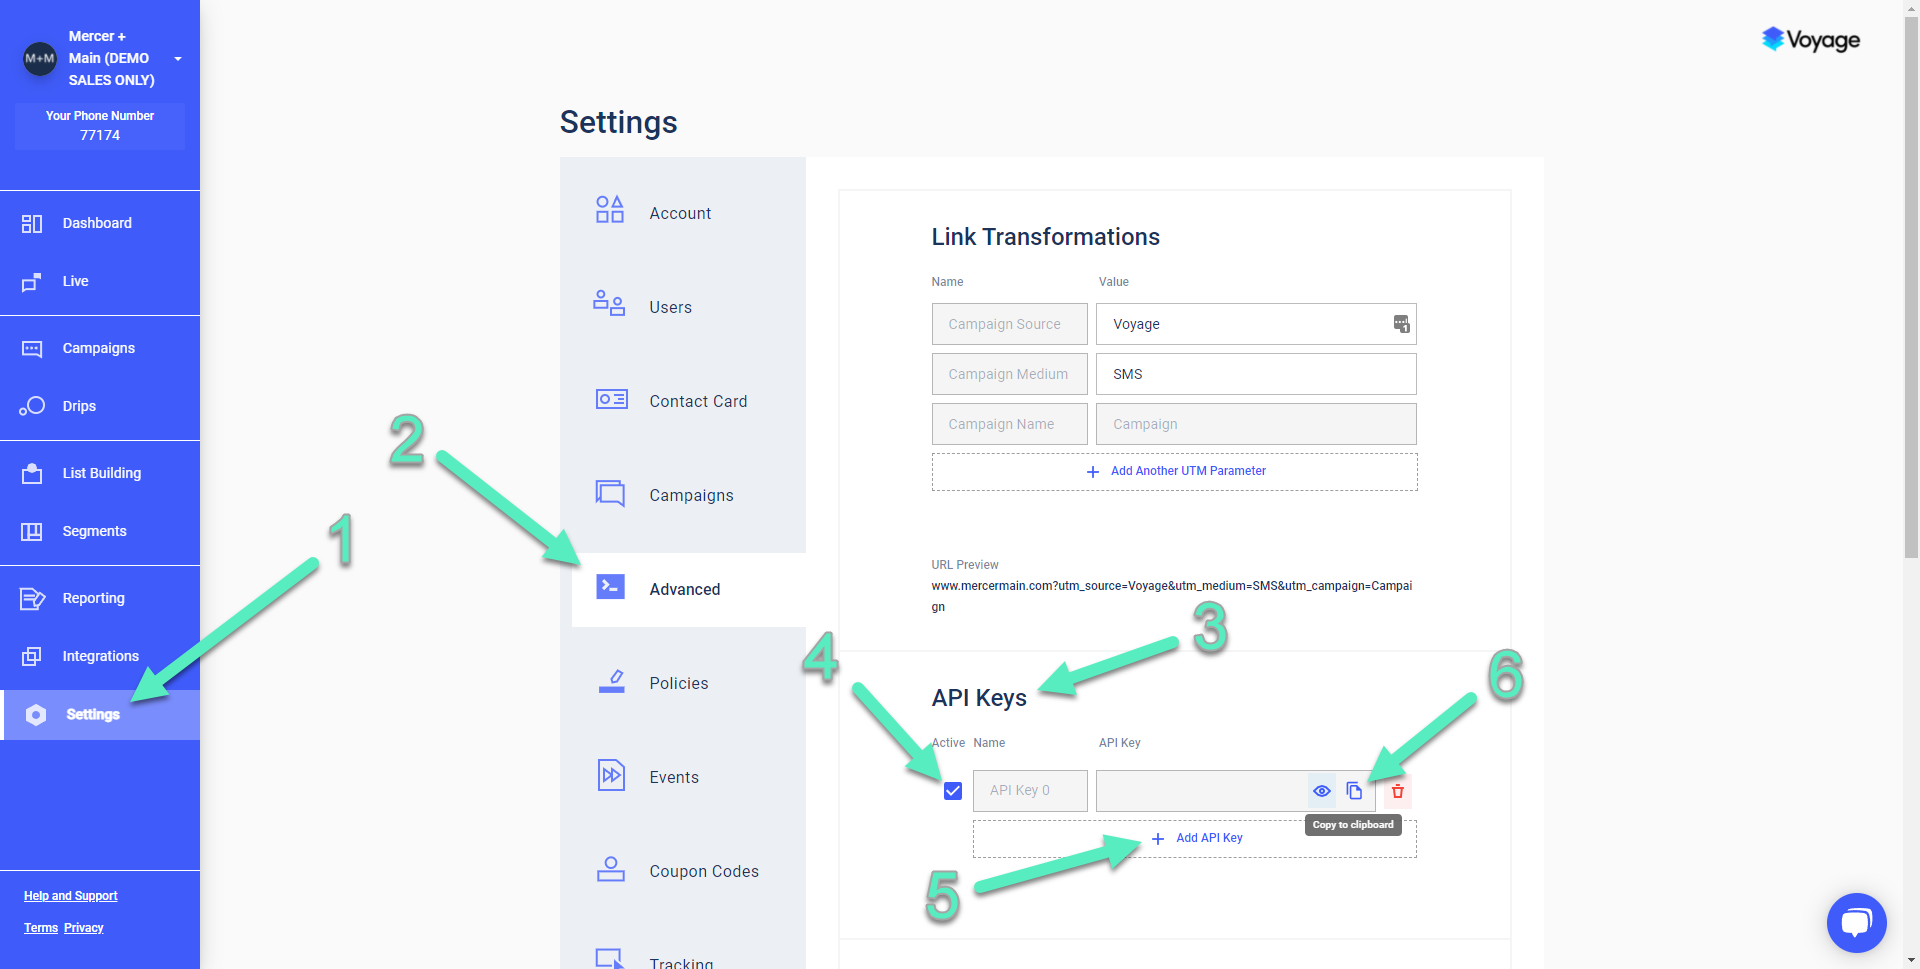
To create your own API Keys, navigate to Settings [1], then Advanced [2], and scroll down to API Keys [3]. Clicking on Add API Key [5] will generate a new key that you can activate or deactivate as needed [4]. Click on the copy icon [6] to send the API key to your clipboard. A valid API key must be included in the header of requests:
API Details
With this method, events can be published with either Phone Number or Voyage Subscriber ID.
Request
phone: [string] Phone Number for the subscriber (e.g. "+15555555555")
subscriberId: [string] Voyage-specific identifier for the subscriber
POST /api/v1/customEvent HTTP/1.1Host: api.voyagetext.comAccept: application/jsonContent-Type: application/jsonx-api-key: { "eventTypeId": , "phone": "", "eventMeta": { "productName": "Name", "customerName": "Name", "rating": 199 }}{ "eventTypeId": , "subscriberId": "", "eventMeta": { "productName": "Name", "customerName": "Name", "rating": 199 }}API Examples
cURL
curl -d '{ "eventTypeId": , "phone": "", "eventMeta": { "productName": "Name", "customerName": "Name", "rating": 199 }}' \ -H 'Content-Type: application/json' \ -H 'x-api-key: ' \https://api.voyagetext.com/api/v1/customEvent
Custom Event Schema
Custom events are defined with standard JSON schemes, which are well documented at json-schema.org. Configuring a custom event in the Voyage API ultimately generates a schema that looks very much like the included examples. This schema will later be used by the system to validate incoming event data.
If there are more complex data structures, such as embedded lists, nullables or objects, you will need to develop a custom schema as our tool currently only supports single dimensional objects. Please contact [email protected] if you would like to implement a more complex custom event.
Embedded objects and lists cannot be used to personalize messages at this time
Here is an example of a more complex Custom Event schema:
{ "$id": "https://voyagesms.com/custom.event.schema.json", "type": "object", "$schema": "http://json-schema.org/draft-04/schema#", "required": ["name", "age", "img"], "properties": { "age": { "use": "number", "type": "number", "title": "age", "description": "Age" }, "img": { "use": "image", "type": [ "string", "null"] "title": "img", "format": "uri", "description": "Picture" }, "name": { "use": "text", "type": "string", "title": "name", "description": "Name" } }, "description": "Customevent"}Integration Partners
For our integration partners, standardized events can be created to apply across multiple clients. Please contact [email protected] for more information on how to get started.
If you have any additional questions please contact us at [email protected].