Dynamic Click to Buy is similar to our normal Click to Buy feature, but with more versatility and customization options. For example, with a dynamic click to buy link, you can send subscribers a direct checkout link with the last product(s) they engaged with in your store. Make it easier than ever before for your customers to complete their purchases.
Dynamic click to buy works only with certain triggers in Drips.
Dynamic Click to Buy Setup
Our dynamic click to buy feature was designed to handle three specific use cases within Drip campaigns: Abandoned Browse sessions, Abandoned Carts, and Abandoned Checkouts.
You'll need to create or clone a Drip campaign to continue. Click on Drips [1] then on Create Drip Campaign [2]:

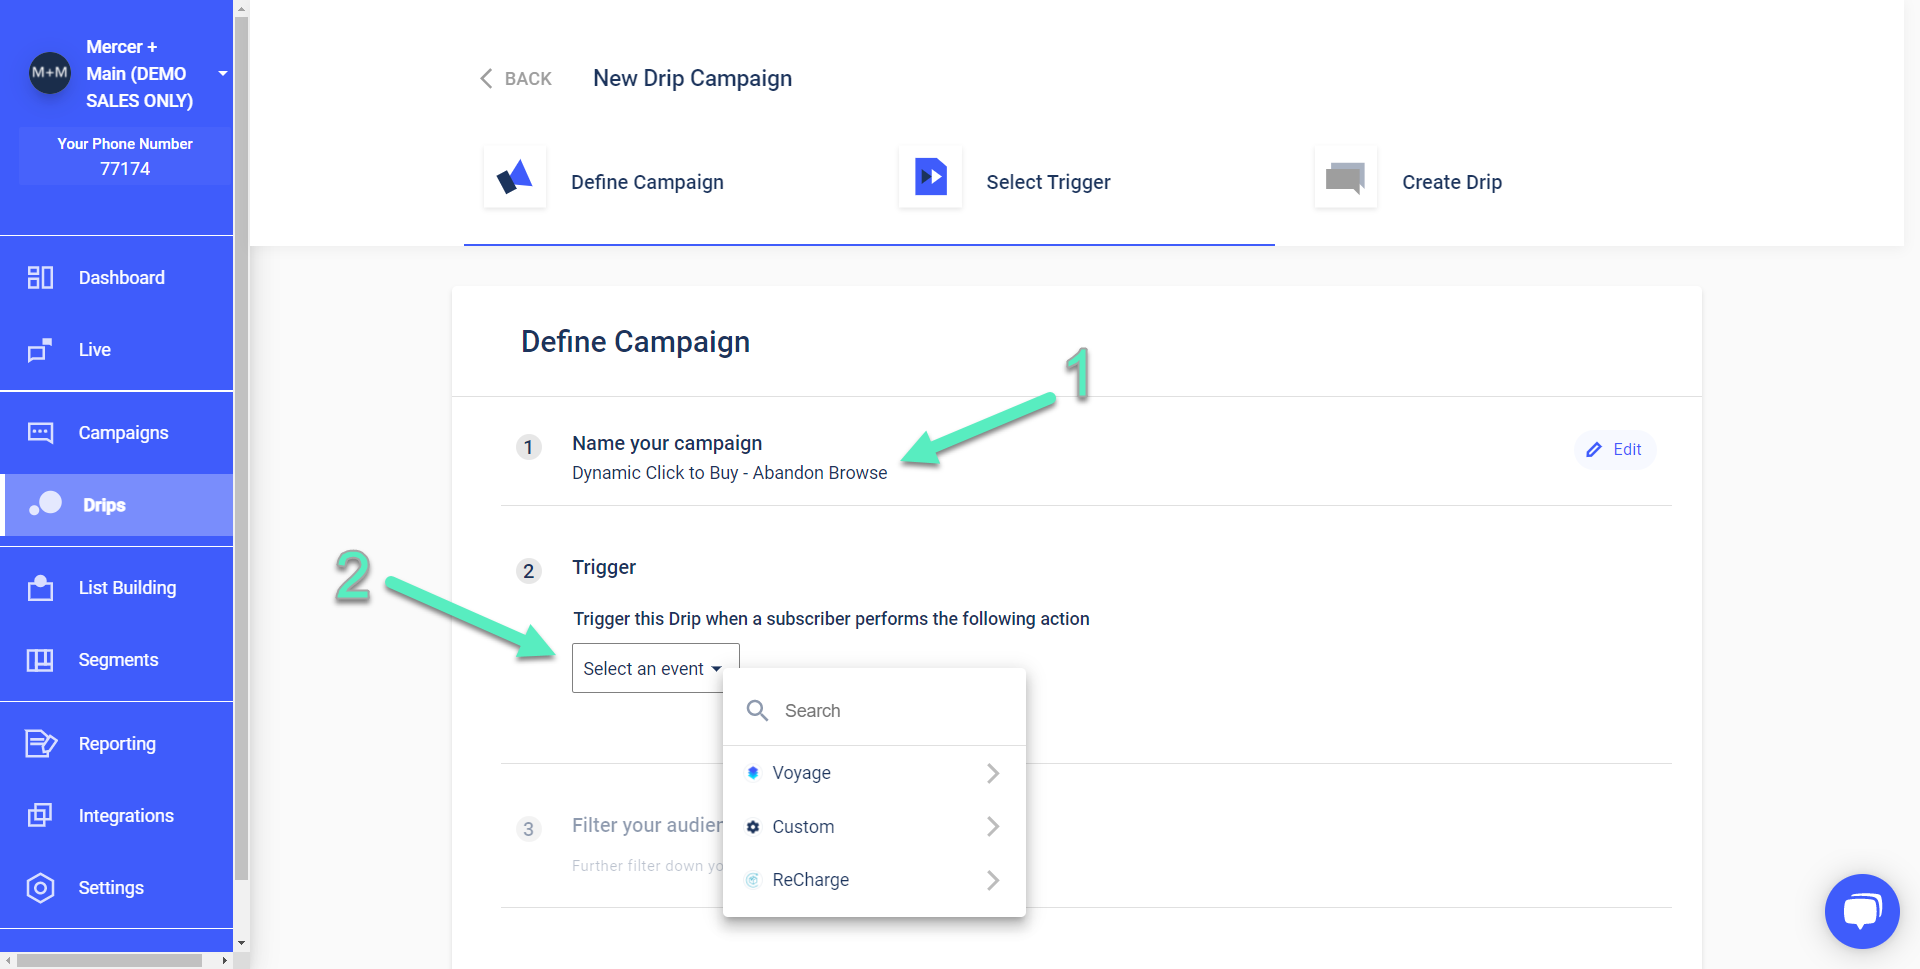
On the next screen, you'll need to give your Drip a name [1], then select an appropriate trigger [2]. The trigger you select will determine your use case. We'll cover each trigger in the sections below.
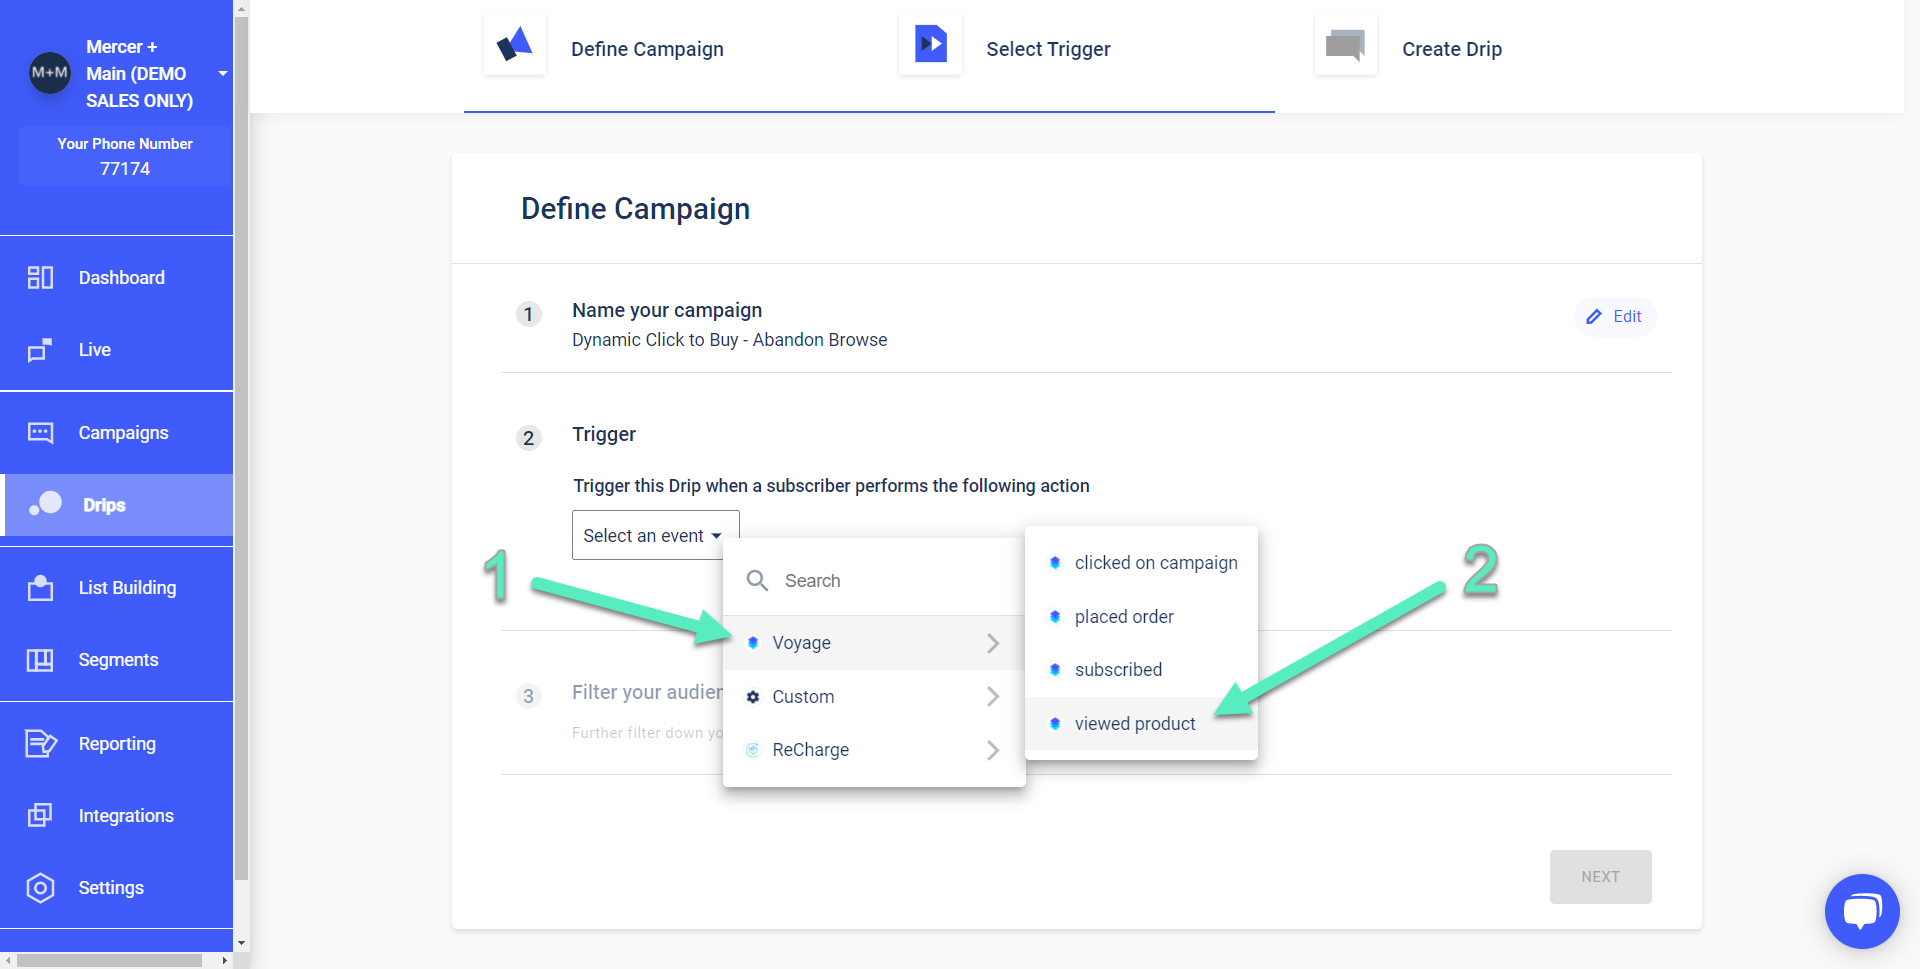
Abandon Browse
The abandon browse trigger is available to all Voyage users. After getting set up, simply select the Voyage event group [1], and look for "viewed product" [2] when setting up your Drip:
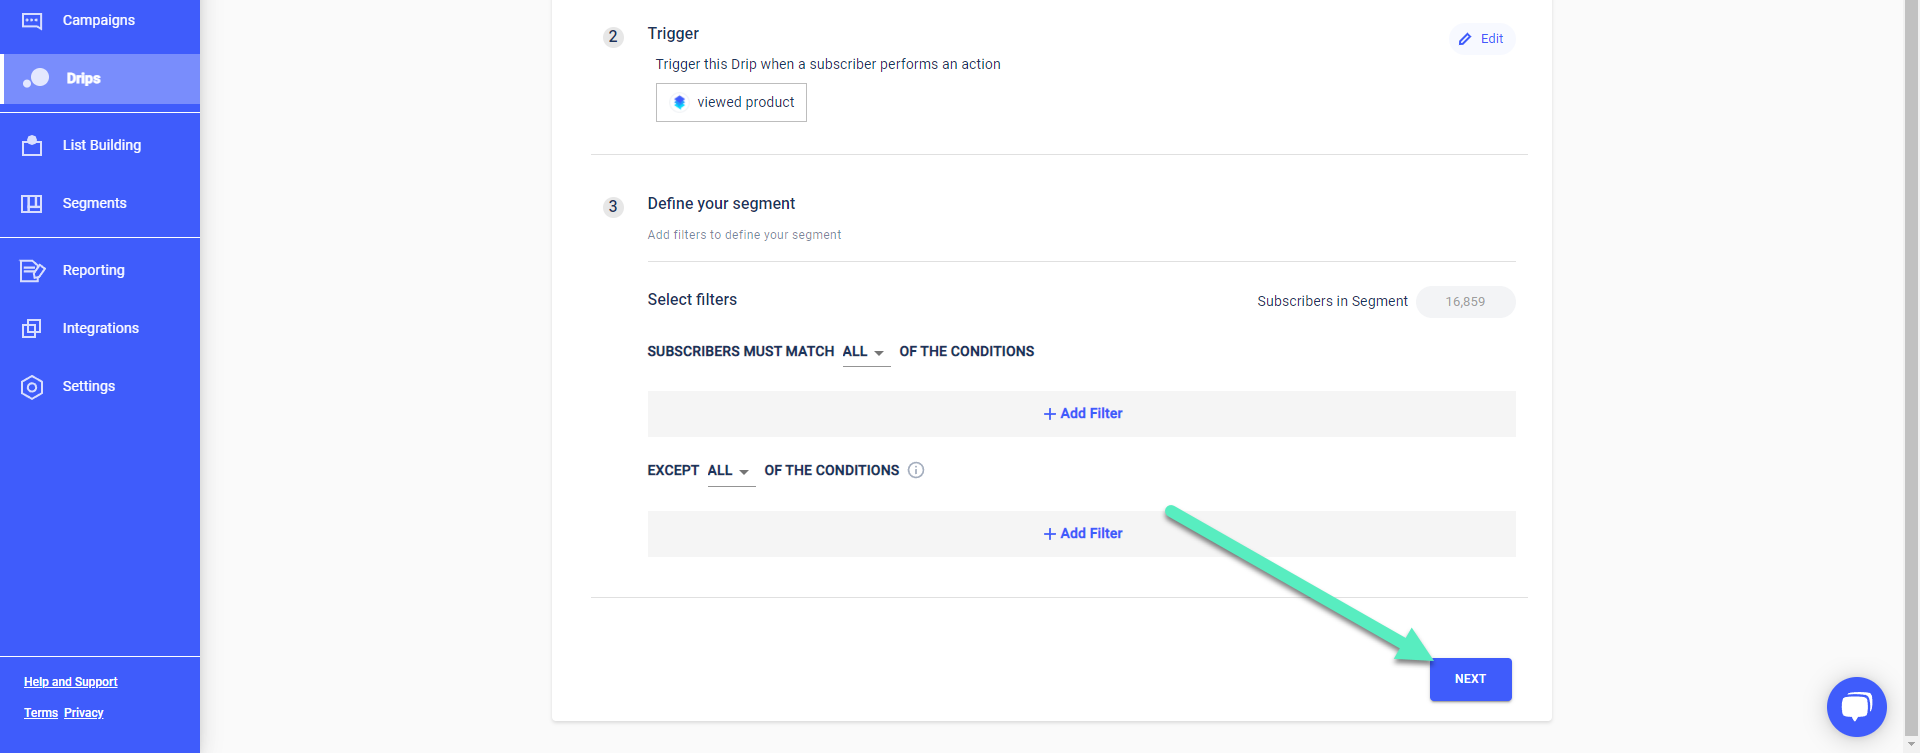
Optionally define segments, then click Next:
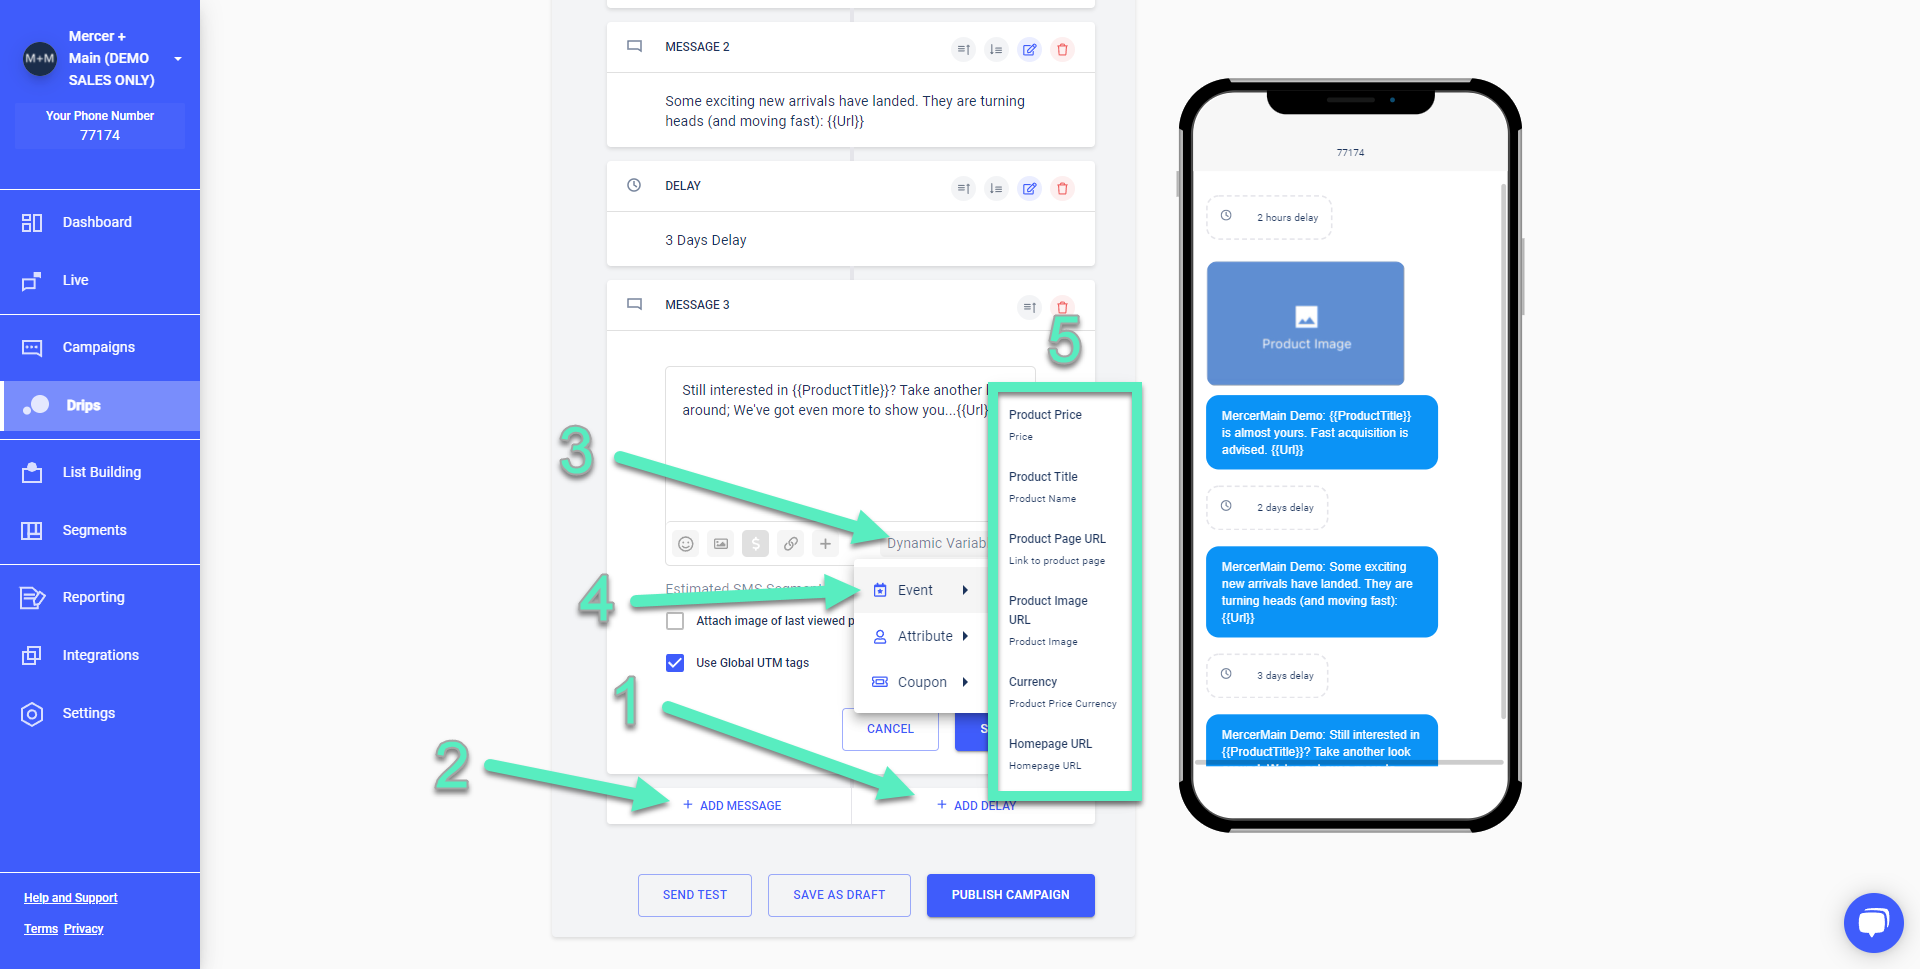
You'll want to add a delay first [1], as with most drip campaigns. Then add a message [2]. As you are composing your drip messages, you can click on Dynamic Variables [3] or type ##{{ to access a drop down menu. Hover over Event [4] and you can insert any number of dynamic options [5] from the product they last viewed:
Abandon Cart
For abandon cart, you'll need a Shopify integration. After following the setup instructions above, select the trigger. Hover over Shopify [1] and select "added to cart" [2]. Click Next [3] to continue:

Optionally define your segments, and click Next again. When editing messages in your flow with this trigger, you will again be able to click on Dynamic Variables [1] or type in ##{{ then hover over Event [2] to see a list of all the dynamic variable options [3] that pertain to Abandon Cart:
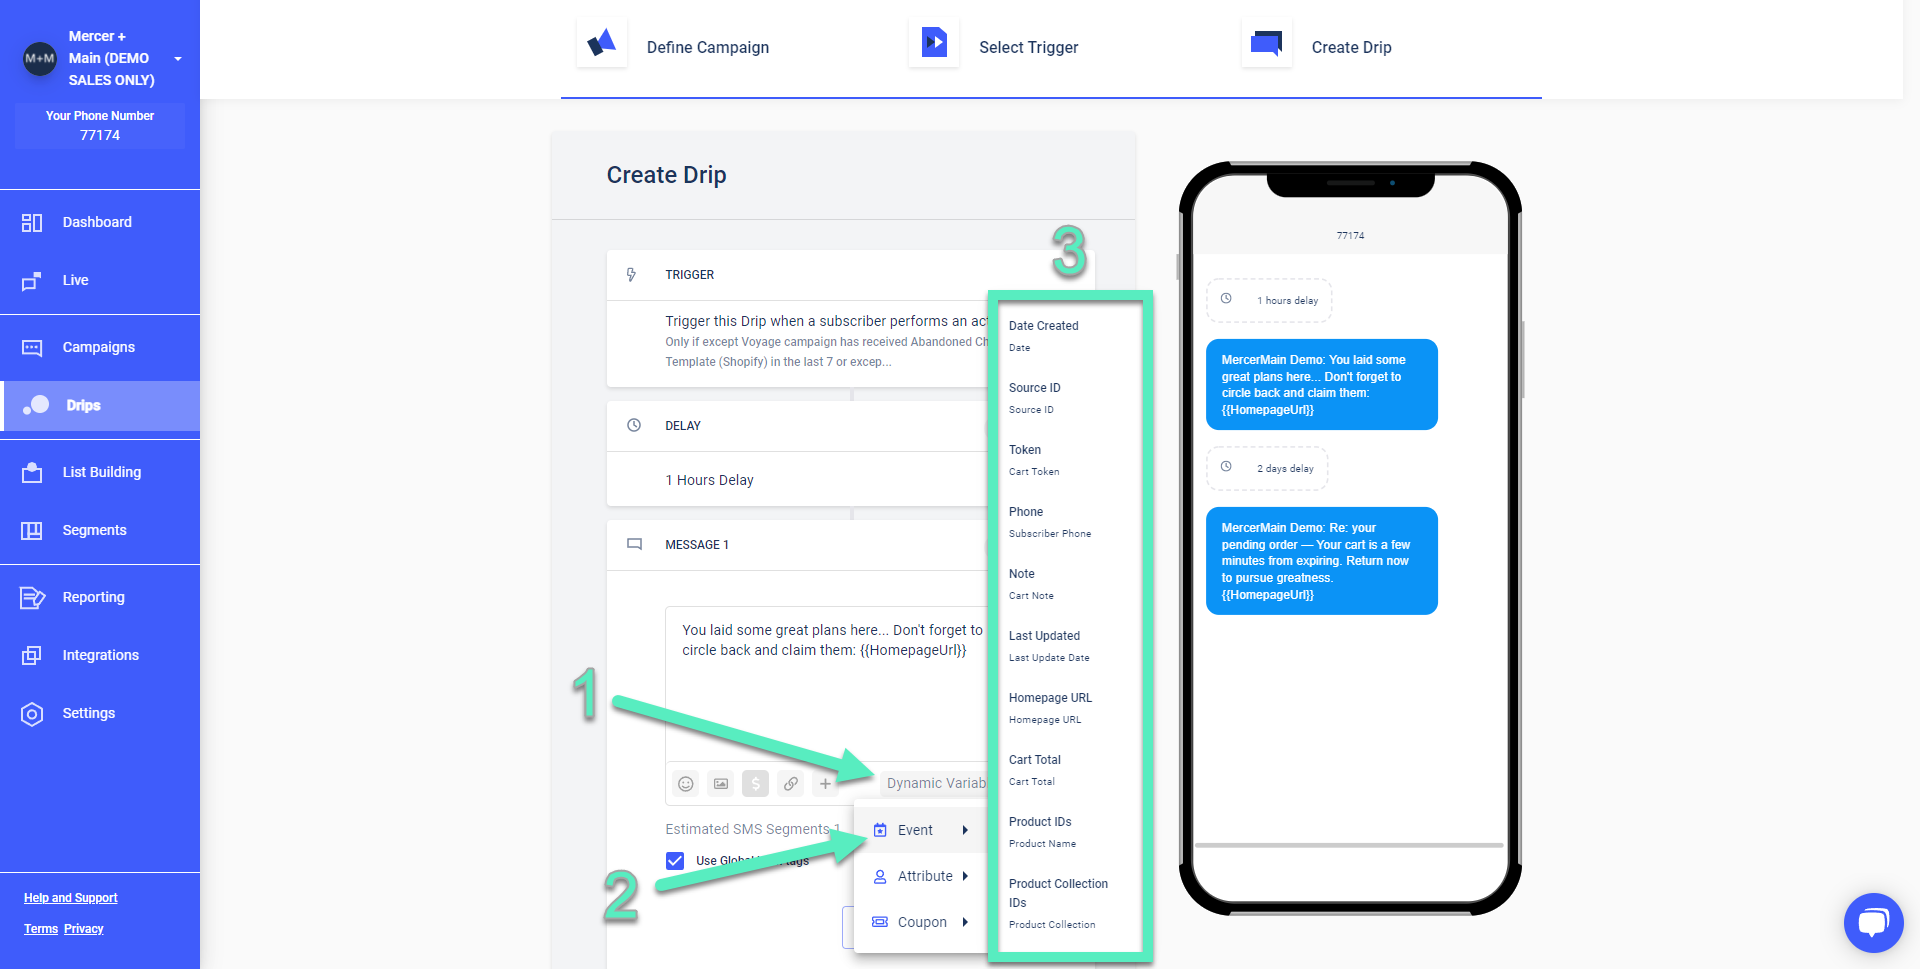
Abandon Checkout
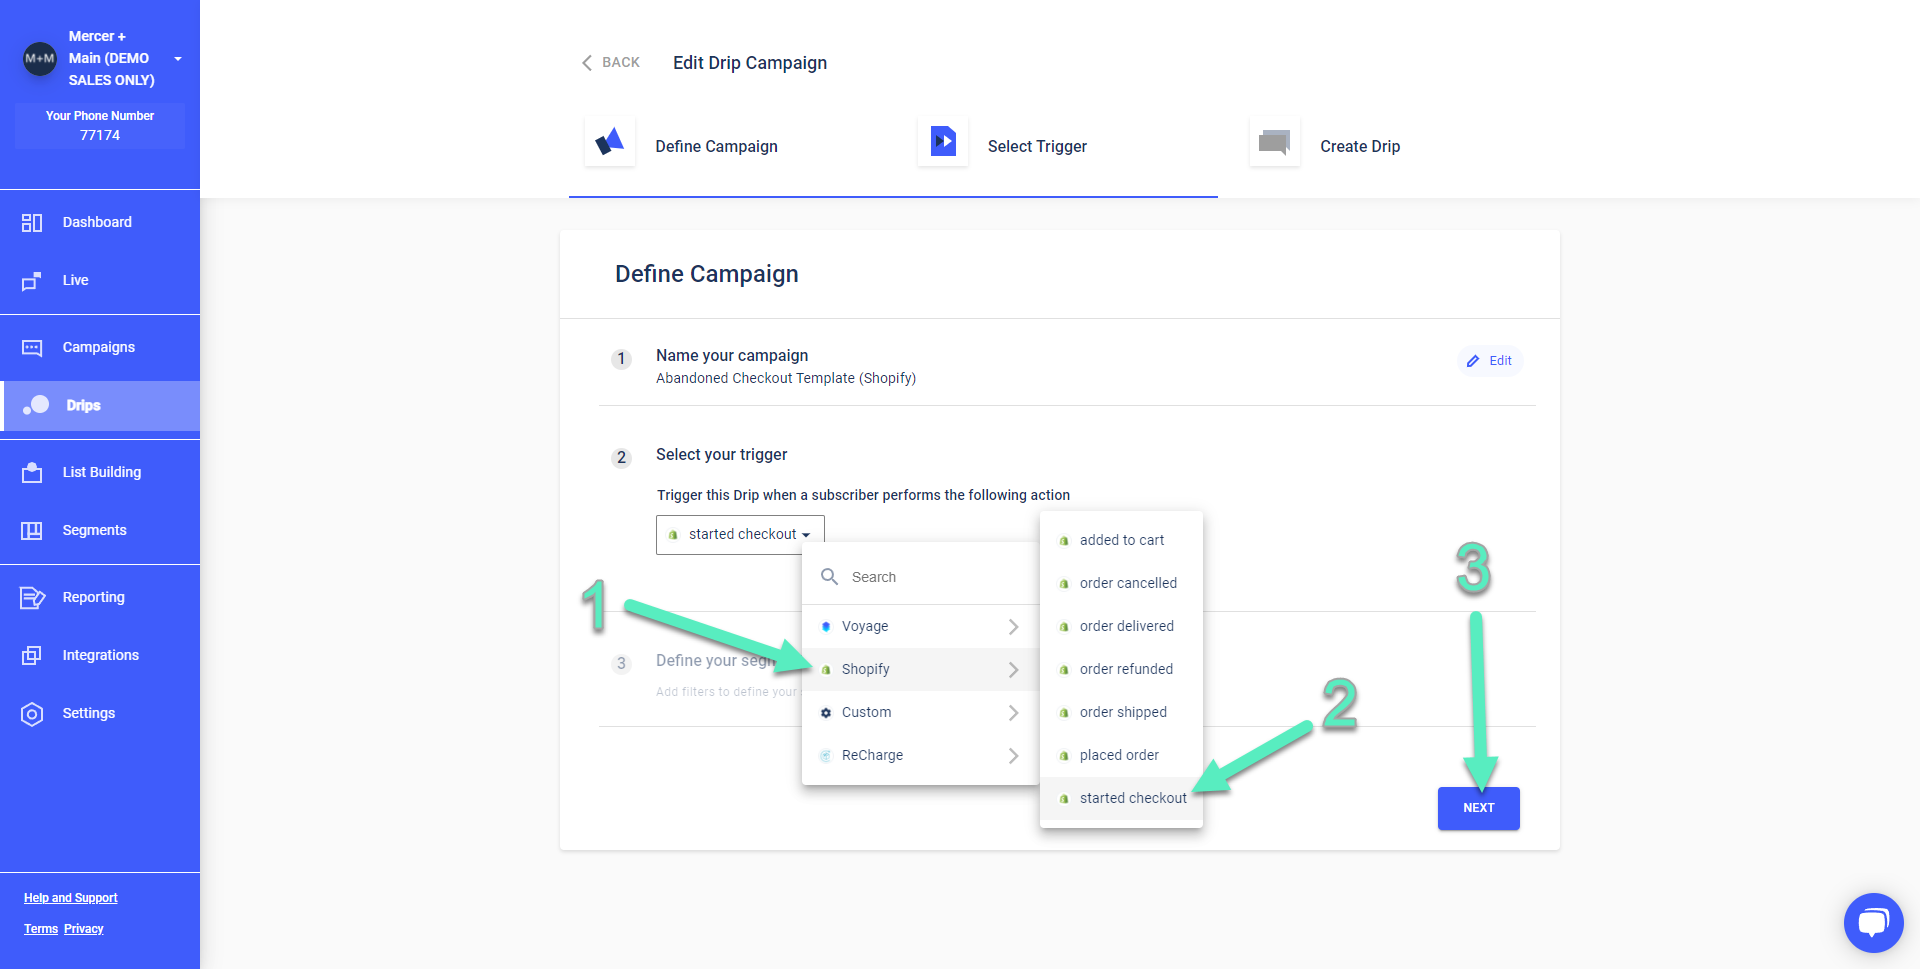
For abandon checkout, you'll also need a Shopify integration. After following the setup instructions above, select the trigger. Hover over Shopify [1] and select "started checkout" [2]. Click Next [3] to continue:
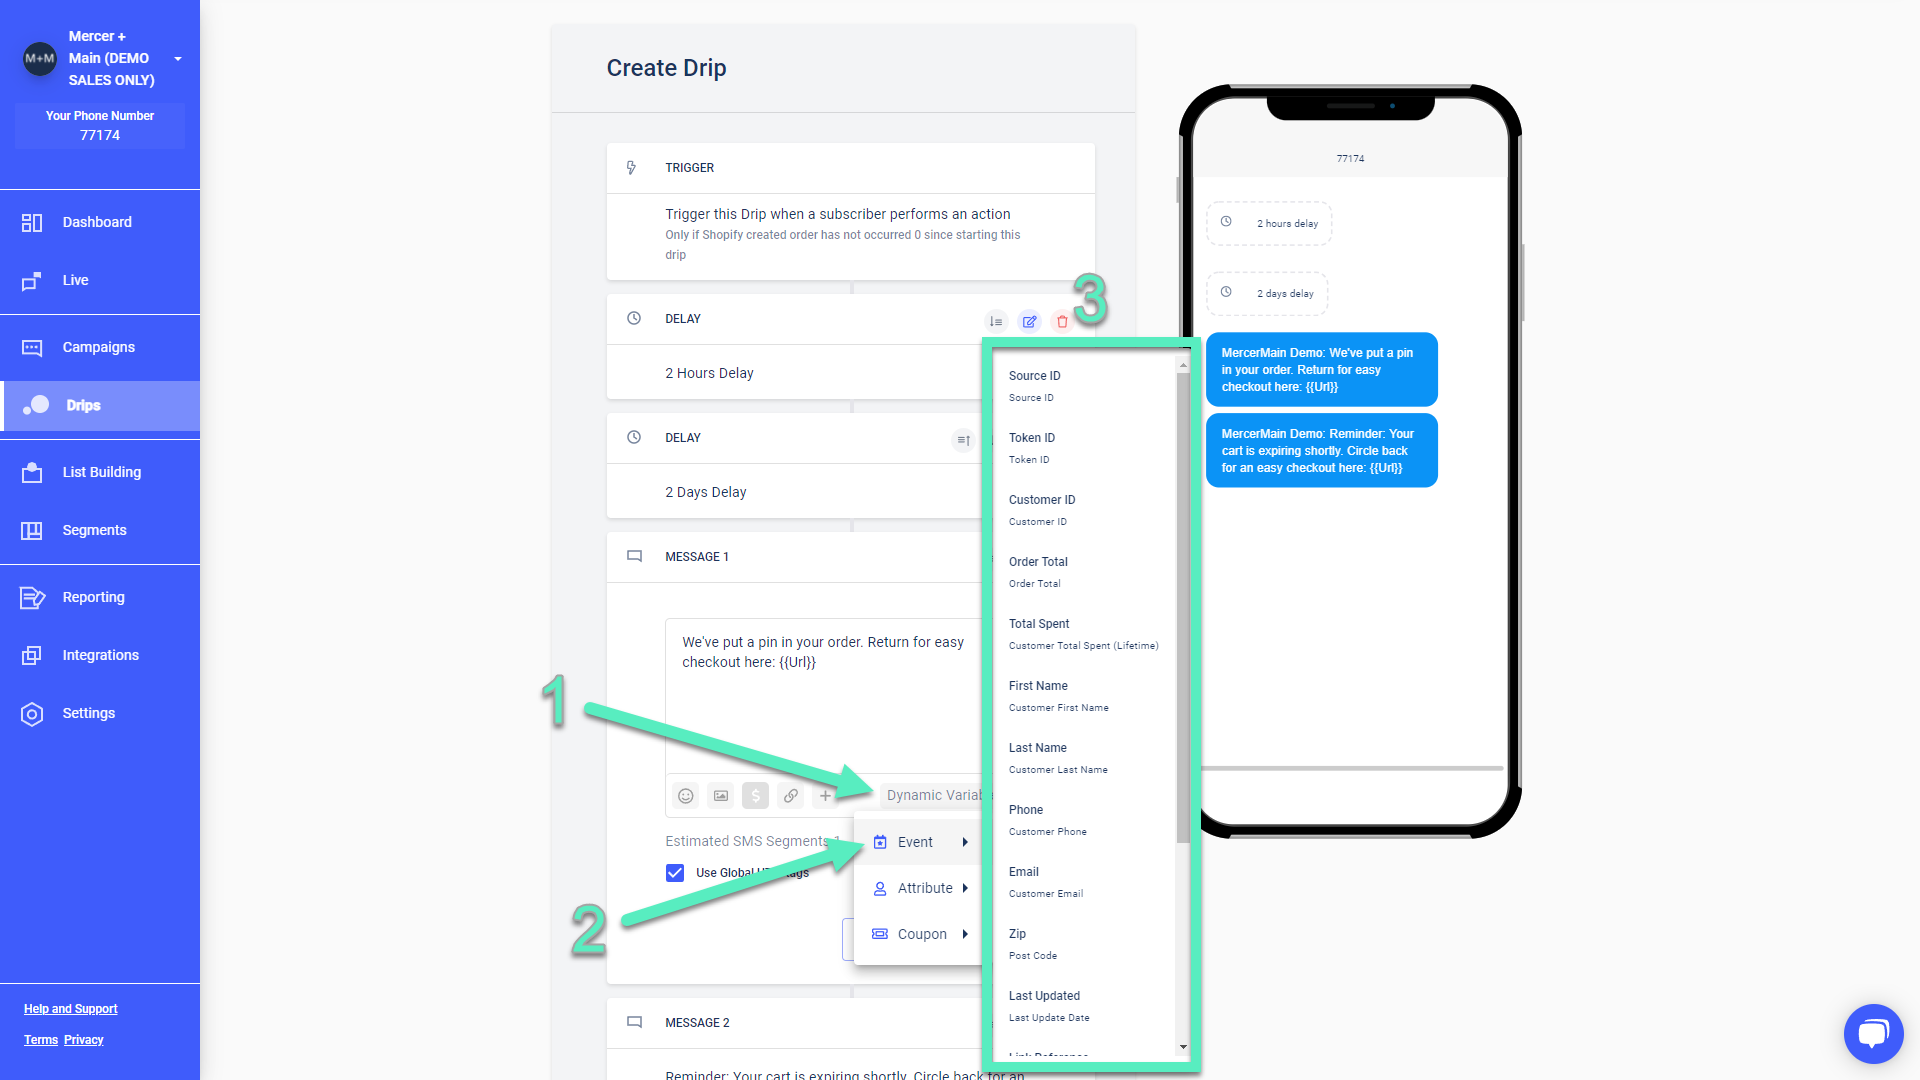
Optionally define your segments, and click Next again. When editing messages in your flow with the "started checkout" trigger, you will again be able to click on Dynamic Variables [1] or type in ##{{ then hover over Event [2] to see a list of all the dynamic variable options [3] that pertain to an Abandon Checkout event:
Using Dynamic Codes in Messages
After you've followed through one of the three trigger setup methods above, using the dynamic code within a message is straightforward.
You can either type in double curly brackets ##{{ [1] in the message box, or click on the Dynamic Variables [2] button to expose the main dynamic variable drop down menu [3]:

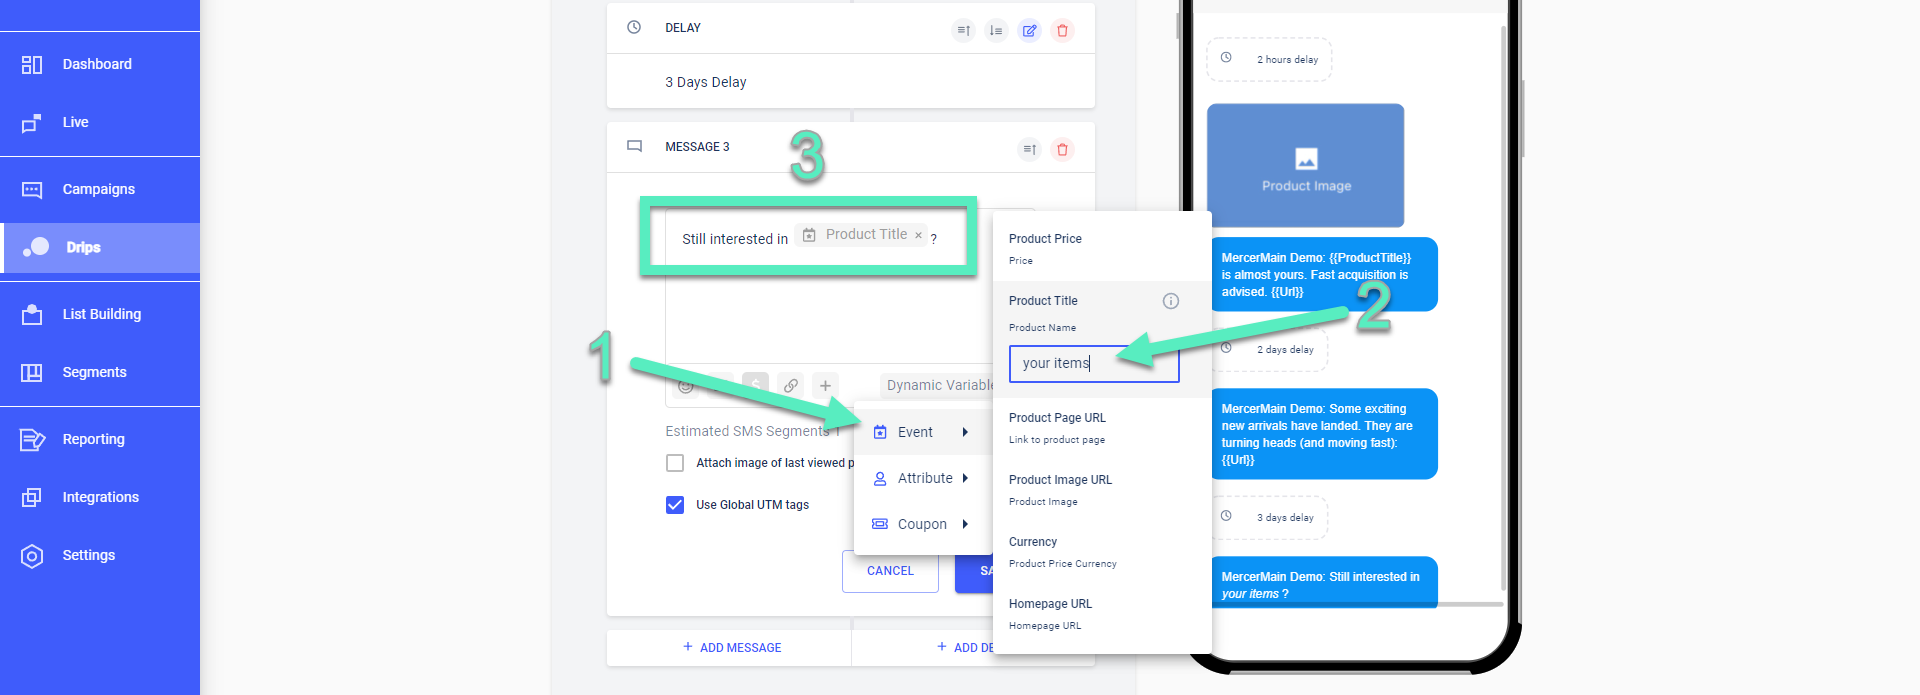
You can use any of the available dynamic values, but in this article we are focusing on the Event type of variables [1]. When you do make a selection, the system will ask for a Fallback value [2] that will be used in the event it cannot retrieve a dynamic variable. Read through your message copy [3] with both the dynamic values and the fallback value in mind to ensure it makes sense in either case:
Fallback Behavior
There are certain situations that trigger a fallback behavior. For example, if there are more than one active products in your catalogue with the same name, then the subscriber will be sent to the product details page rather than checkout.
Also, if there is more than one variant for a given product, the subscriber will again be sent to the product details page where they can select their specific variant.
If you have any additional questions please contact us at [email protected].