When you need to engage your customers at a specific time or for a specific purpose, such as a special event, promotion, sale, or new launch, a campaign is the answer. A campaign serves as a one-time marketing outreach to continue engagement and drive revenue.
Note: The word 'campaign' is also used to describe List Building and Drips. In this article we are focusing on One-Time Campaigns which we refer to as Campaigns in our Help Center.
Example Use Cases
Some examples when you may want to use campaigns include:
Promotional discounts
Product launches
Restocking events
Event updates
Brand marketing
Campaigns Page Overview
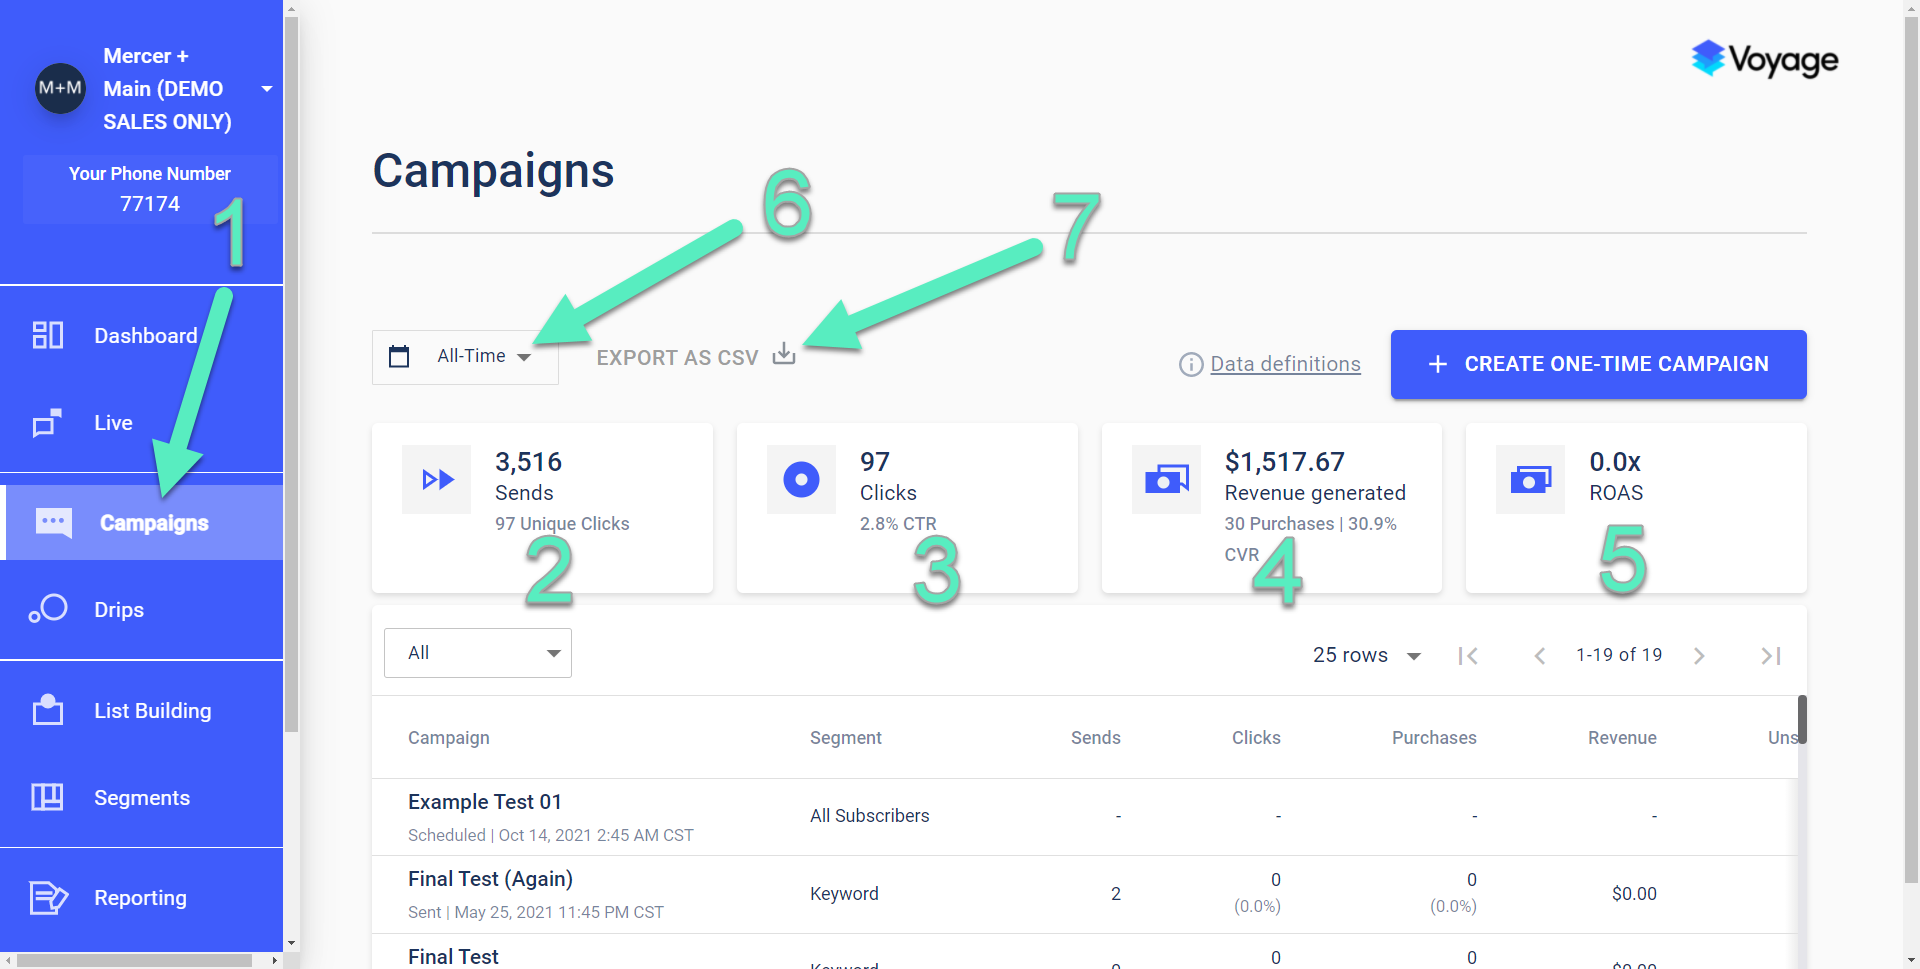
To access the Campaigns page, simply click on the Campaigns main menu selection on the left [1]. Once there you’ll see four summary stats for the selected time range, including Sends [2], Clicks and CTR [3], Revenue generated [4] and Return on Ad Spend (ROAS) [5]. Note that you can change the time range by clicking on the drop down box in the top left corner [6], and all your data can be exported by clicking on Export as CVS [7]:
Your campaign list may be empty if your account is new, but once you’ve created several campaigns you’ll see them all listed on this page.
For every campaign you will see important analytical data like the segment, sends, clicks, purchases, revenue, unsubscribes and return on ad spend (ROAS) in this list view [1]. Clicking on any column label will sort the campaign list by that column and show a sort arrow [2]. Click a second time to switch from descending to ascending and click a third time to remove the sort.
Under the Options column on the far left you’ll see an eye icon [3] that lets you preview that campaign. Clicking on the ellipses under Options [4] exposes the Archive option [5] and if the campaign is still in a draft status you can also edit [6] or clone [7] the campaign:

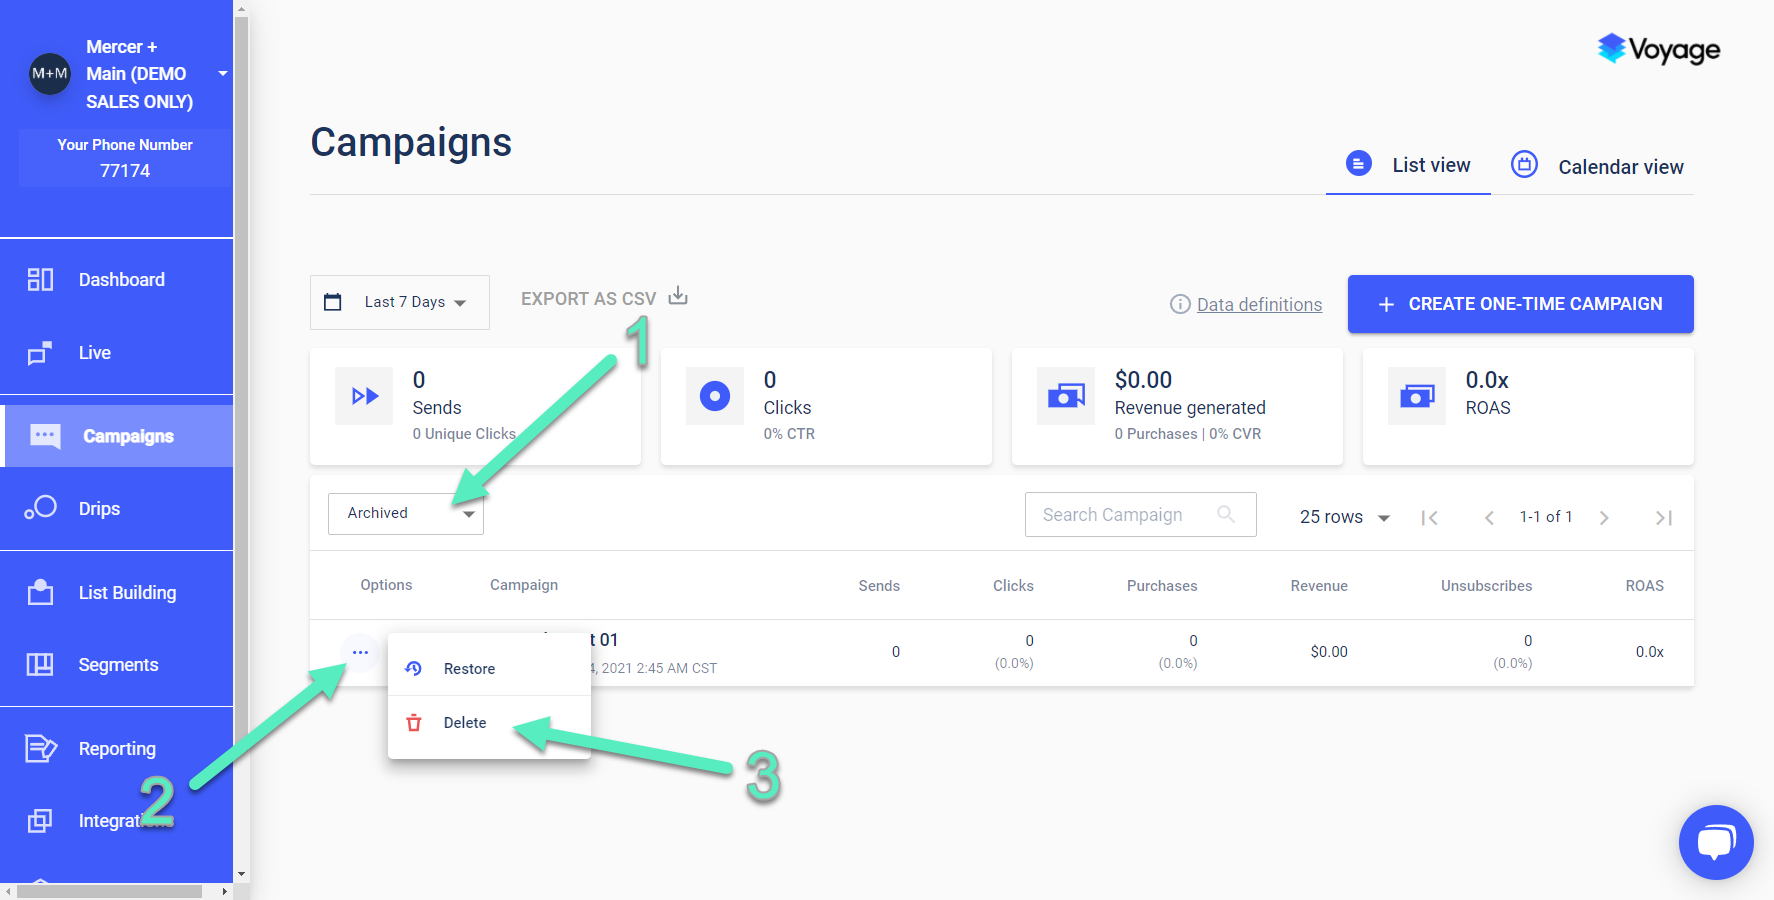
Note, to delete a campaign it must first be moved to an Archived status as described above. You can see Archived campaigns using this drop-down [1]. Click on the ellipsis [2] in this view to either restore or Delete [3] the campaign. Please be aware, deletion cannot be undone, so we recommend you leave your old campaigns in an archived state so you can retain the performance data:
Create a Campaign
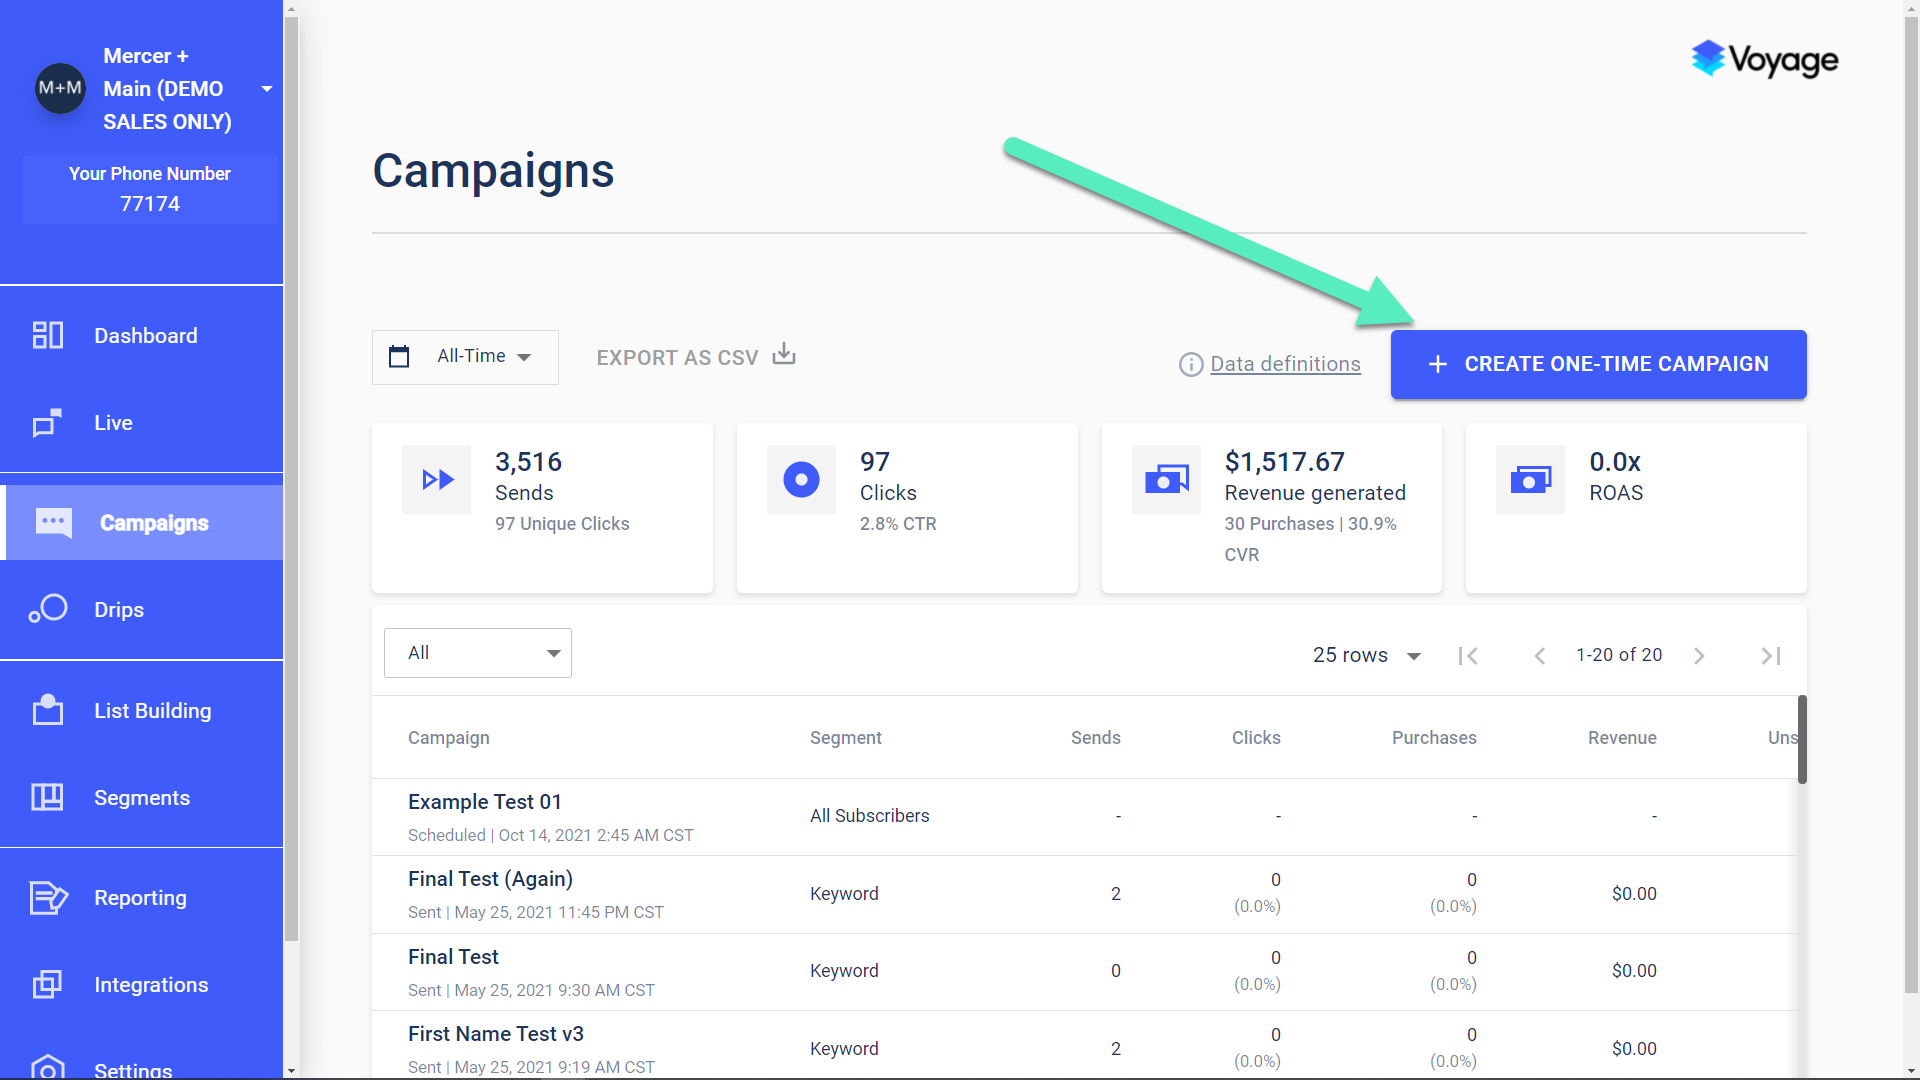
On the main Campaigns page look to the upper right corner for a blue button that says Create One-Time Campaign. Click that to begin:
Define Campaign
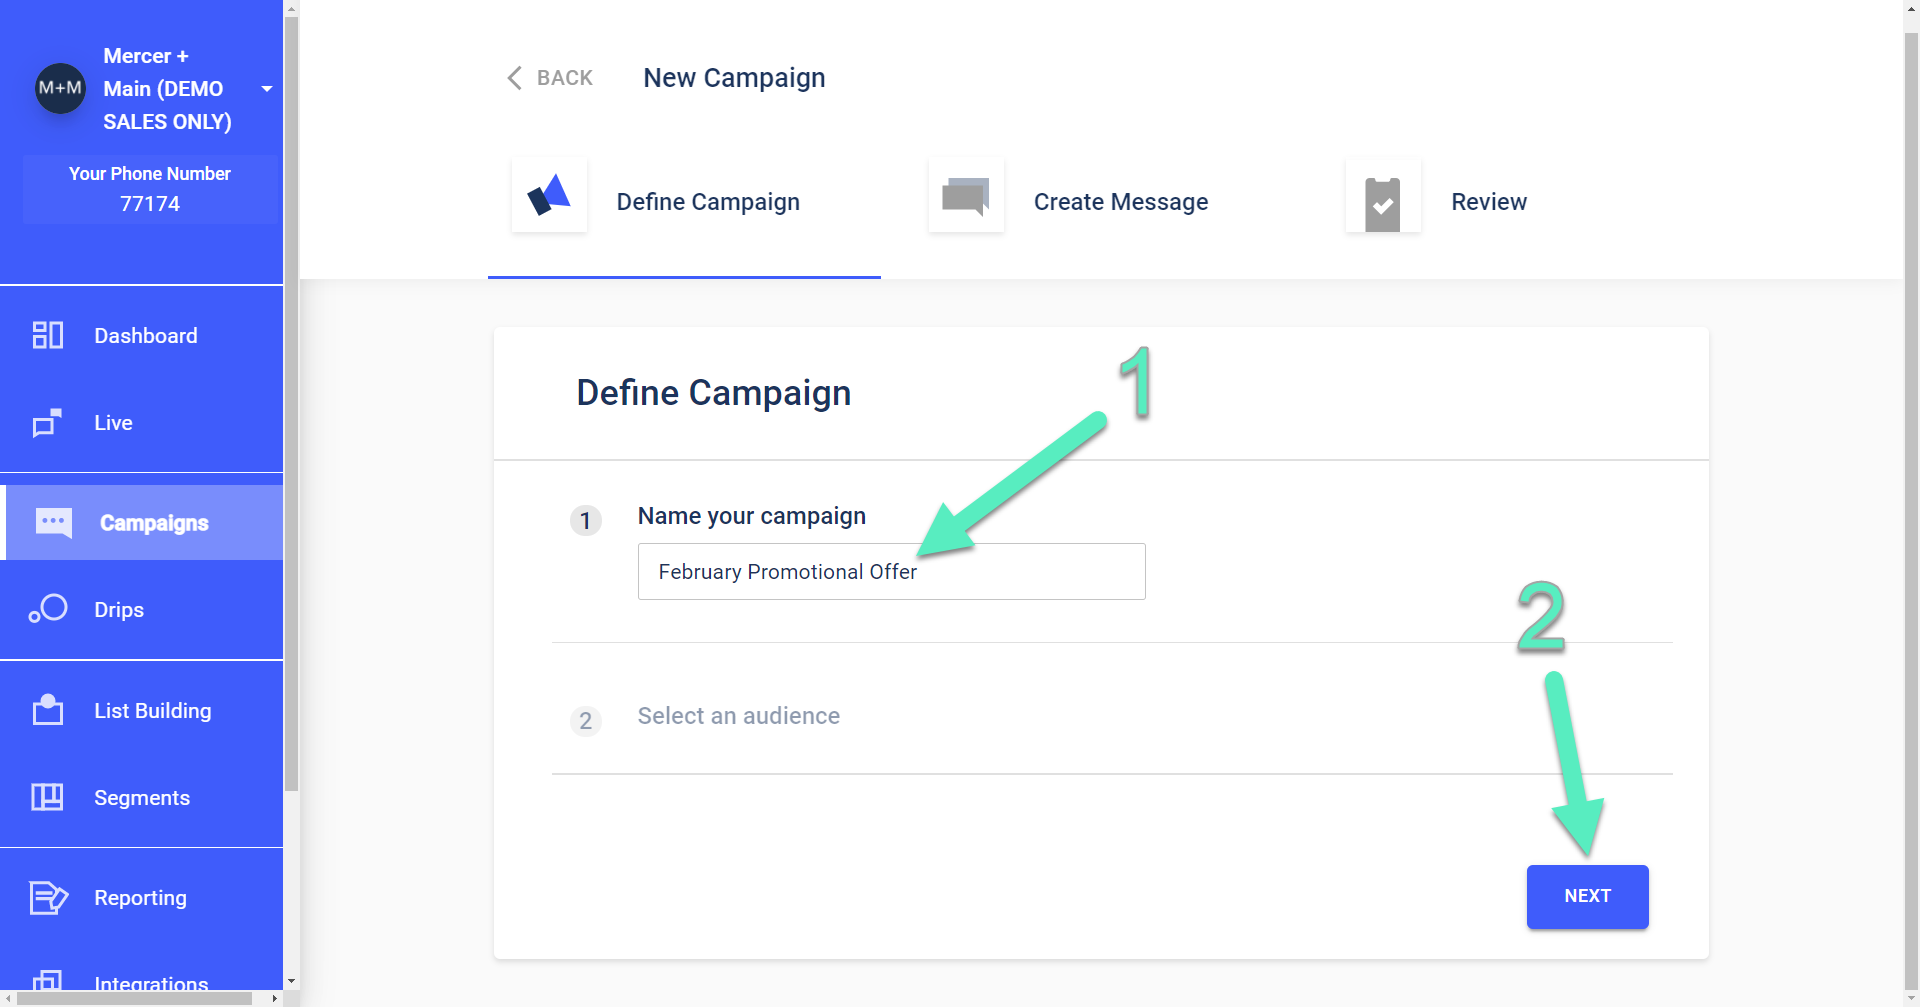
The first step in defining a campaign is to name your campaign [1]. Click Next [2] to continue:
You can select All Subscribers [1], or filter your campaign’s audience by Keyword [2], Source [3], or Segment [4]. If you do select one of those three filters you’ll need to choose a particular value with a drop down menu [5].
Note: If you don’t see the options you expect to see, you can click here to investigate possible causes. The numbers of recipients that match your selected filter will be seen immediately to the right of your audience selection. You may also click on New Segment here [6] to define new custom segments. Click next to continue:

Create Message
The Create Message page gives you access to our powerful dynamic message editor. As you type in your CTA in the message box [1], you’ll see a real-time preview to the right [2].
When you are ready to send a test message to yourself or your internal marketing team, click on Send Test here [3]. You can save your changes as a draft to continue working later [4]. Saving as a draft will also let you clone the campaign. Click on Next [5] to continue to scheduling:

Review
On the review page you will be able to see all the campaign’s settings at a glance, and pick a Scheduled Date and Time [1]. Send Throttling [2] is an optional control that you can use to restrict how many messages are sent each hour. From here you can again send a test or save your work as a draft.
When you are ready, click on Schedule [3] to finalize the campaign. Note that once a campaign is Scheduled it cannot be edited, but it can be cancelled before the send date/time:
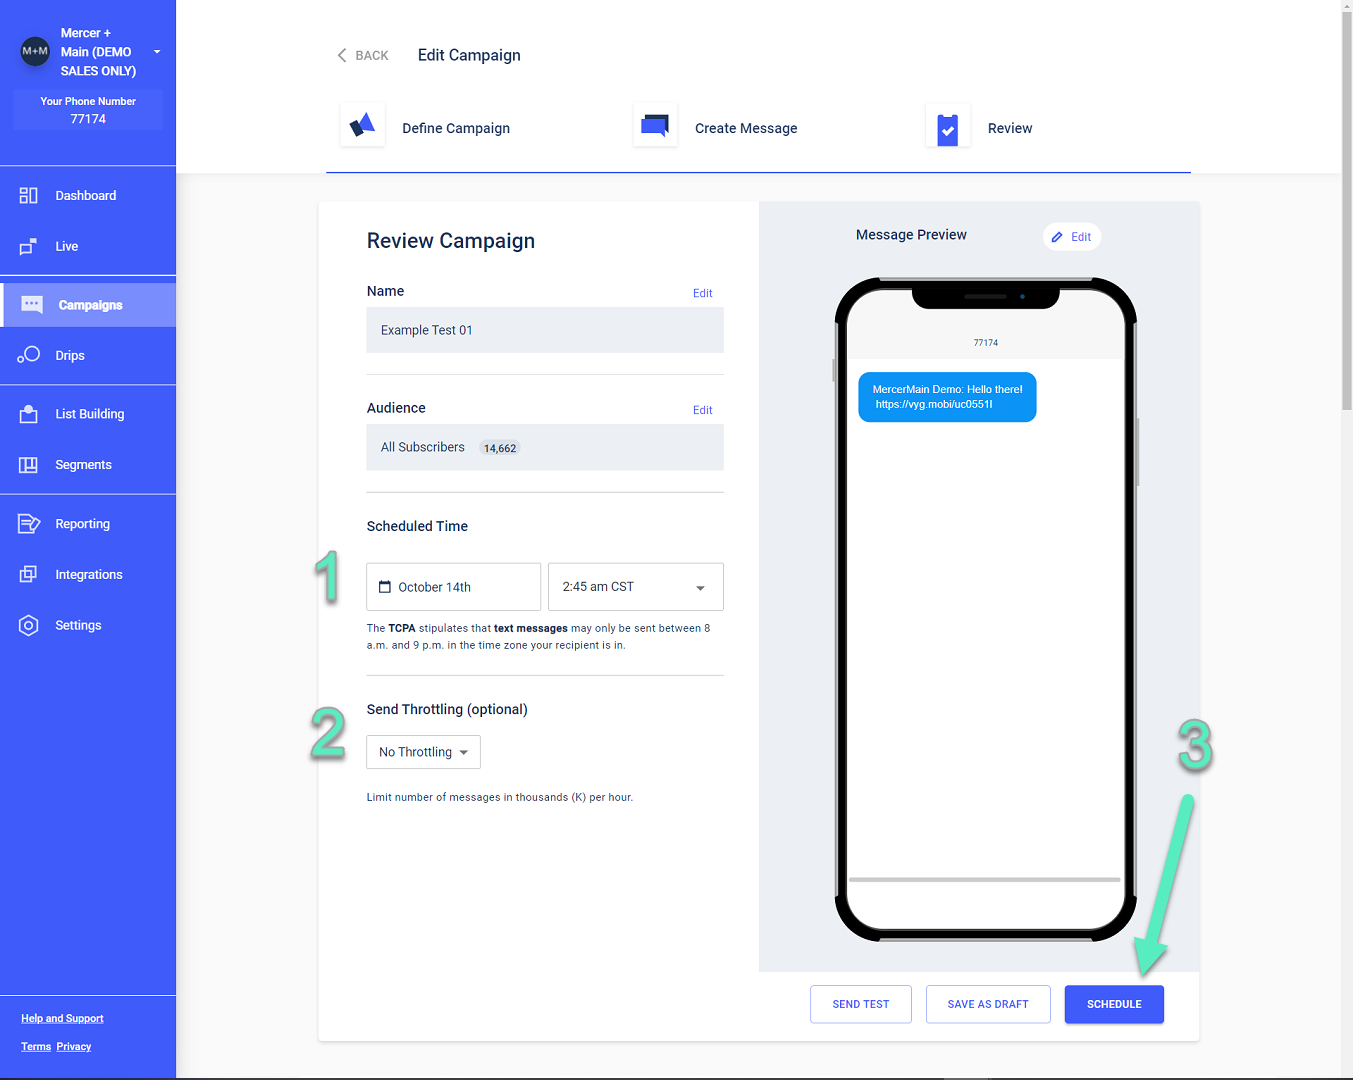
Keep in mind that the Telephone Consumer Protection Act (TCPA) stipulates that messages can only be sent between 8am and 9pm in the time zone of the recipient. Adjust your selection accordingly.
The first available time is auto-selected. All times seen are in the PST time zone.
If you have any additional questions please contact us at [email protected].